Hvordan fungerer skematavlen?
Oprindeligt skrevet på engelsk, bør eventuelle oversættelsesfejl kontrolleres i forhold til den originale atrikle
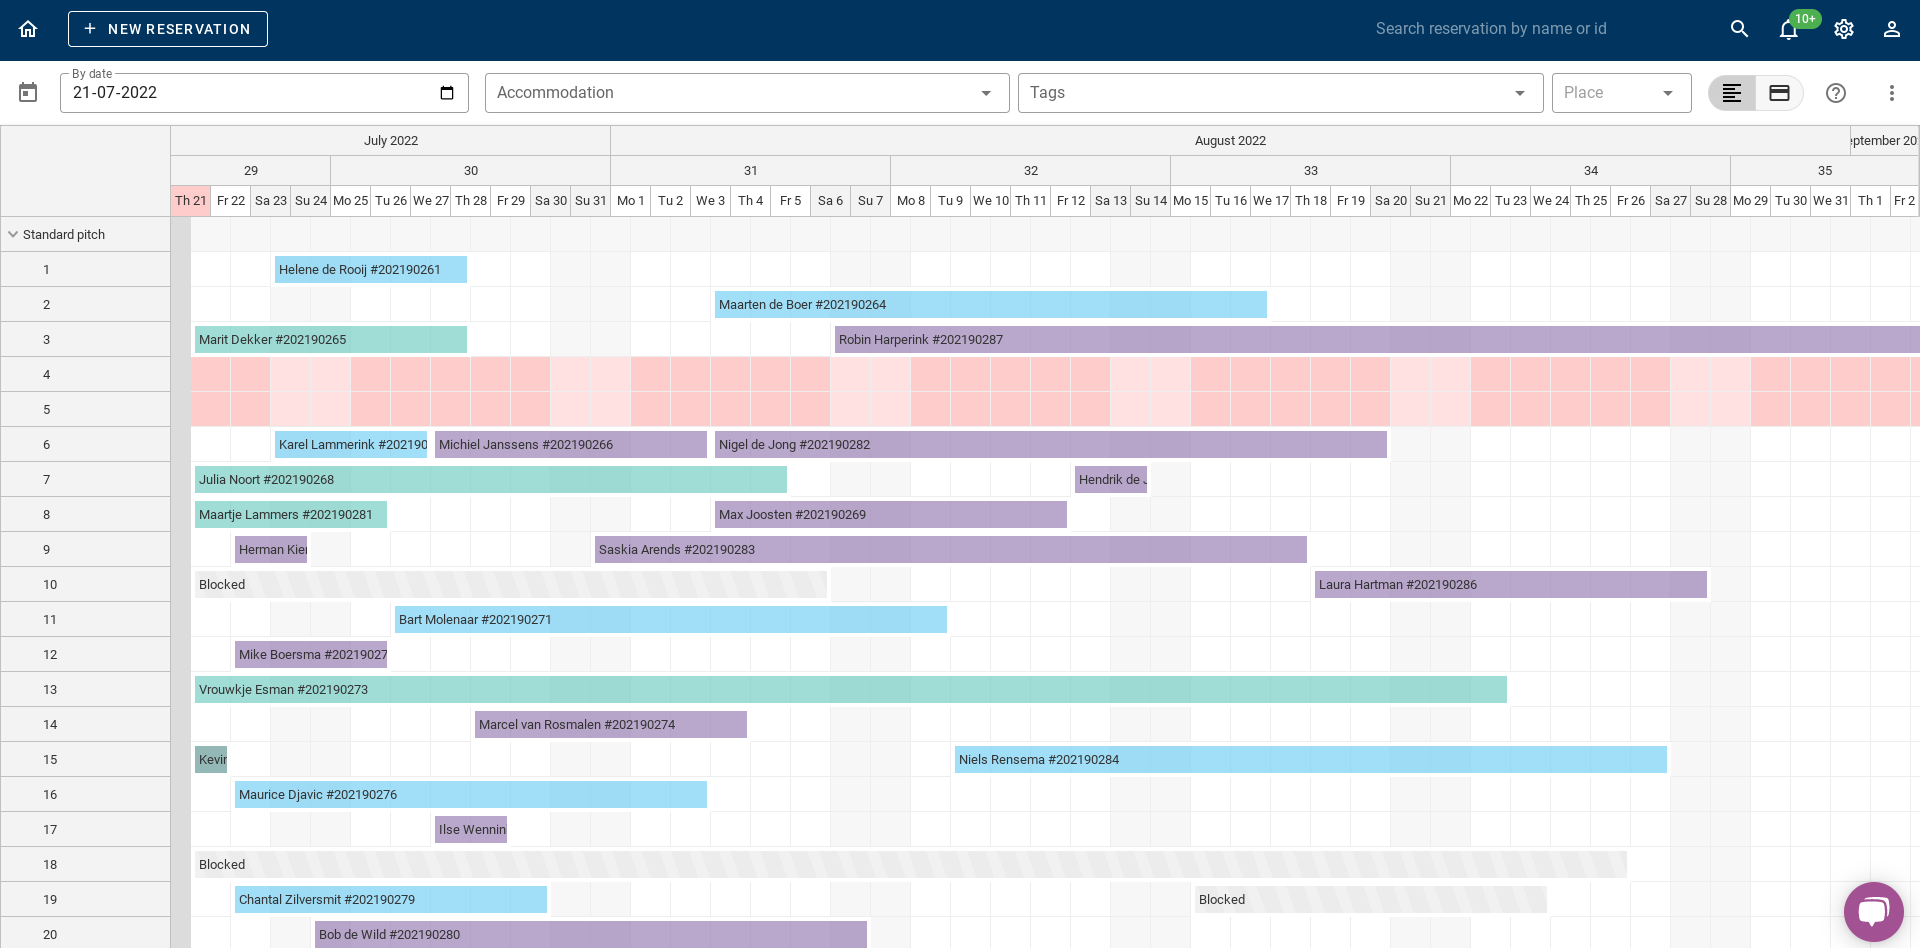
Tidsplanen er en oversigt over alle reservationerne i en valgt periode. Her kan du se hvem, hvornår og hvor gæster kommer til din campingplads. Det er også muligt at reservere fra skematavlen. Der er mange måder at se tidsplanen på. Det er muligt at vælge de ting, du vil se i skematavlen. Dette kan være særlige ferier, perioder eller folk, der allerede har betalt og meget flere variationer. Denne artikel forklarer alt trin for trin.
1. Statusvisning
2. Betalingsvisning
3. Overnatning, tag og sted filter
4. Tilføjelse og fjernelse af en spærret periode
5. Hvordan flytter jeg en reservation i skematavlen?
6. Hvordan laver man en reservation i skematavlen?
7. Hurtig søgning efter en særlig periode
1. Statusvisning
I skematavlen kan du se statusvisningen og en betalingsvisning. På billedet herunder kan du se i rødt cirkel, hvor du kan skifte mellem statusvisning og betalingsvisning. Dette afsnit diskuterer statusvisningen.

Statusvisningen betyder, at du kan se status for en reservation. Dette kapitel forklarer, hvilke statusser der er, og hvad farverne på skematavlen betyder.
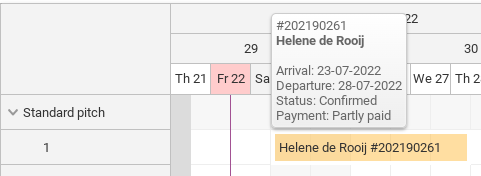
1.1: Status bekræftet
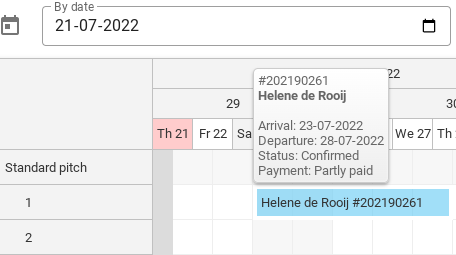
Som du kan se på billedet ovenfor, er reservationer markeret med blåt bekræftede reservationer.
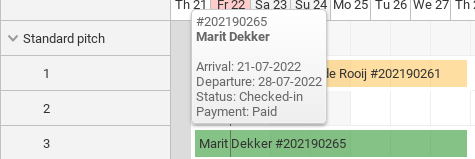
1.2: Status tjekket ind
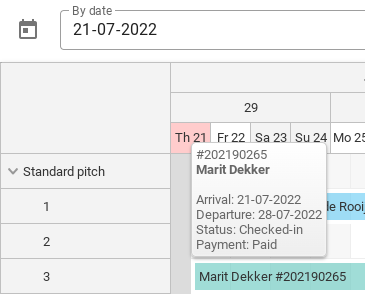
Som du kan se på billedet ovenfor, er reservationer, der er markeret grønt, reservationer, der er tjekket ind.
1.3: Status checket ud
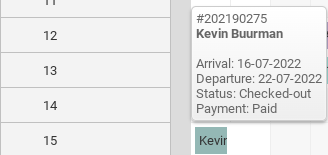
Som du kan se på billedet ovenfor, er reservationer, der er markeret med mørkegrøn, reservationer, der er tjekket ud.
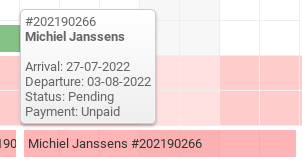
1.4: Status afventer
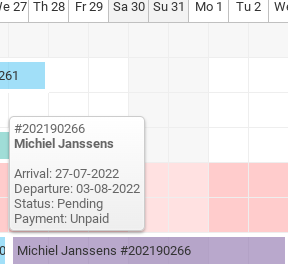
Som du kan se på billedet ovenfor, er reservationer, der er markeret lilla, reservationer, der afventer. Så disse mangler stadig at blive bekræftet.
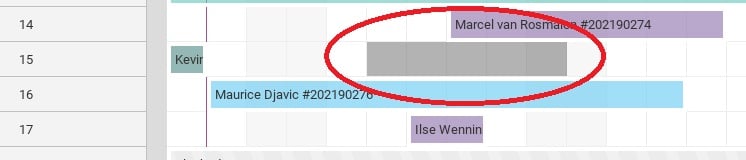
1.5: Status blokeret
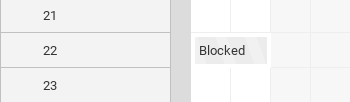
Som du kan se på billedet ovenfor, er reservationer, der er markeret lysegrå/stribet, spærrede perioder.
2. Betalingsvisning
Det er også muligt at se betalingsvisningen pr. reservation ud over statusvisningen. På billedet nedenfor kan du se, hvor du kan skifte mellem statusvisning og betalingsvisning i skematavlen.
2.1: Delvist betalt
Som du kan se på billedet ovenfor, er de delvist betalte reservationer markeret med gult.
2.2: Betalt
Som du kan se på billedet ovenfor, er fuldt betalte reservationer markeret med grønt.
2.3 Ulønnet
Som du kan se på billedet ovenfor, er ubetalte reservationer markeret med rødt.
3. Overnatning, tag og sted filter
Dette afsnit beskriver, hvordan du kan filtrere tidsplanstavlen efter boligtype, sted og tags.
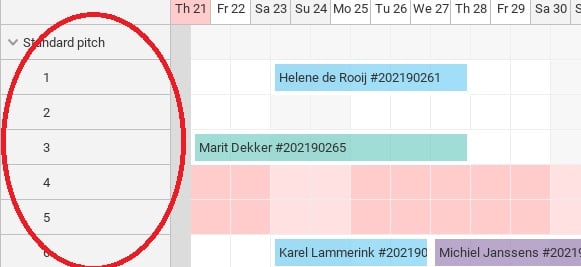
3.1 Indkvarteringsfilter
På billedet nedenfor kan du se boligfilteret cirklet med rødt. Ønsker du kun at se 1 bolig i plantavlen, kan du klikke på denne knap. Du kan derefter vælge, hvilke boliger du ønsker at se.

3.2 Tag-filter
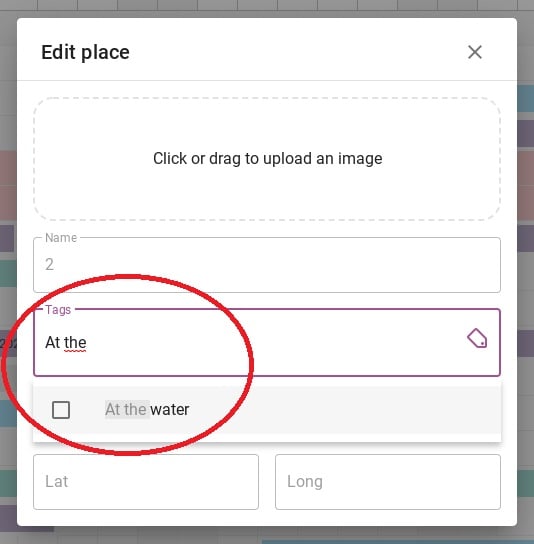
For at filtrere på et tag skal du først tilføje tags til bestemte steder. For at gøre dette skal du klikke på det stednummer, hvor du vil tilføje et tag. På billedet herunder er det cirklet med rødt, hvor du kan klikke.
Dette fører dig til fanen nedenfor. Her kan du tilføje et bestemt tag til et sted under overskriften 'Tags'. På billedet nedenfor kan du se i den røde cirkel, at jeg nu tilføjer som eksempel tagget 'Ved vandet' til plads 2.
På billedet herunder kan du se, at jeg har tilføjet mærket 'Ved vandet' i det røde cirklede område øverst, så du kun vil se sted 2. Stedet, hvor jeg lige har tilføjet mærket.

3.3 Anbring filter
På billedet nedenfor kan du se stedfiltret cirklet med rødt. Med dette filter kan du filtrere et bestemt sted. Når du klikker på et sted, vil kun reservationerne af det pågældende sted blive vist i tidsplanen.

4. Tilføjelse og fjernelse af en spærret periode
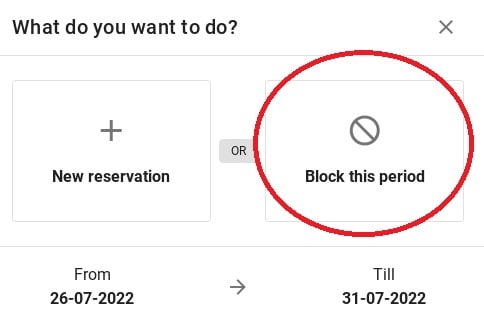
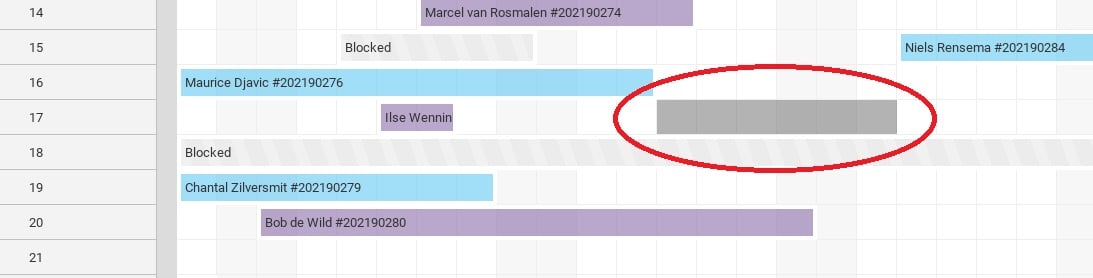
Hvis du vil spærre et bestemt sted i en bestemt periode, kan du tilføje en spærre fra Plantavlen. Brug musen til at vælge den periode, du vil blokere. (Se billedet nedenfor).
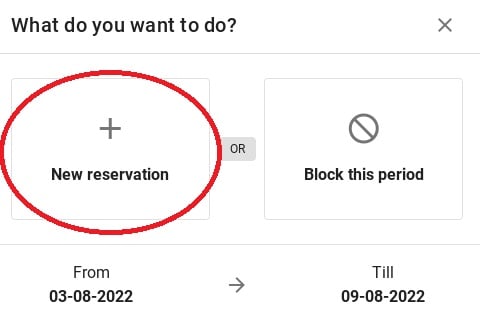
Der vises en meddelelse, der spørger, om du ønsker at reservere denne periode eller spærre denne periode. Klik på 'Bloker denne periode'. Billedet nedenfor viser dig, hvordan underretningen ser ud.
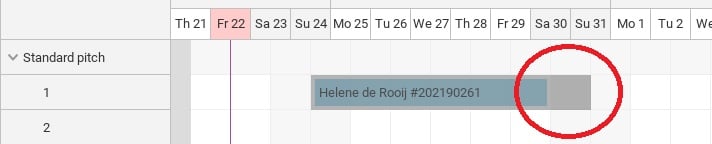
Så kan du se på billedet nedenfor, at blokken er sat. For at fjerne denne blok skal du blot klikke på den. Blokken vises derefter automatisk fjerne.

5. Hvordan flytter jeg en reservation i skematavlen?
Fra skematavlen er det muligt at flytte reservationer til et andet sted. På denne måde har du nemt overblik over de ledige pladser pr. Nedenfor er forklaret, hvordan du kan flytte en reservation.
Tip: Når du flytter reservationer på nogen måde, skal du altid kontrollere, om datoer og priser er korrekte!
5.1: Flyt til en anden dato
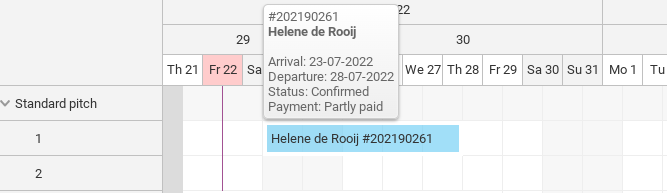
Nedenfor er en prøvereservation. Disse gæster bliver fra 23-07-2022 til 28-07-2022. Antag, at disse gæster ringer og angiver, at de gerne vil ankomme 2 dage senere og tage af sted 2 dage senere.
Du ser i skematavlen, at 2 dage efter denne reservation stadig ikke er noget i skematavlen, og ville det være muligt at flytte denne reservation for gæsten.
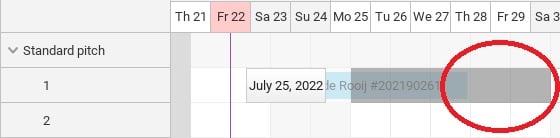
Du griber reservationen med musen og trækker den til den ønskede dato. Billedet nedenfor viser, hvordan du gør dette.
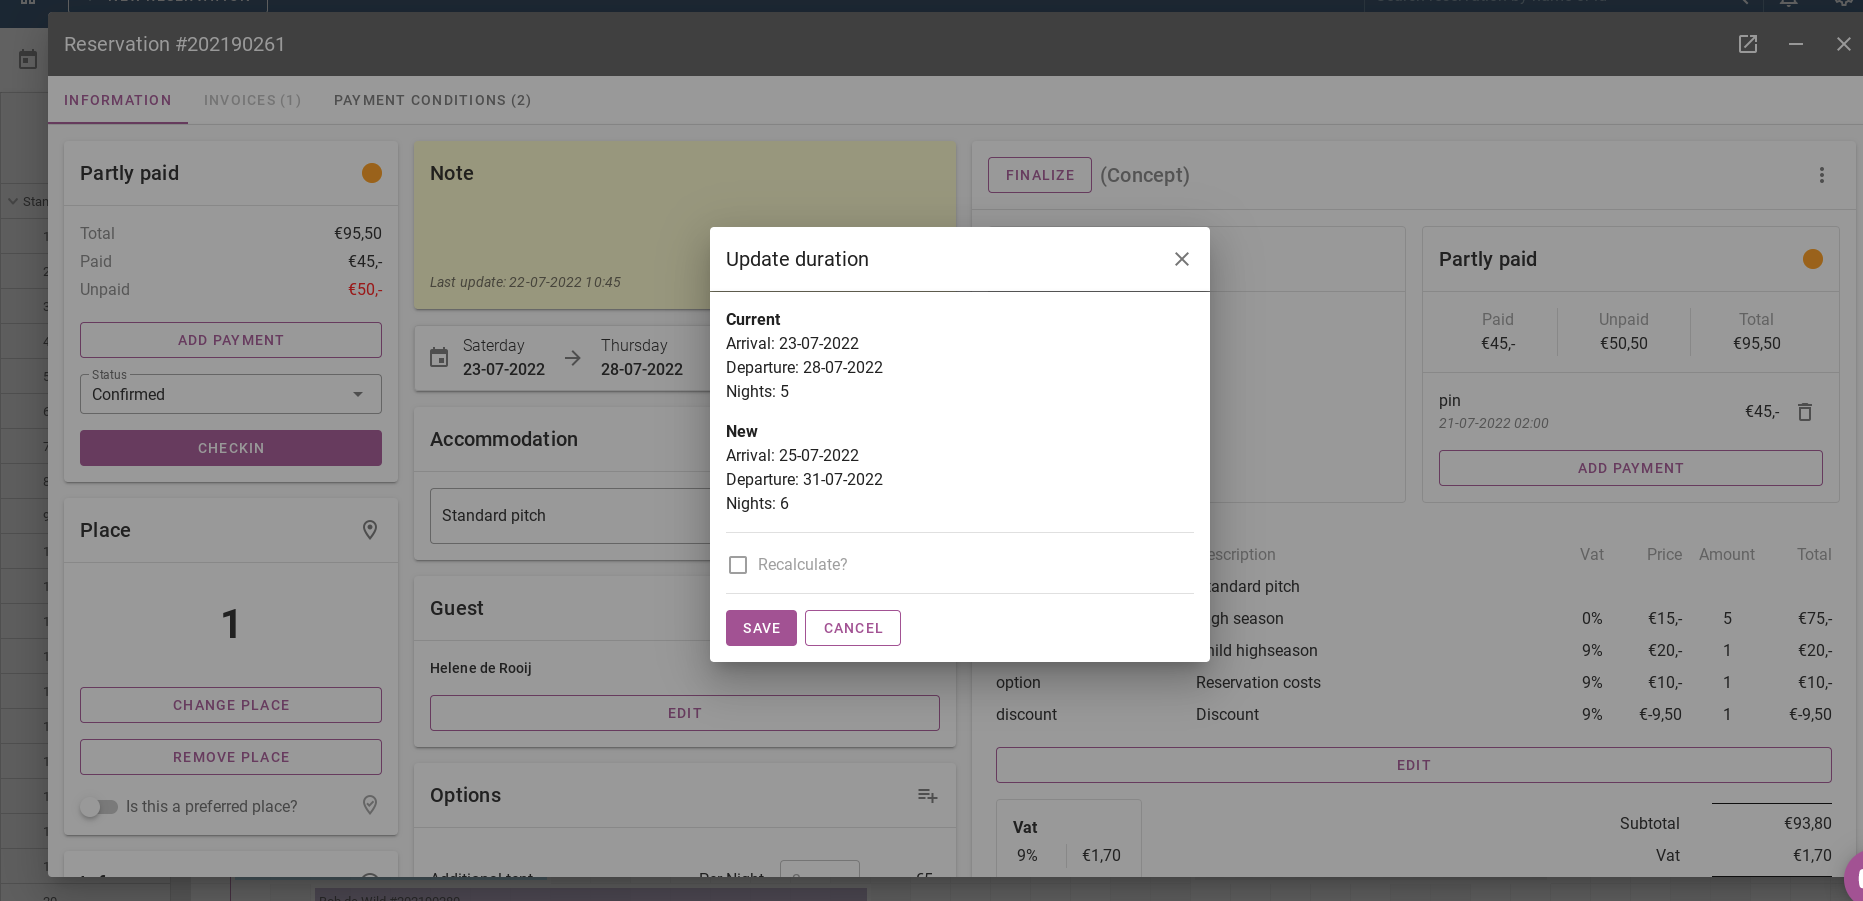
Hvis du frigiver reservationen med musen, åbner systemet automatisk reservationen. Systemet vil også bede om en 'opdateringsvarighed'. Det betyder, at du kan genberegne reservationen og se, om de nye datoer er korrekte. Hvis alle data er korrekte, klik Gemme. Billedet nedenfor viser, hvordan opdateringsvarigheden ser ud.
5.2: Flyt til et andet sted
Du kan også flytte en eksisterende reservation til et andet sted i planlægningstavlen ved at klikke på den med musen. Billedet nedenfor viser, hvordan dette fungerer.
5.3: Forlæng eller forkort en reservation
For at forlænge eller forkorte en reservation tager du fat i siden af reservationen på planlægningstavlen med musen (se billedet nedenfor). Træk den derefter til en anden dato.
Igen vil systemet bede om en genberegning af reservationen, tjek venligst dette omhyggeligt.
6. Hvordan laver man en reservation i skematavlen?
For at foretage en reservation fra skematavlen skal du vælge perioden med musen. Dette gøres som vist på billedet nedenfor.
Du vil igen få vist beskeden, der spørger dig, om du vil tilføje en blokering eller foretage en ny reservation. Klik nu på 'Ny reservation' knap.
Efter at have klikket på knappen 'Ny reservation' kommer du til siden, hvor alle detaljer kan indtastes. For at se en detaljeret forklaring af, hvordan du foretager en reservation, klik her. Du vil derefter blive dirigeret til en anden artikel.
7. Hurtig søgning efter en særlig periode
Nedenfor er et billede, hvor du kan se den øverste kant af planlægningstavlen. Kalenderen cirklet med rødt er en knap, der giver dig mulighed for hurtigt at hoppe til en anden dato i planlægningstavlen.

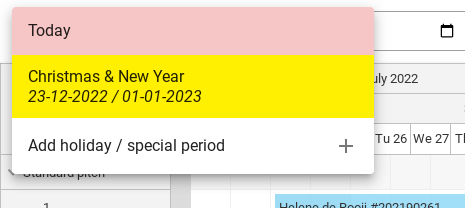
På billedet herunder kan du se, hvad der kommer op, når du bevæger musen på denne knap. Her kan du se et eksempel på perioden jul & nytår. Når du klikker på denne periode, springer planlægningstavlen automatisk til denne dato.
Du kan også tilføje ferieperioder og andre særlige perioder ved at klikke på 'Tilføj ferie / særlig periode'.
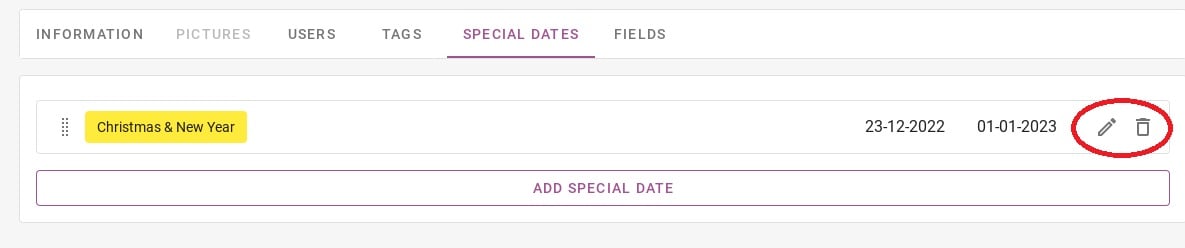
Når du klikker på 'Tilføj ferie / særlig periode', vil du blive ført til siden nedenfor. Under overskriften 'Særlige datoer' det er muligt at indtaste disse datoer. Omkranset i rødt vil du se en blyant og en skraldespand. Med blyanten kan du ændre denne eksisterende periode, og med skraldespanden kan du slette denne periode.
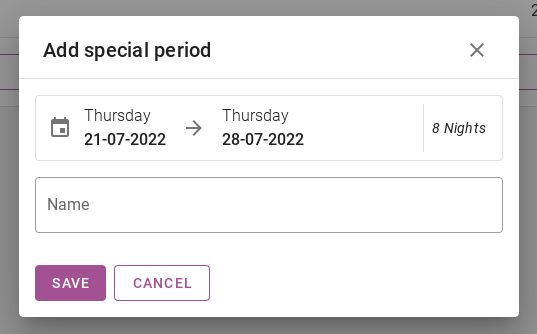
Knappen i lilla med teksten 'ADD SPECIAL DATE' kan bruges til at tilføje en ny periode. På billedet nedenfor kan du se, hvordan denne periode kan tilføjes. Du indtaster start- og slutdatoen i kalenderen og giver den særlige periode et navn. Til sidst trykker du på gem.
Billedet nedenfor viser en kalender omkranset med rødt. I denne kalender kan du klikke på en dato. Tidsplanen springer så til denne dato og viser alle reservationer.
