Como gerenciar preços?
Originalmente escrito em inglês, quaisquer erros de tradução devem ser verificados em relação ao artigo original
1. How to create a price?
2. Adding rows to the price schedule
3. How to set a special period price?
4. How to set a week price?
1. How to create a price?
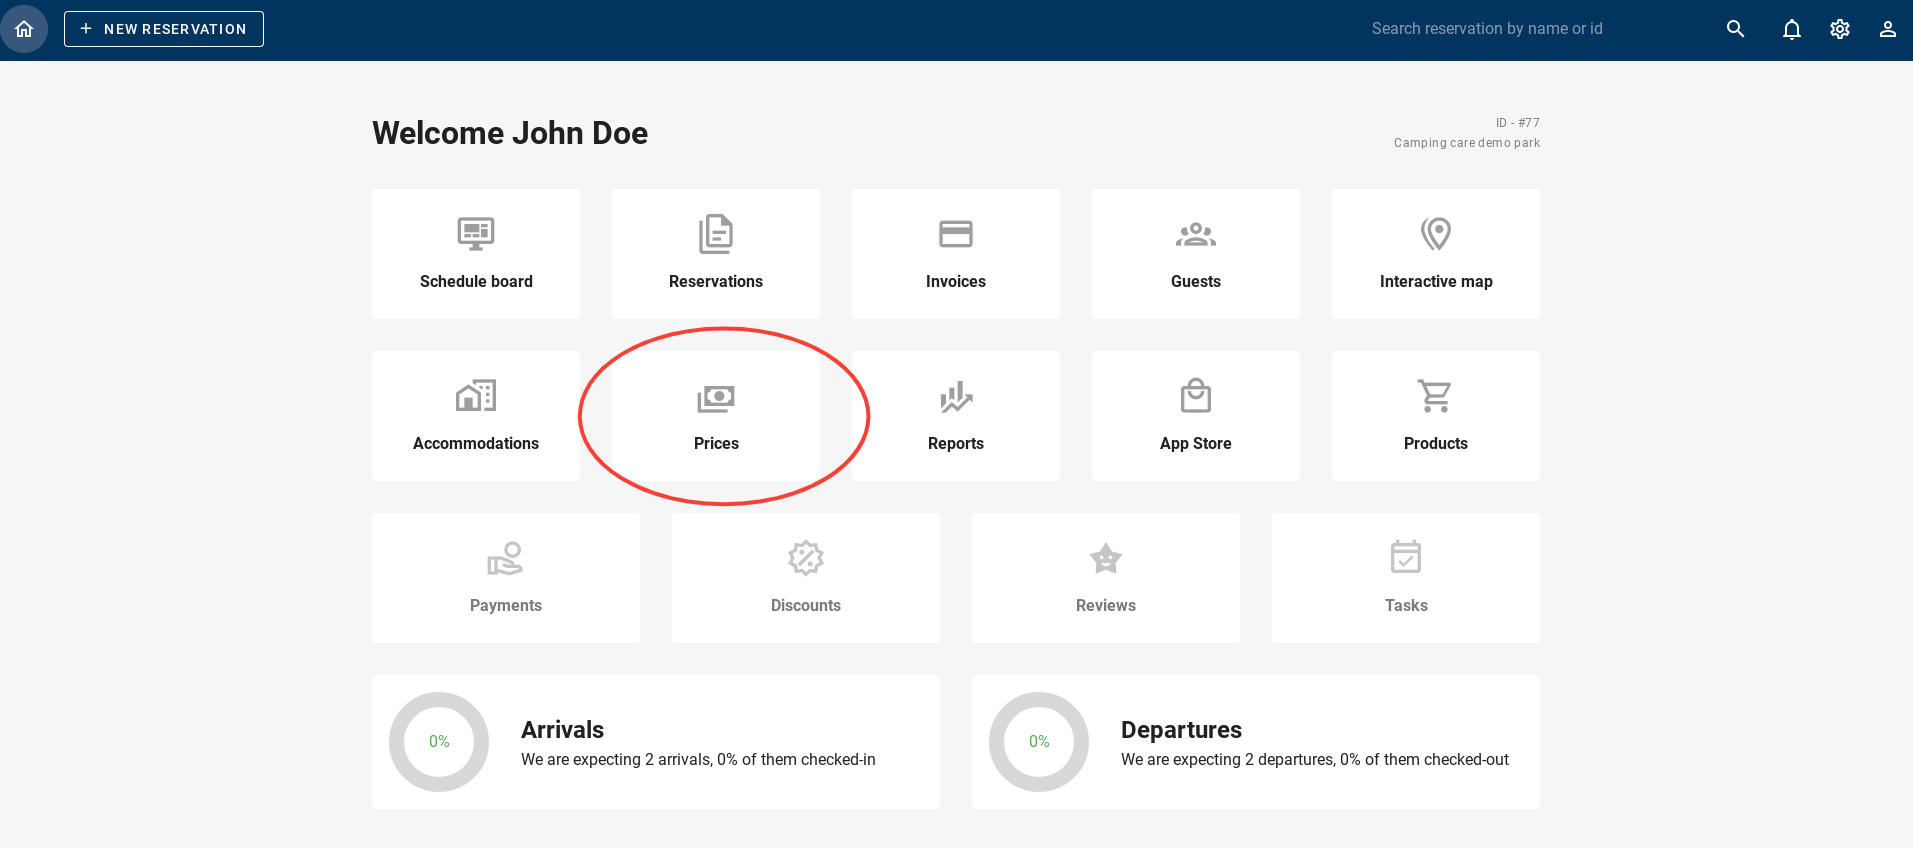
When you are in the dashboard, click on ´Prices´. On the picture below, it is circled in red.
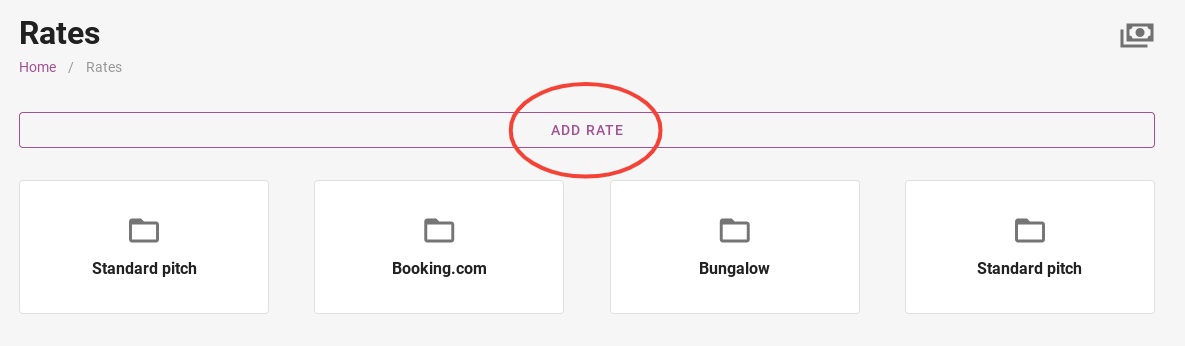
Next, you can set a price. Press the purple button with ´Add rate´. Below the purple button are the current rates that are active.
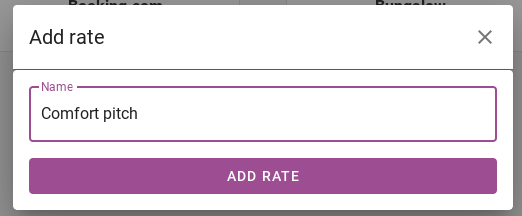
You give the rate a name and click ´Add rate´. As an example, comfort pitch has now been used.
The price schedule has been created and now you can enter the prices. The next paragraph explains how to update the prices.

1. Update prices
When you are in the desired rate, you can start updating the prices.
To update prices, click on the purple button in the top left hand corner that says ‘Update prices’.

You will be directed to the page below. First, specify the period for which you wish to update the price. As an example the date 26-08-22 till 14-09-22 has been chosen.
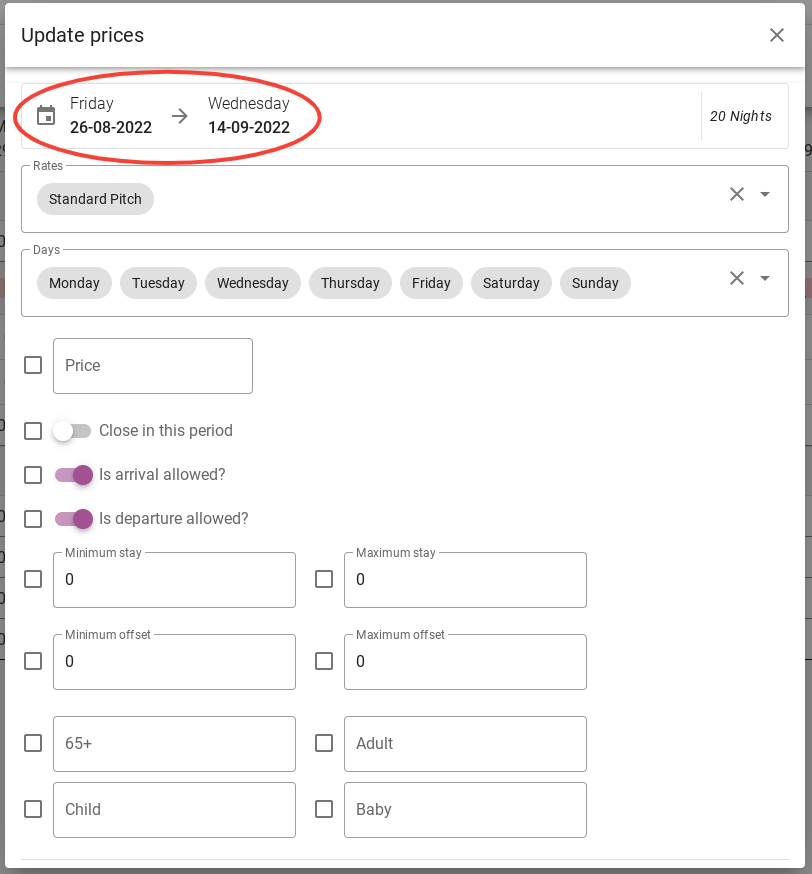
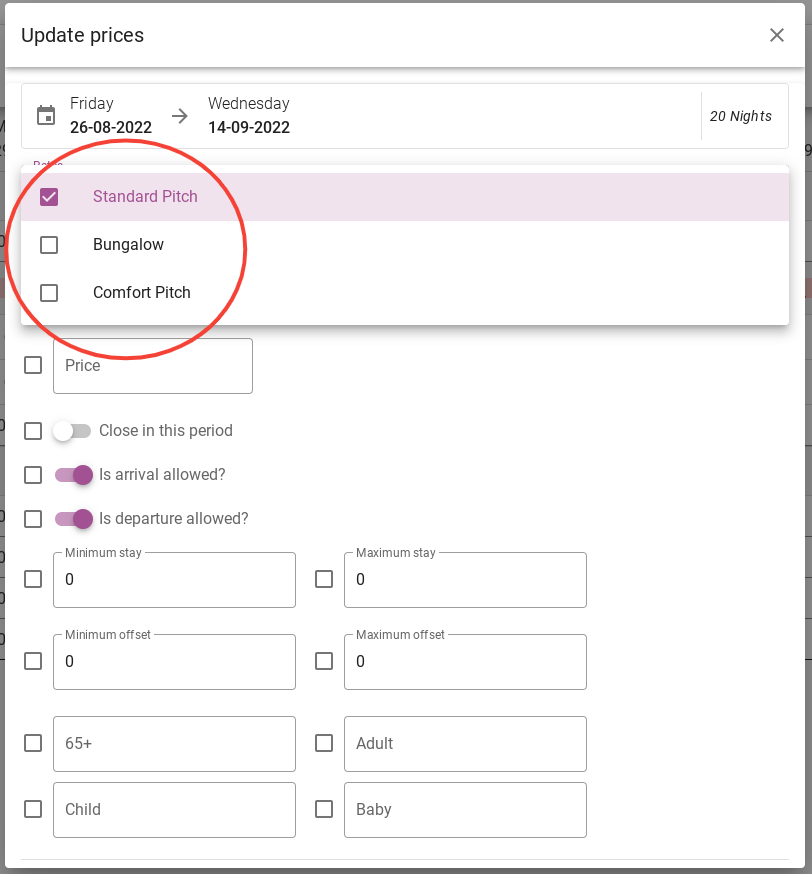
Next you choose a rate of which you want to adjust the prices. More explanation about the rates can be found in another article. Click aqui to go to that article.
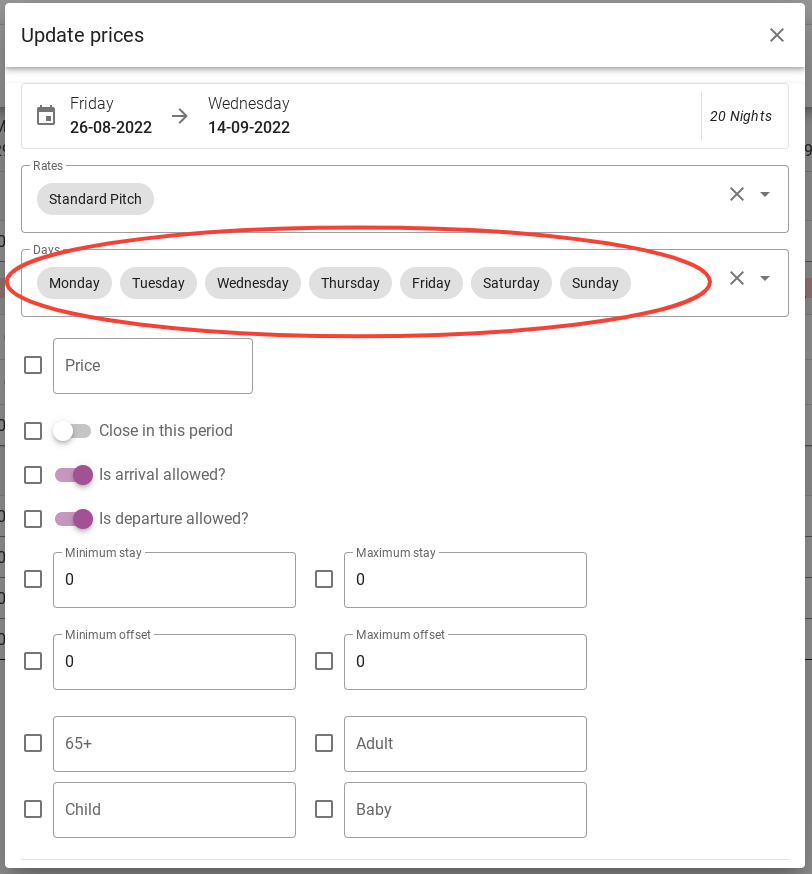
Next you choose the days within the chosen period of which you want to update the price. By default, all days are shown. You can also choose to update only Friday, Saturday, Sunday for example. In that case, the prices will only be updated on weekends within the chosen period.
Next, you specify the price.
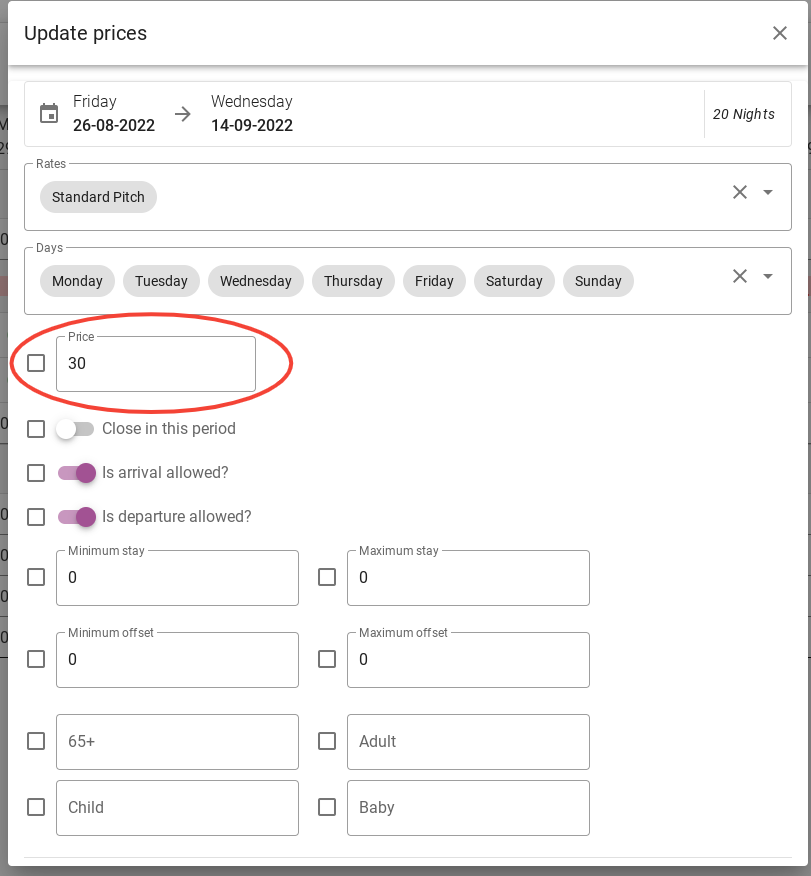
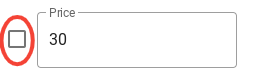
It is important that you select the checkbox on the left when you save the price update.
The next step in the price update is whether you want to block the period. If you want to block the period, you do not need to enter the price as explained above. You only need to set the switch to ´ Close in this period ´.
In addition, you can indicate here whether arrival and departure are possible in the selected period.
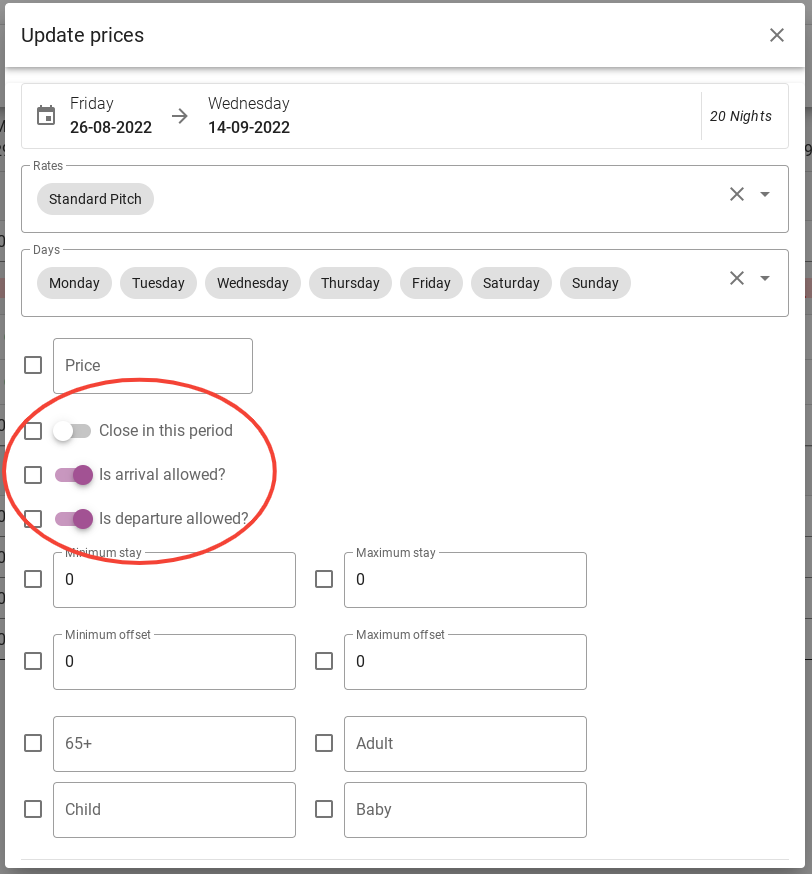
It is important that you select the checkbox on the left when you save the price update.
The next step is the minimum and maximum stay. At the minimum stay, you enter how long the guests have to stay within the chosen period. At maximum stay, you fill in how long the guests can stay in the selected period.
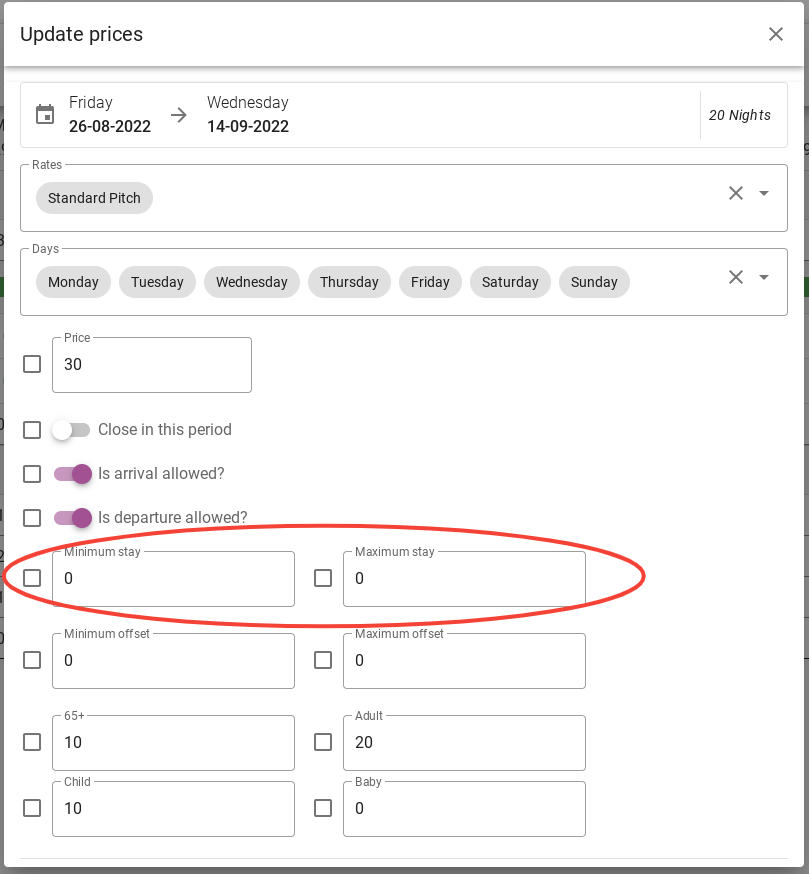
It is important that you select the checkbox on the left when you save the price update.
At minimum offset, you fill in the minimum number of days guests must book in advance. At maximum offset you fill in how long the guests have to book in advance. Paragraph 2 explains this in more detail.
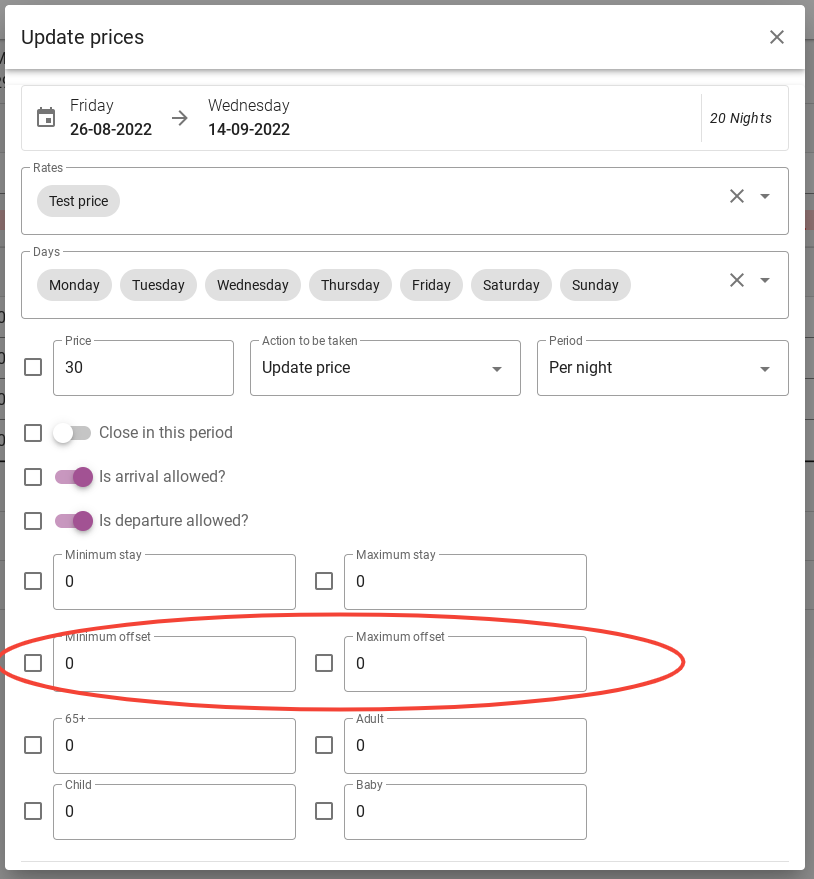
It is important that you select the checkbox on the left when you save the price update.
The last step is the additional guests. Here you enter the extra price per night for each age table in the selected price period.
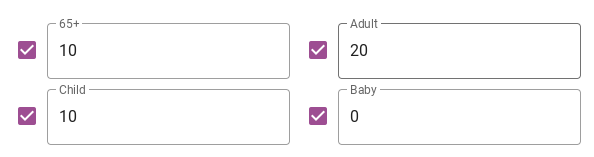
The final result will be as shown in the image below. It is important to check the checkboxes on the left of the fields you have changed.
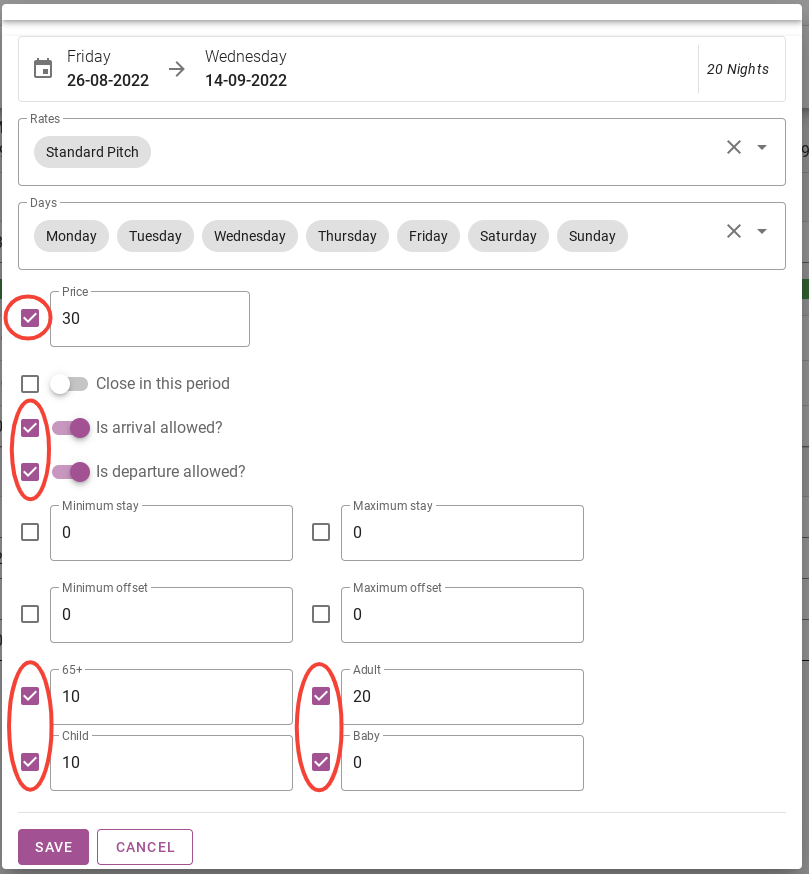
Do not forget to click on save.
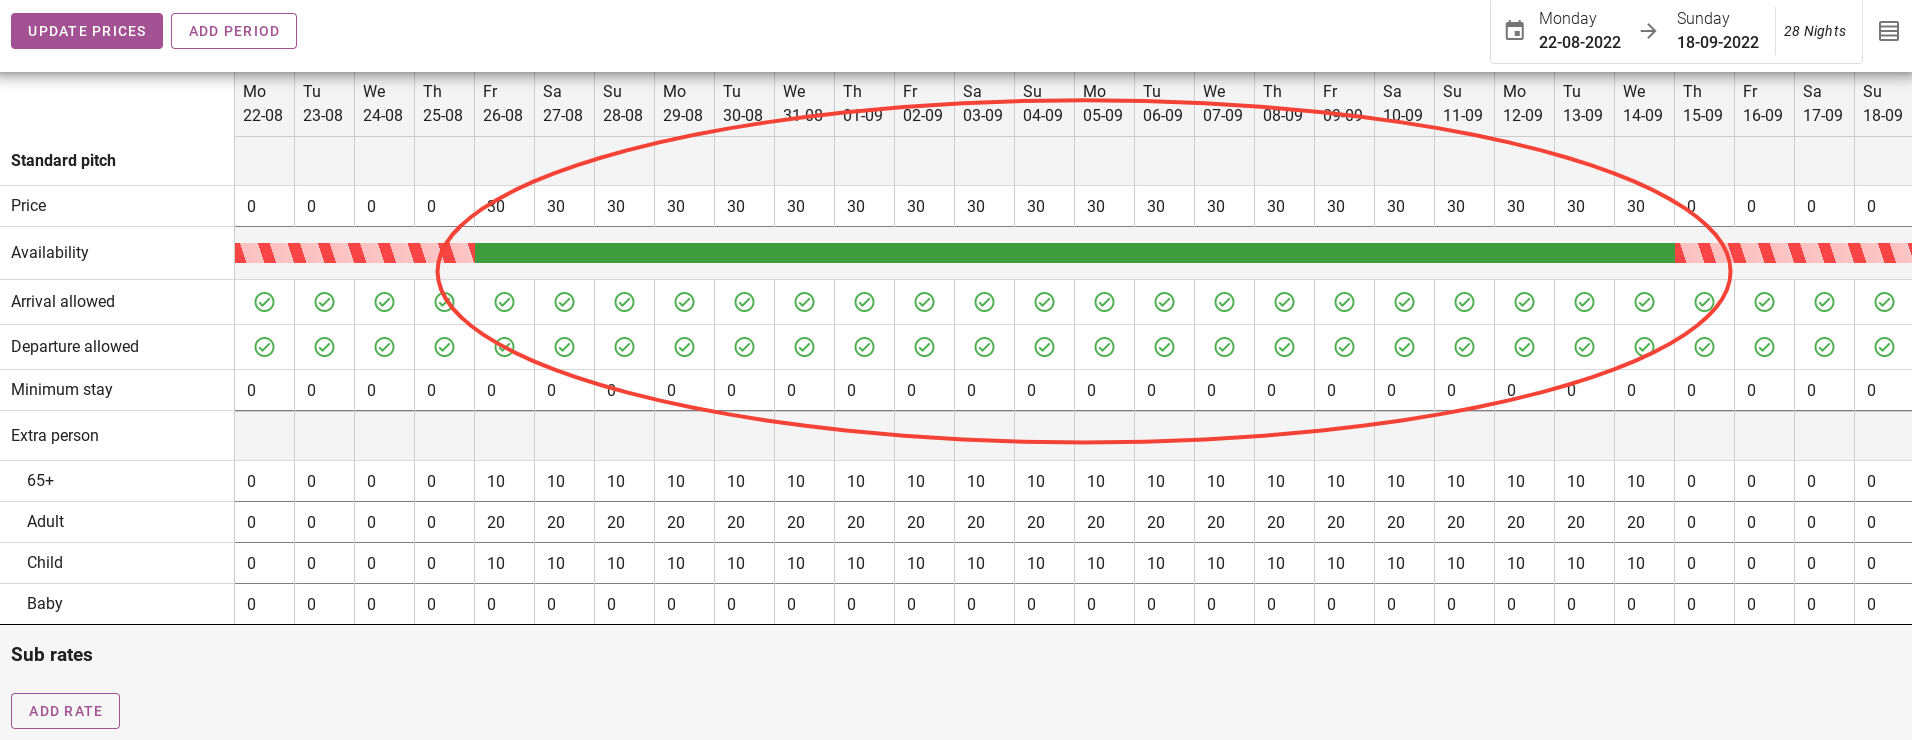
When you have clicked on save, the price update has been completed. You will now see that the price has changed in the selected period. The availability has also changed to green, as there are no prices available for the period before or after.
2. Adding rows to the price schedule
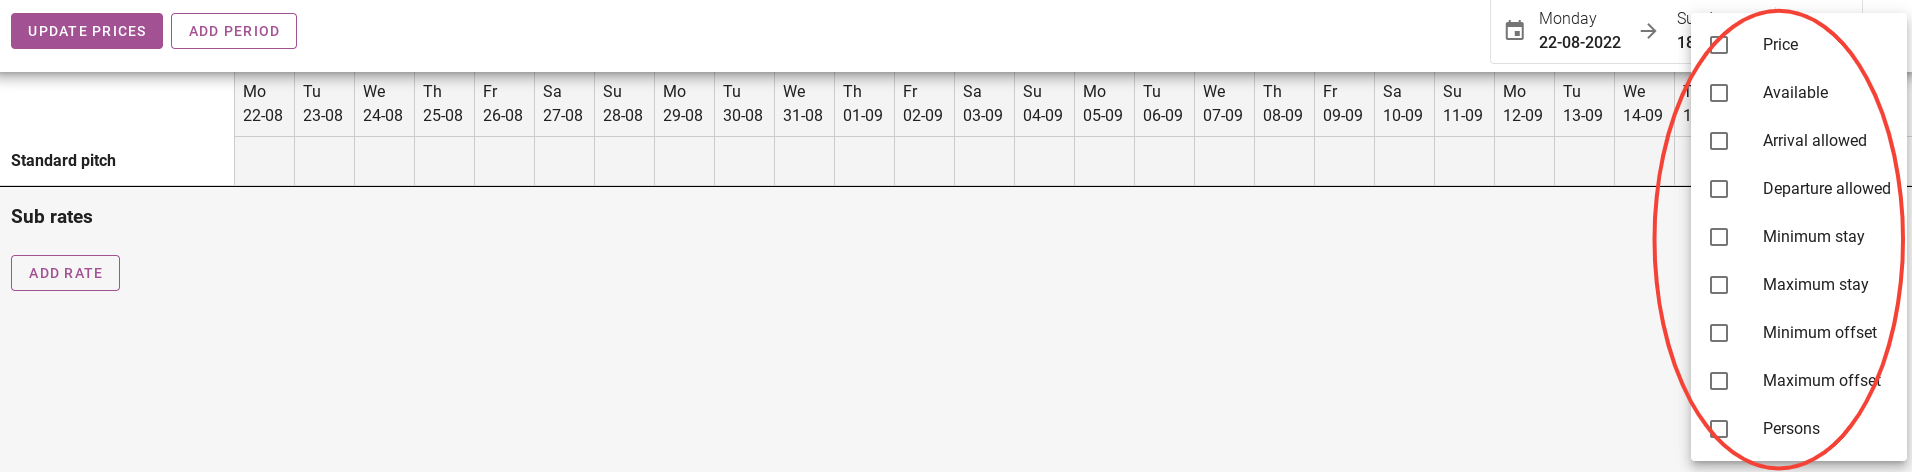
It is possible to add different rows in the schedule of prices. In the picture below, the possibilities are circled in red. In this paragraph we will go through them one by one.
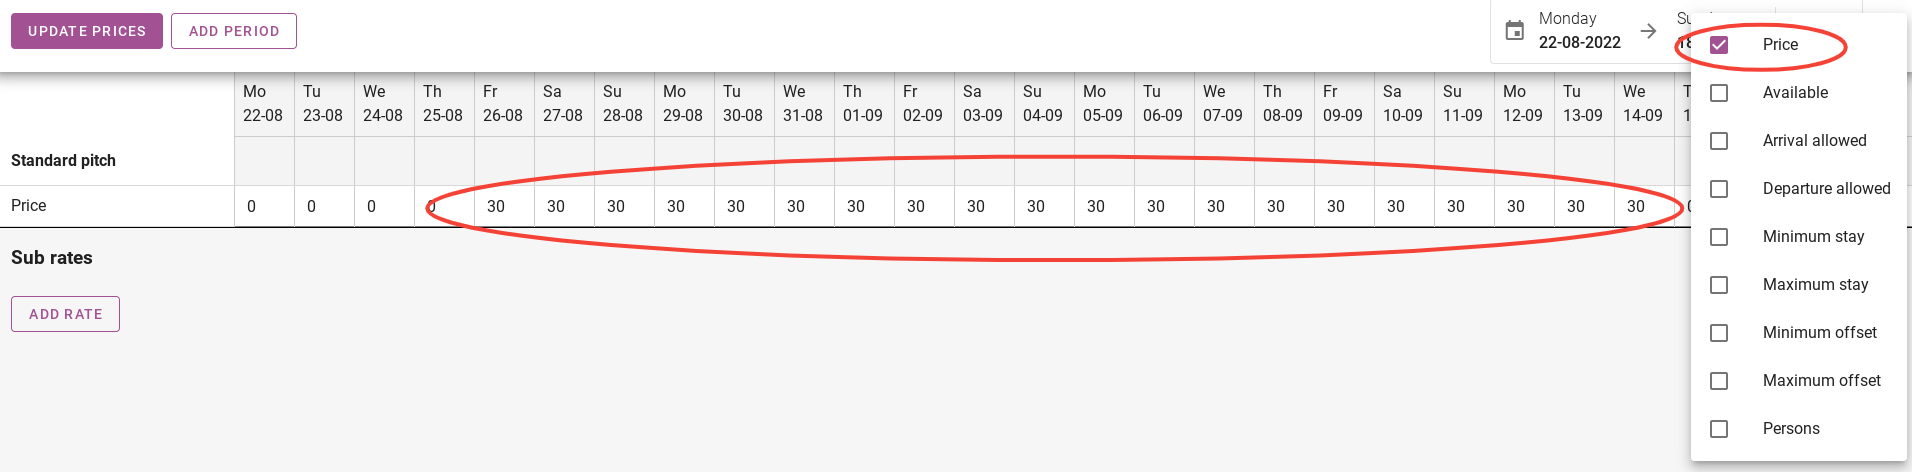
2.1 Price
The first row to be added to the price list is ‘price’. The night rate can be entered here. You can easily change the prices per day.
2.2 Available
The next row to be added to the price list is “available”. With this row you can set the availability per day. For example, we have indicated that there is no availability between 22-08 and 26-08. These are shown in red.

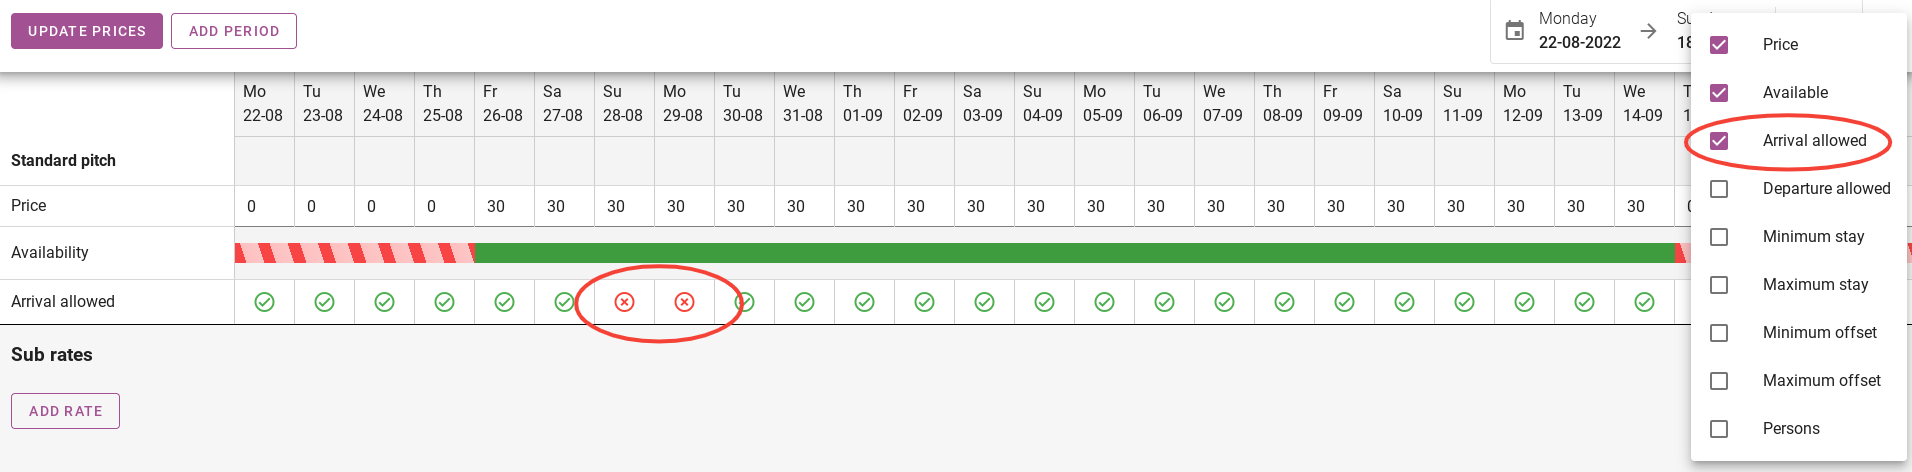
2.3 Arrival allowed
The next row to be added to the price list will be ‘arrival allowed’. In this row you can indicate per day whether guests are allowed to arrive. In the picture below I have indicated as an example that it is not possible for guests to arrive on 28 and 29-08.
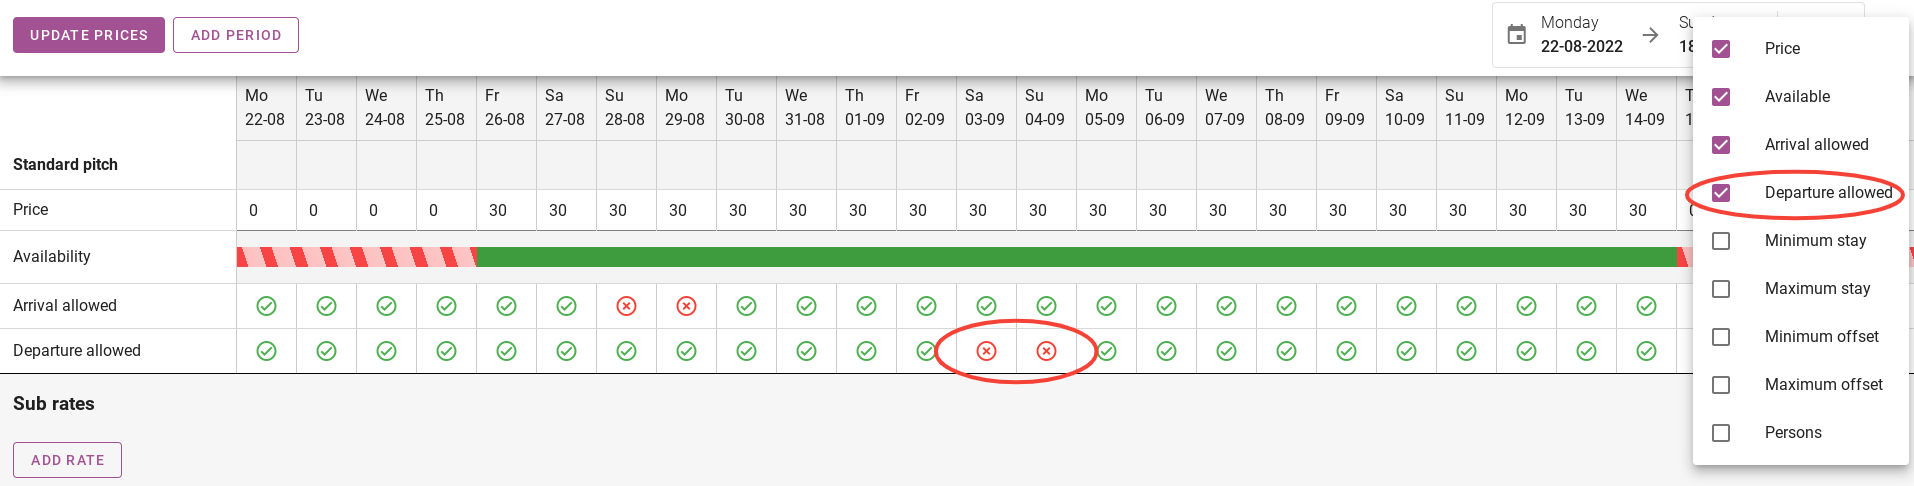
2.4 Departure allowed
The next row to be added to the price list is ‘departure allowed’. Here you can indicate per day whether it is possible for guests to leave. In the picture below I have indicated as an example that it is not possible for guests to leave on 03-09 and 04-09.
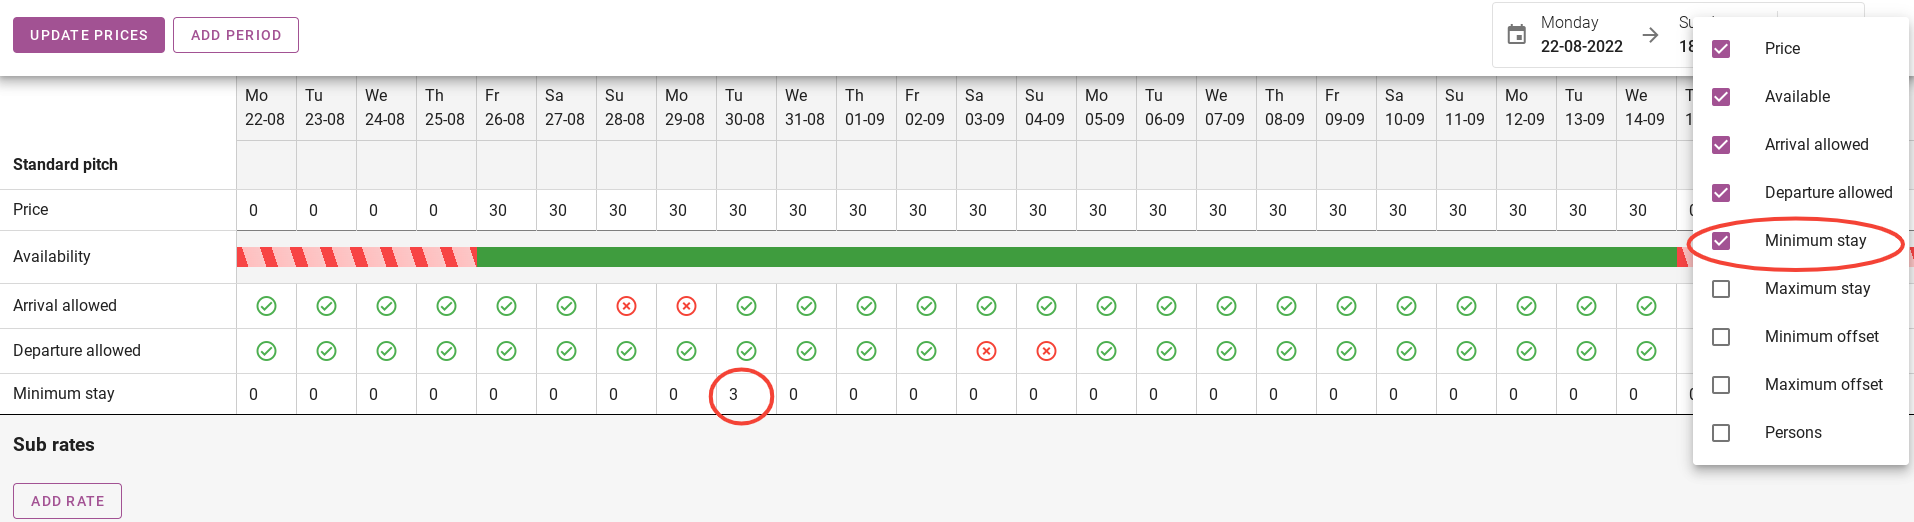
2.5 Minimum stay
The next row to be added to the price list is ‘minimum stay’. For example, if you have a minimum stay of 3 on 30-08, as shown in the picture below, this means that guests arriving on 30-08 will have to stay a minimum of 3 nights.
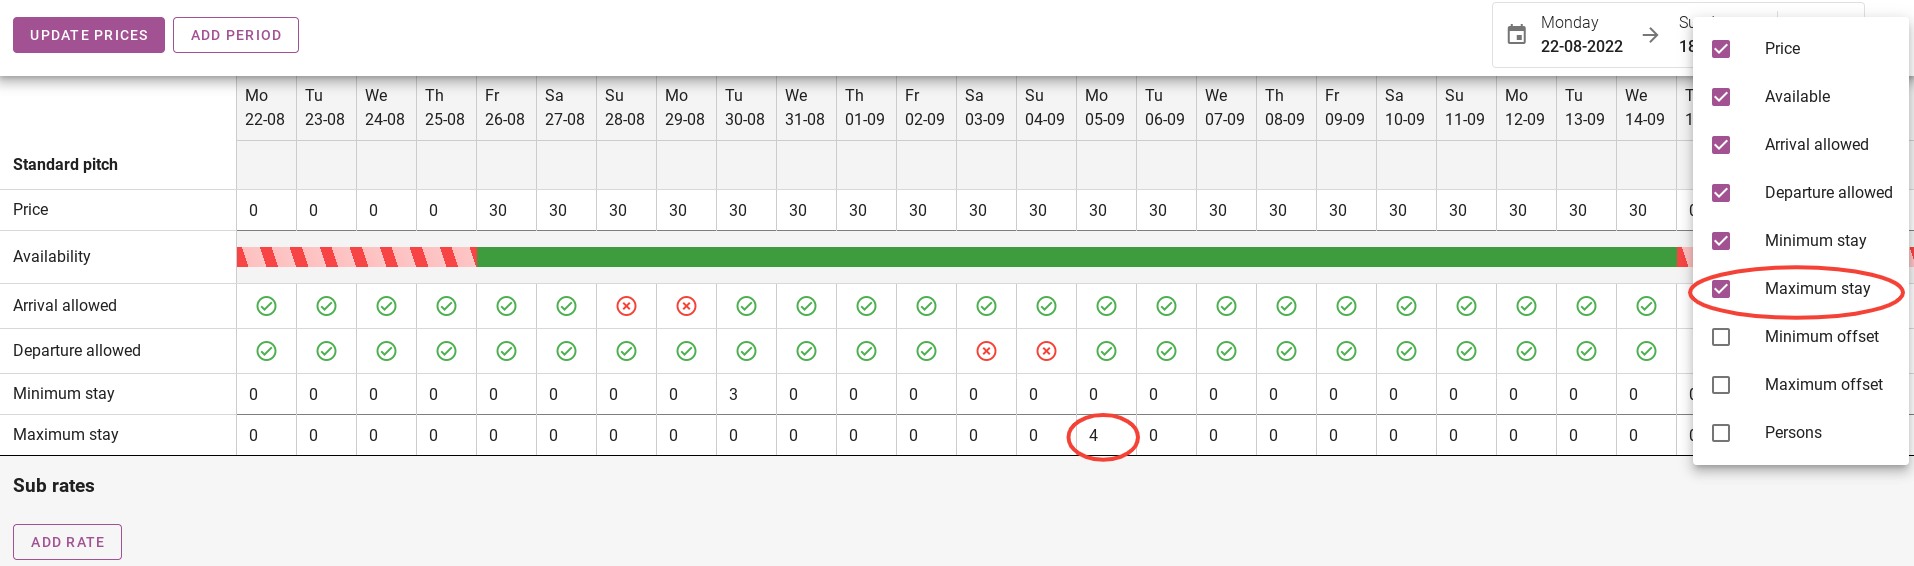
2.6 Maximum stay
The next row to be added to the price panel is ‘maximum stay’. An example is circled in red on the photo below. If guests arrive on 05-09, they are allowed to stay for a maximum of 4 nights.
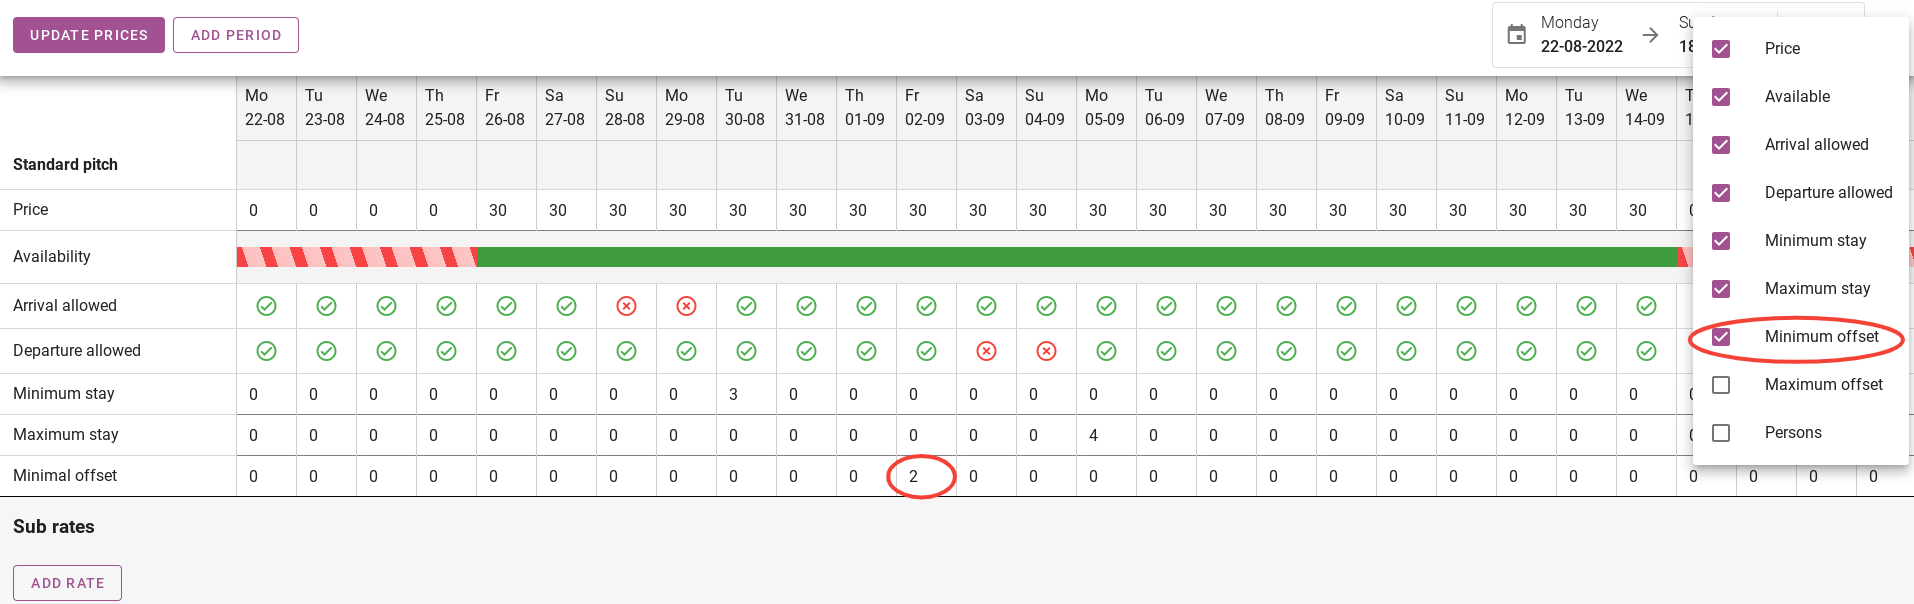
2.7 Minimum offset
The next row to be added to the price panel is “minimum offset”. In the picture below you can see that there is a minimum offset of 2 on 02-09. This means that guests who want to arrive on 02-09 must book at least 2 days in advance.
2.8 Maximum offset
The next row that will be added to the price list is “maximum offset”. On the image below you can see that there is a maximum offset of 5 on 08-09. This means that guests who want to arrive on 08-09, can book a maximum of 5 days in advance.
.png)
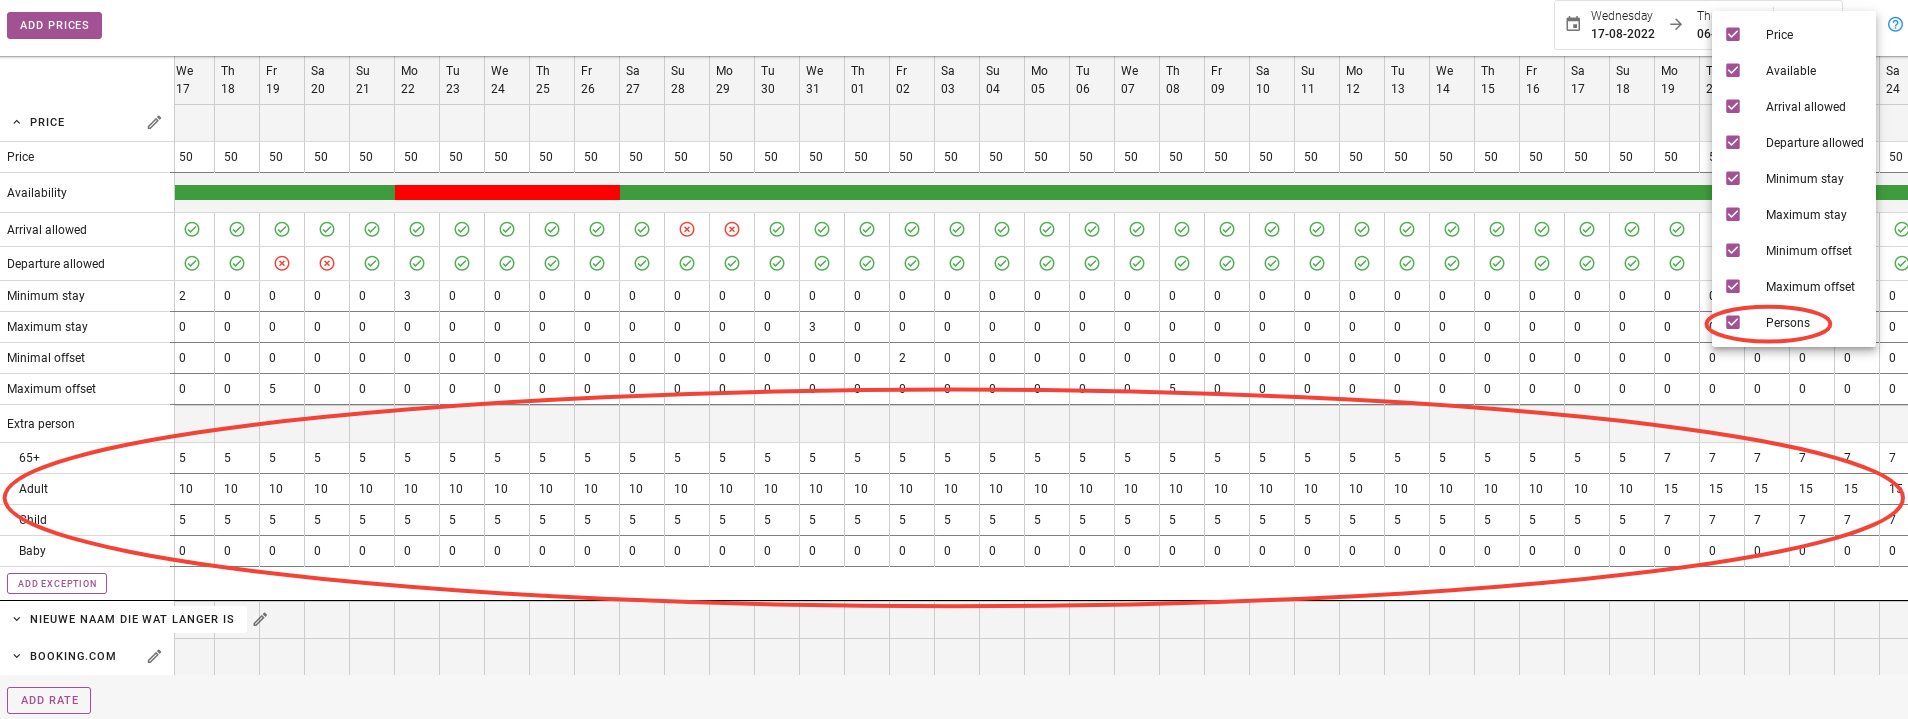
2.9 Persons
The last row that will be added to the price overview is ´persons´. On the image below you can see that the extra persons will appear in the price overview. You can then add the price per age and per day. As you can see on the picture below, the prices are the same until 07-09 and the price goes up a little till 11-09.
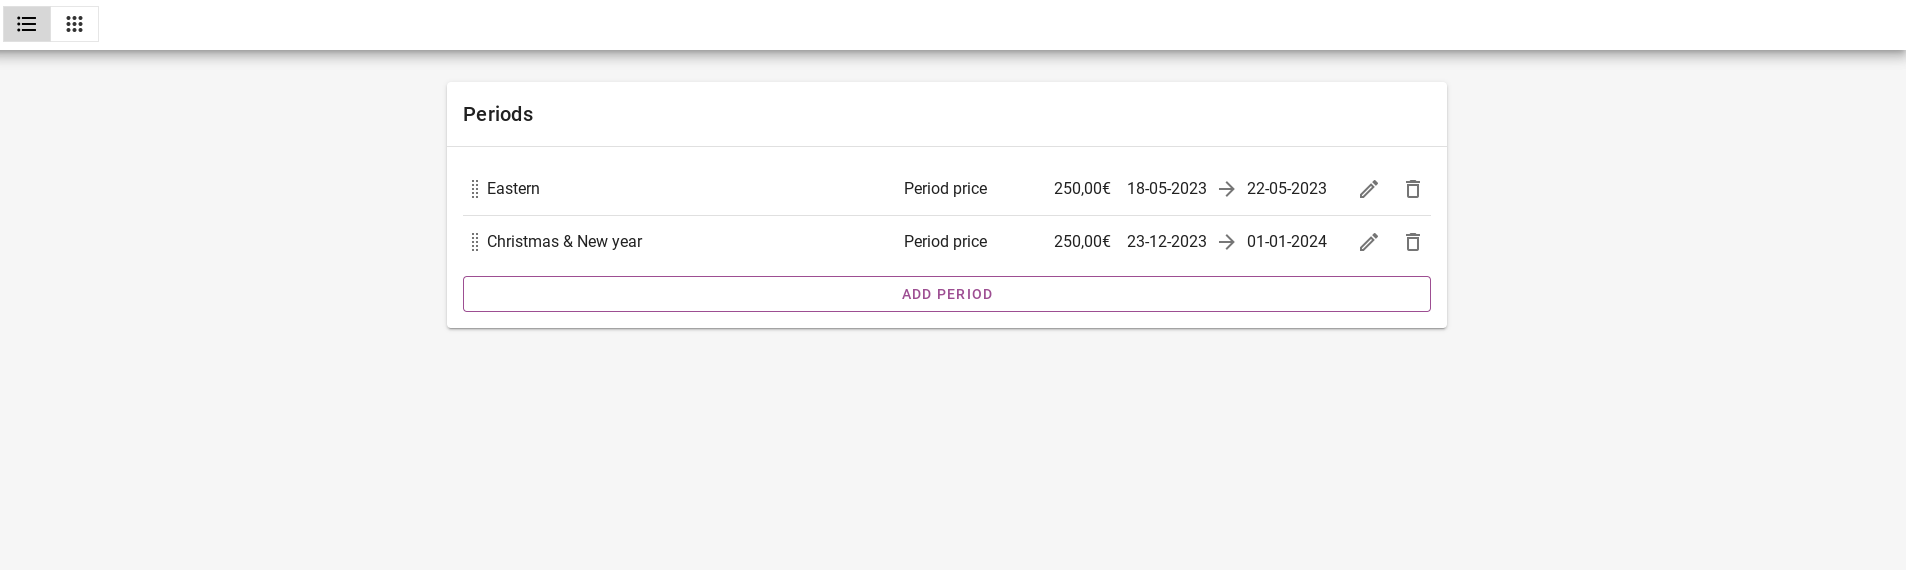
3. How to set a special period price?
It is also possible to set up a special price for a fixed period. For example, a price for the whole period during Eastern or Christmas. When you are in the price schedule, select the “list view” on the top right as shown in the screenshot below. .png)
Here you can add a fixed price for a fixed period.
The list looks like this;
You can see in the price scedule when a price per night belongs to a period price. The price becomes purple and is underlined.
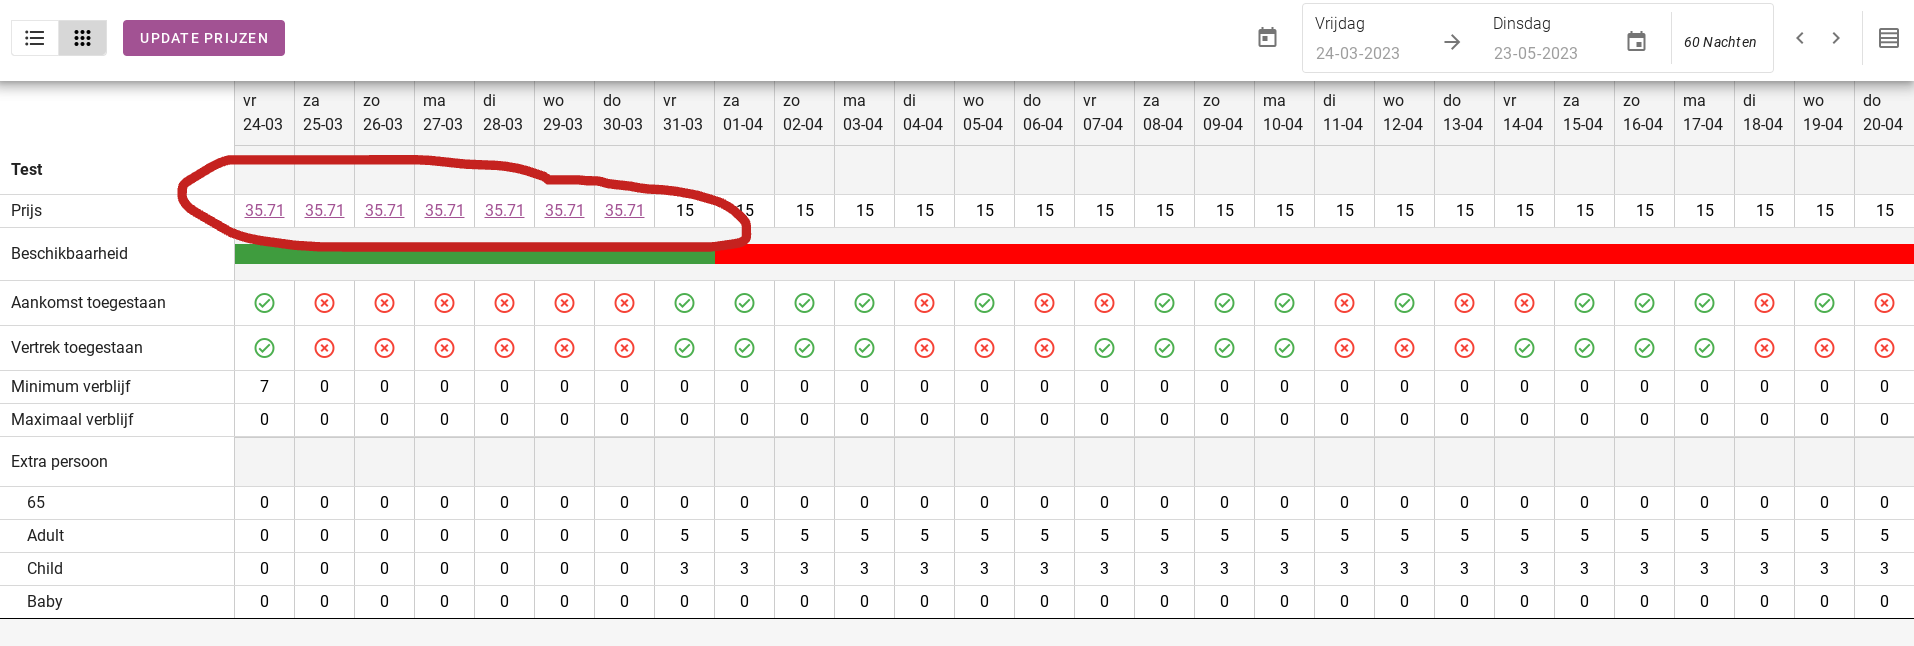
4. How do I setup a weekprice
The best way to setup a weekprice is to put the nightprices in. Then set the minimum to 7 night.
Important: one accommodation can have multiple pricetables. One accommodation can have a pricetable for the prices per night and one pricetable for the weekprices for example.