Hur fungerar schemaläggningstavlan?
Ursprungligen skriven på engelska, eventuella översättningsfel bör kontrolleras mot originalatriklen
Schematavlan är en översikt över alla bokningar under en vald period. Här kan du se vem, när och var gästerna kommer till din camping. Det går även bra att göra bokningar från schematavlan. Det finns många sätt att se schematavlan. Det är möjligt att välja de saker du vill se i schematavlan. Detta kan vara speciella semestrar, perioder eller personer som redan betalat och mycket fler varianter. Den här artikeln förklarar allt steg för steg.
1. Statusvy
2. Betalningsvy
3. Boende, tagg och platsfilter
4. Lägga till och ta bort en spärrad period
5. Hur flyttar jag en reservation i schematavlan?
6. Hur gör man en reservation i schematavlan?
7. Snabbsökning efter en speciell period
1. Statusvy
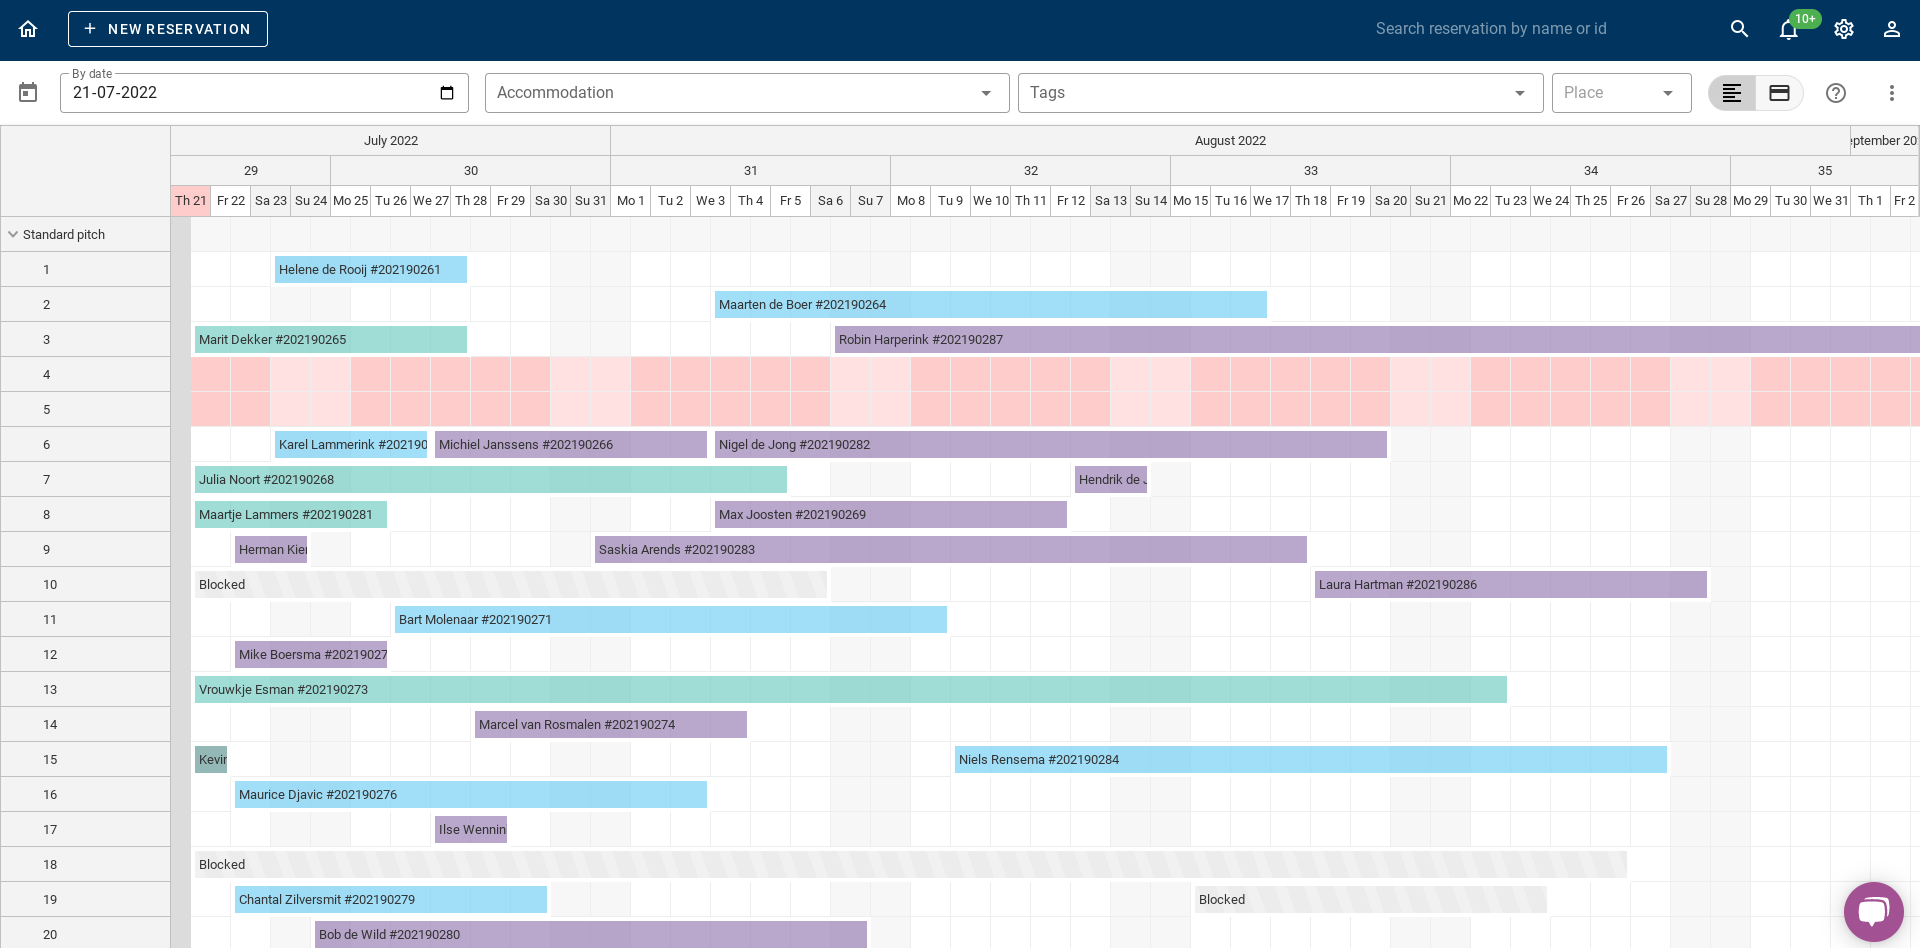
I schematavlan kan du se statusvyn och en betalningsvy. På bilden nedan ser du i inringat rött var du kan växla mellan statusvy och betalningsvy. Detta stycke diskuterar statusvyn.

Statusvyn innebär att du kan se status för en reservation. Det här kapitlet förklarar vilka statuser som finns och vad färgerna på schematavlan betyder.
1.1: Status bekräftad
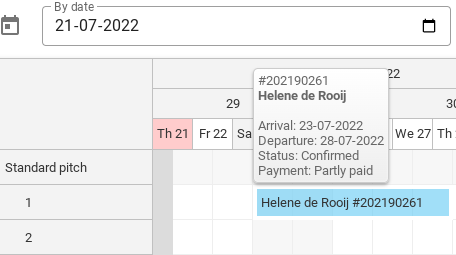
Som du kan se på bilden ovan är bokningar markerade med blått bekräftade bokningar.
1.2: Status incheckad
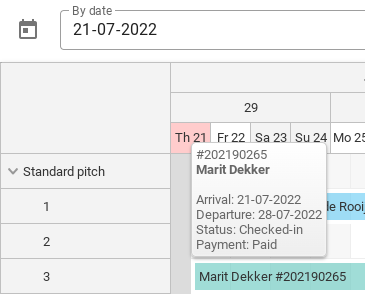
Som du kan se på bilden ovan är reservationer som är markerade med grönt reservationer som är incheckade.
1.3: Status utcheckad
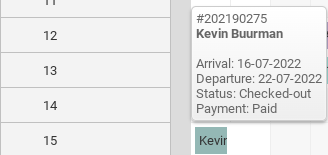
Som du kan se på bilden ovan är reservationer som är markerade mörkgröna reservationer som är utcheckade.
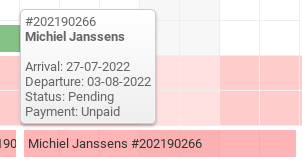
1.4: Status väntande
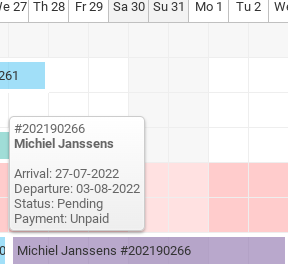
Som du kan se på bilden ovan är reservationer som är markerade med lila reservationer som väntar. Så dessa måste fortfarande bekräftas.
1.5: Status blockerad
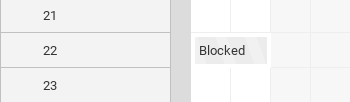
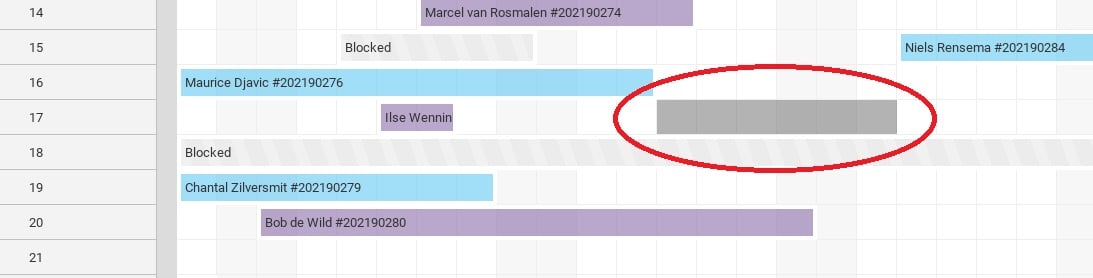
Som du kan se på bilden ovan är reservationer som är markerade ljusgrå/randiga spärrade perioder.
2. Betalningsvy
Det är även möjligt att se betalningsvyn per bokning utöver statusvyn. På bilden nedan kan du se var du kan växla mellan statusvy och betalningsvy i schematavlan.
2.1: Delvis betald
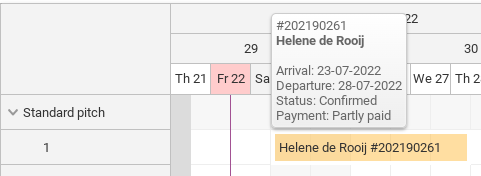
Som du kan se på bilden ovan är de delvis betalda reservationerna markerade med gult.
2.2: Betalt
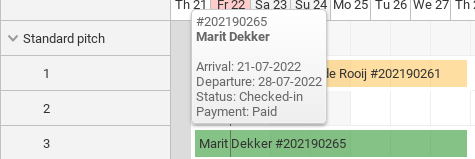
Som du kan se på bilden ovan är fullbetalda bokningar markerade med grönt.
2.3 Obetald
Som du kan se på bilden ovan är obetalda bokningar markerade med rött.
3. Boende, tagg och platsfilter
Detta stycke beskriver hur du kan filtrera schematavlan efter boendetyp, plats och taggar.
3.1 Boendefilter
På bilden nedan kan du se boendefiltret inringat i rött. Om du bara vill se 1 boende i plantavlan kan du klicka på denna knapp. Du kan sedan välja vilka boenden du vill se.

3.2 Taggfilter
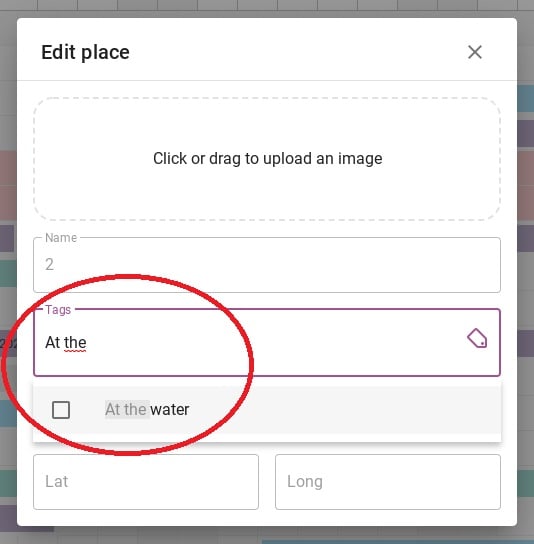
För att filtrera på en tagg måste du först lägga till taggarna på vissa platser. För att göra detta, klicka på platsnumret där du vill lägga till en tagg. På bilden nedan är den inringad i rött där du kan klicka.
Detta tar dig till fliken nedan. Här kan du lägga till en viss tagg till en plats under rubriken 'Taggar'. På bilden nedan kan du se i den röda inringade att jag nu lägger till som exempel taggen 'Vid vattnet' till plats 2.
På bilden nedan kan du se att jag har lagt till taggen 'Vid vattnet' i det röda inringade området längst upp, så du kommer bara se plats 2. Platsen där jag just lagt till taggen.

3.3 Placera filtret
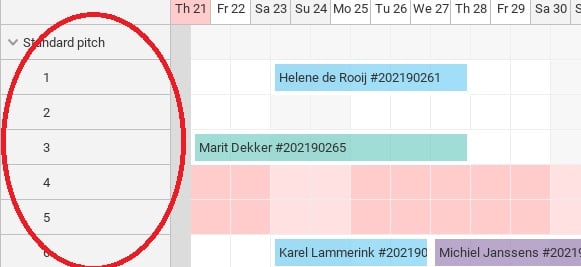
På bilden nedan kan du se platsfiltret inringat i rött. Med detta filter kan du filtrera en specifik plats. När du klickar på en plats kommer endast reservationerna för den specifika platsen att visas i schematavlan.

4. Lägga till och ta bort en spärrad period
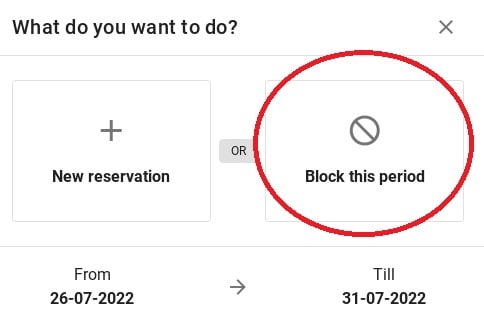
Om du vill spärra en viss plats under en viss tid kan du lägga till en spärr från Planstyrelsen. Använd musen för att välja den period du vill blockera. (Se bild nedan).
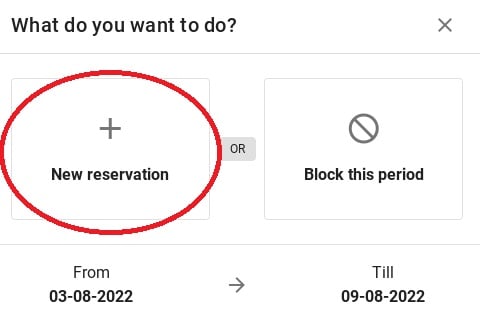
Ett meddelande kommer då att visas som frågar om du vill göra en reservation för denna period eller blockera denna period. Klicka på "Blockera denna period". Bilden nedan visar hur aviseringen ser ut.
Då kan du se på bilden nedan att blocket är satt. För att ta bort detta block, klicka bara på det. Blocket visas då automatiskt avlägsna.

5. Hur flyttar jag en reservation i schematavlan?
Från schematavlan är det möjligt att flytta bokningar till en annan plats. På så sätt har du en enkel överblick över de lediga utrymmena per plats. Nedan förklaras hur du kan flytta en reservation.
Tips: när du flyttar reservationer på något sätt, kontrollera alltid om datum och priser stämmer!
5.1: Flytta till ett annat datum
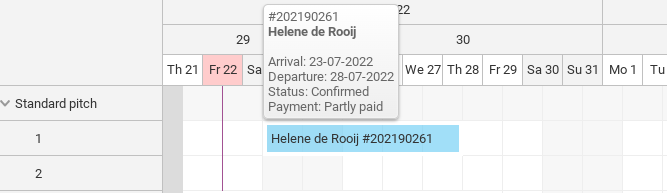
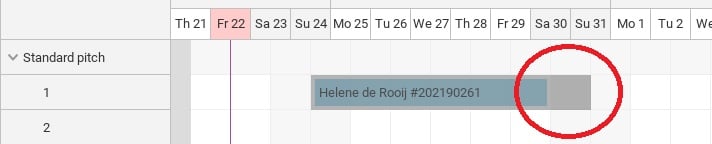
Nedan finns ett exempel på reservation. Dessa gäster bor från 2022-07-23 till 2022-07-28. Anta att dessa gäster ringer och anger att de vill anlända 2 dagar senare och gå 2 dagar senare.
Du ser i schematavlan att 2 dagar efter denna bokning fortfarande inte finns något i schematavlan, och skulle det vara möjligt att flytta denna reservation för gästen.
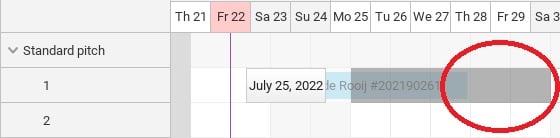
Du tar tag i bokningen med musen och drar den till önskat datum. Bilden nedan visar hur du gör detta.
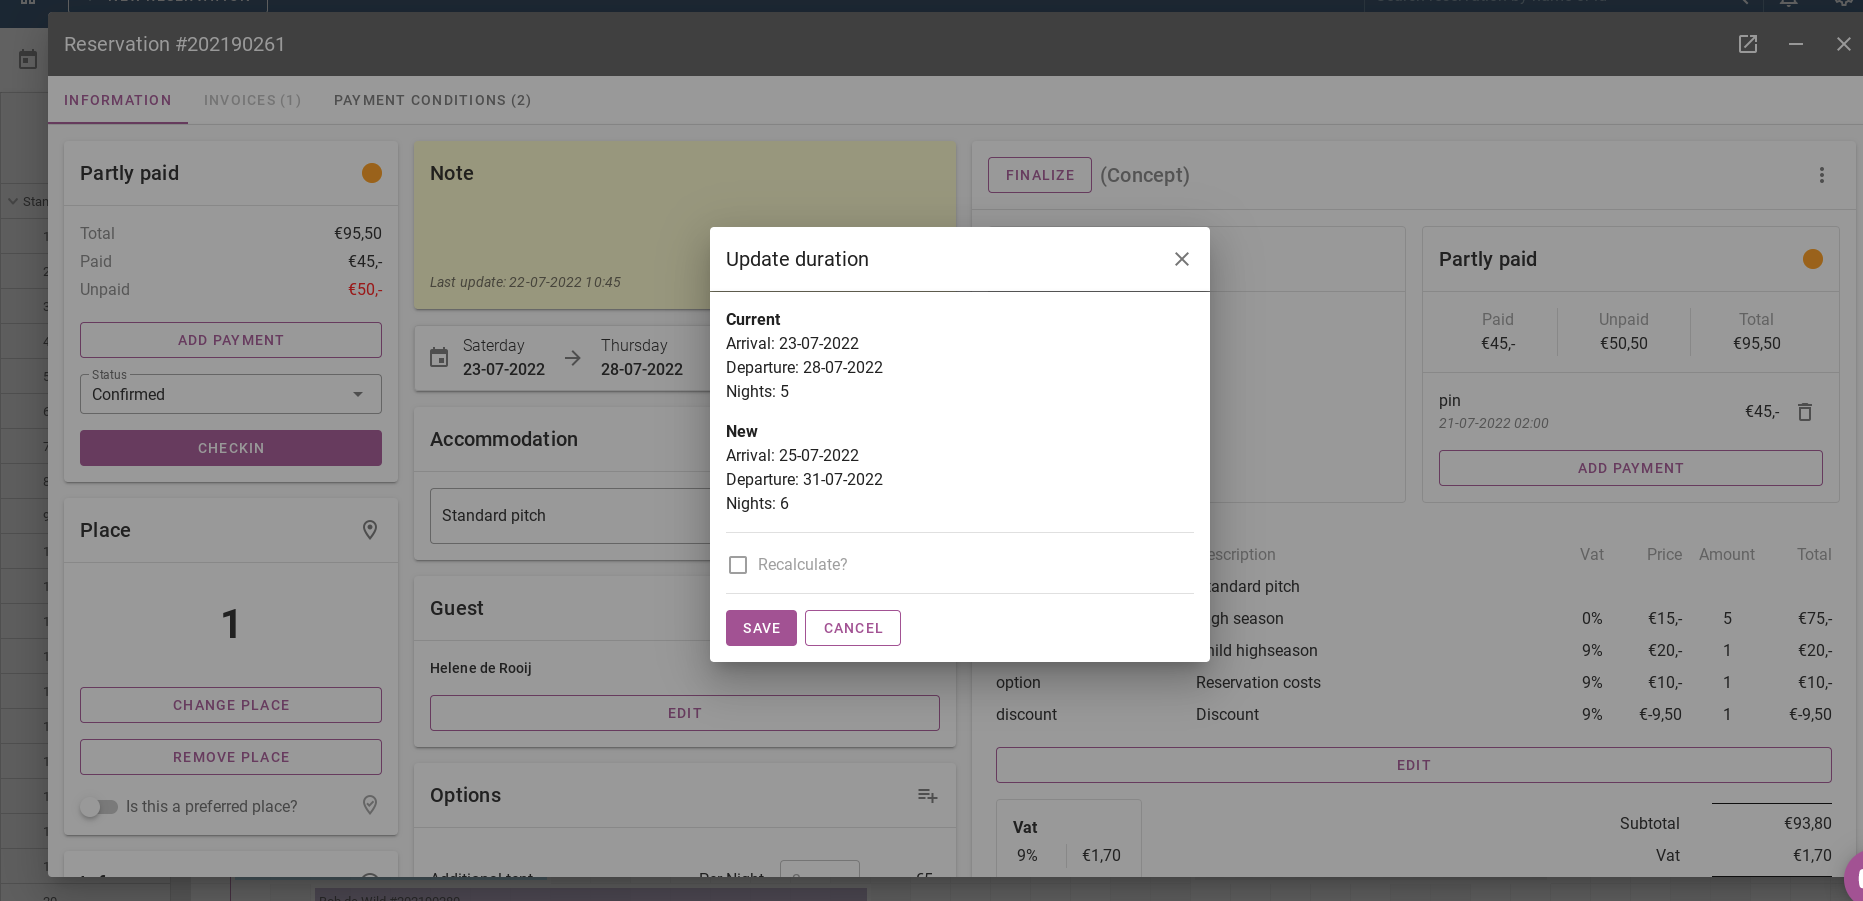
Om du släpper reservationen med musen kommer systemet automatiskt att öppna bokningen. Systemet kommer också att be om en "uppdateringslängd". Det betyder att du kan räkna om bokningen och se om de nya datumen är korrekta. Om alla uppgifter är korrekta, klicka spara. Bilden nedan visar hur uppdateringstiden ser ut.
5.2: Flytta till en annan plats
Du kan också flytta en befintlig reservation till en annan plats i planeringstavlan genom att klicka på den med musen. Bilden nedan visar hur detta fungerar.
5.3: Förläng eller förkorta en reservation
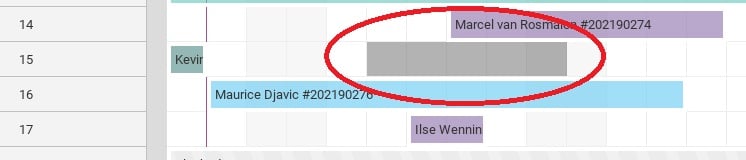
För att förlänga eller förkorta en reservation tar du tag i sidan av reservationen på planeringstavlan med musen (se bilden nedan). Dra det sedan till ett annat datum.
Återigen kommer systemet att be om en omräkning av bokningen, vänligen kontrollera detta noggrant.
6. Hur gör man en reservation i schematavlan?
För att göra en reservation från schematavlan, välj perioden med musen. Detta görs enligt bilden nedan.
Du kommer återigen att se meddelandet som frågar dig om du vill lägga till ett block eller göra en ny bokning. Klicka nu på 'Ny reservation' knapp.
Efter att ha klickat på knappen 'Ny bokning' kommer du till sidan där alla detaljer kan anges. För att se en detaljerad förklaring av hur man gör en bokning klicka här. Du kommer då att dirigeras till en annan artikel.
7. Snabbsökning efter en speciell period
Nedan är en bild där du kan se den övre kanten av schemaläggningstavlan. Kalendern inringad i rött är en knapp som gör att du snabbt kan hoppa till ett annat datum i planeringstavlan.

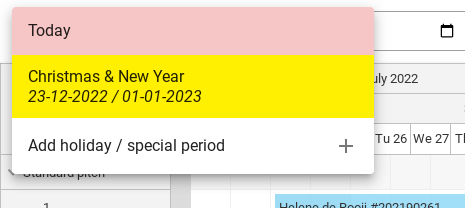
På bilden nedan kan du se vad som dyker upp när du flyttar musen på den här knappen. Här kan du se ett exempel på perioden jul & nyår. När du klickar på denna period hoppar planeringstavlan automatiskt till detta datum.
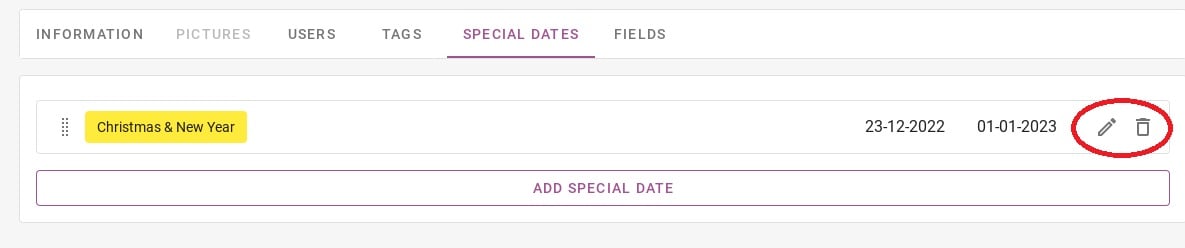
Du kan också lägga till semesterperioder och andra specialperioder genom att klicka på 'Lägg till semester/särskild period'.
När du klickar på 'Lägg till semester/särskild period', kommer du att föras till sidan nedan. Under rubriken 'Specialdatum' det är möjligt att ange dessa datum. Inringad i rött ser du en penna och en papperskorg. Med pennan kan du ändra denna befintliga period, och med papperskorgen kan du radera denna period.
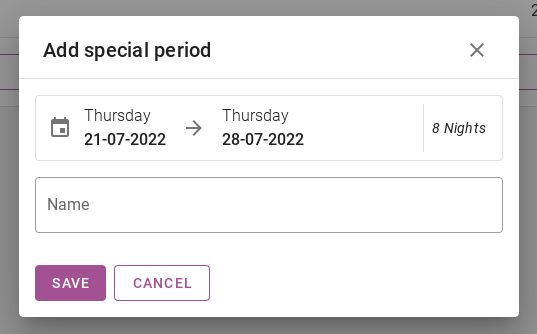
Knappen i lila med texten "ADD SPECIAL DATE" kan användas för att lägga till en ny period. På bilden nedan kan du se hur denna period kan läggas till. Du anger start- och slutdatum i kalendern och ger specialperioden ett namn. Till sist trycker du på spara.
Bilden nedan visar en kalender inringad i rött. I den här kalendern kan du klicka på ett datum. Schematavlan kommer då att hoppa till detta datum och visa alla bokningar.
