How does the schedule board work?
Originally written in English, any translations errors should be checked against the original atricle
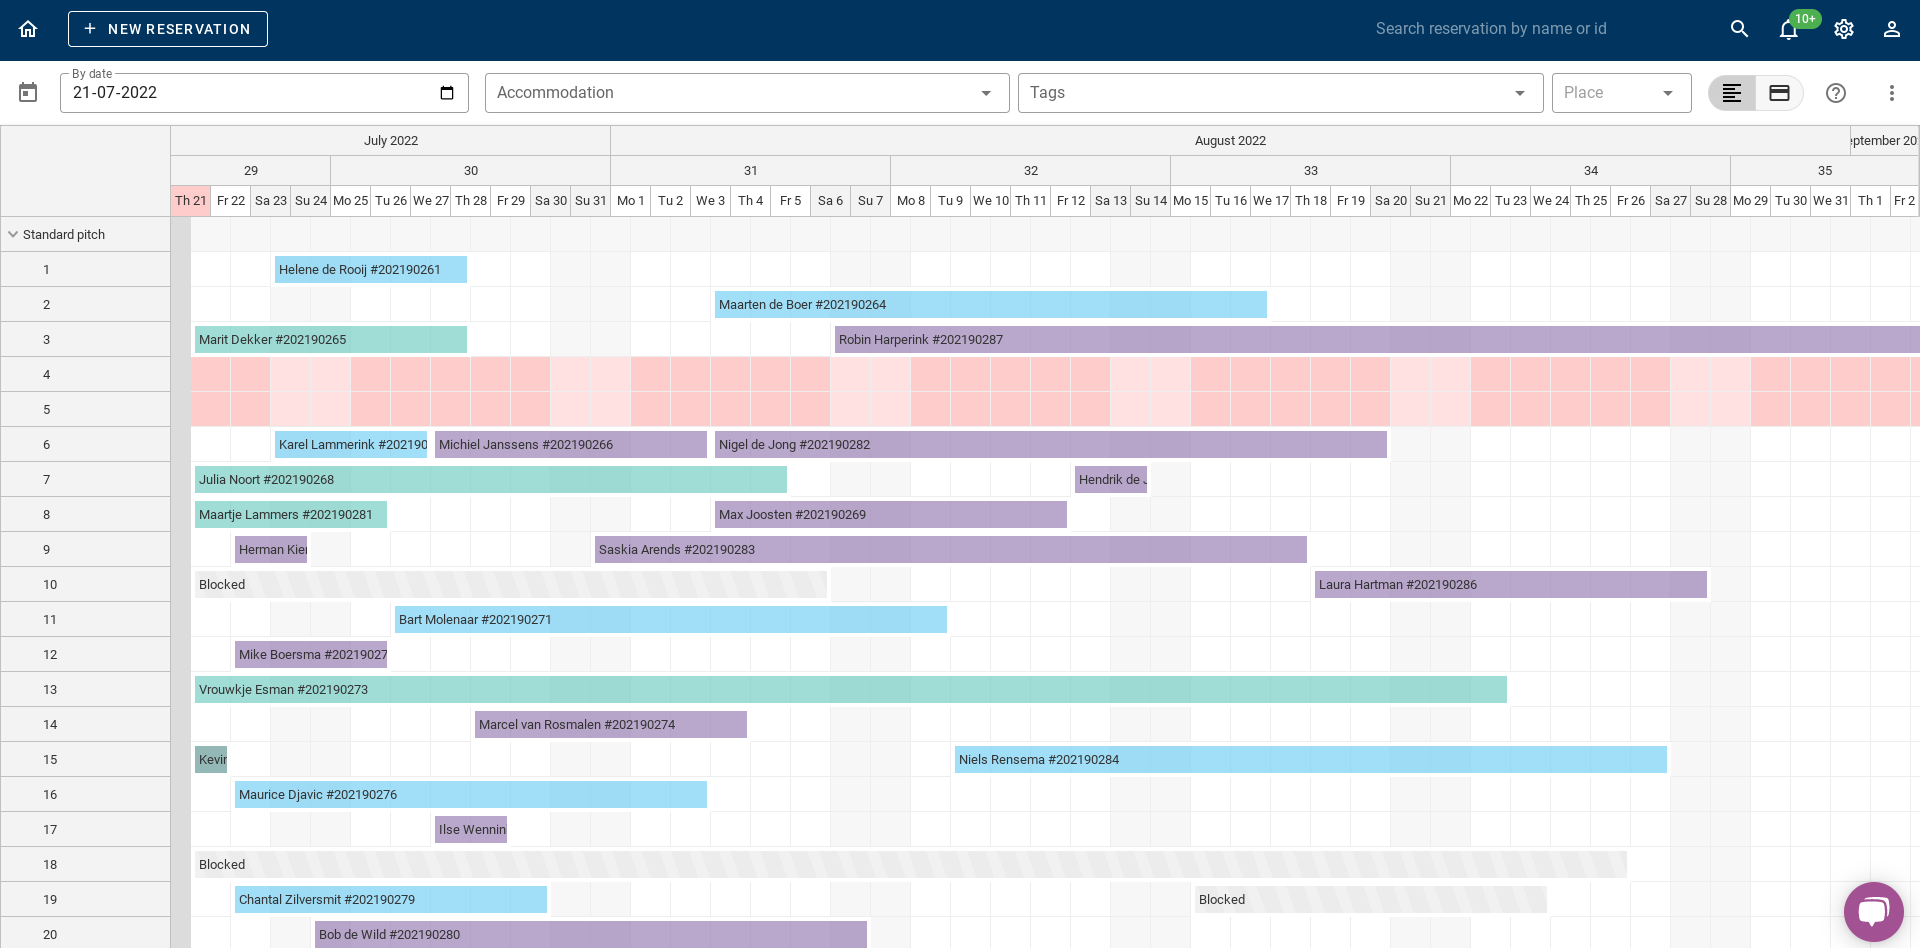
The schedule board is an overview of all the reservations in a selected period. Here you can see who, when and where guests are coming to your campsite. It is also possible to make reservations from the schedule board. There are many ways to view the schedule board. It is possible to select the things you want to see in the schedule board. This can be special vacations, periods or people who already paid and much more variations. This article explains everything step by step.
1. Status view
2. Payment view
3. Accommodation, tag and place filter
4. Adding and removing a blocked period
5. How do I move a reservation in the schedule board?
6. How to make a reservation in the schedule board?
7. Quick search for a special period
1. Status view
In the schedule board you can see the status view and a payment view. In the picture below, you can see in circled red where you can switch between status view and payment view. This paragraph discusses the status view.

The status view means you can see the status of a reservation. This chapter explains which statuses there are and what the colours on the schedule board mean.
1.1: Status confirmed
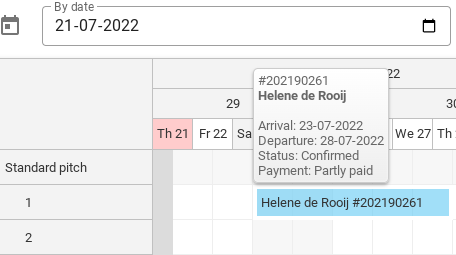
As you can see on the picture above, reservations marked in blue are confirmed reservations.
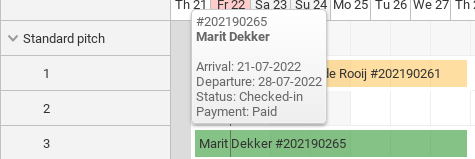
1.2: Status checked-in
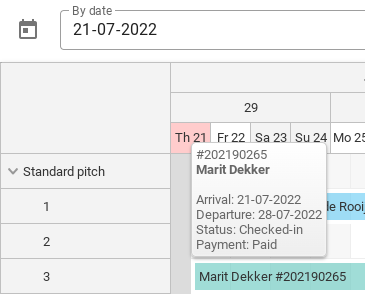
As you can see on the picture above, reservations that are marked green are reservations that are checked in.
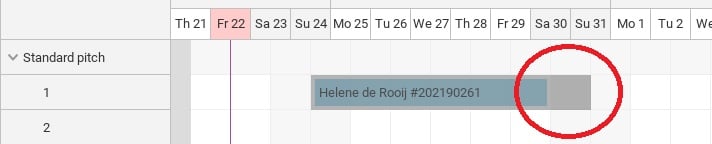
1.3: Status checked-out
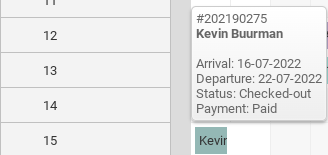
As you can see on the picture above, reservations that are marked grey are reservations that have been checked out.
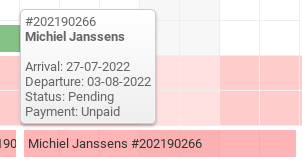
1.4: Status pending
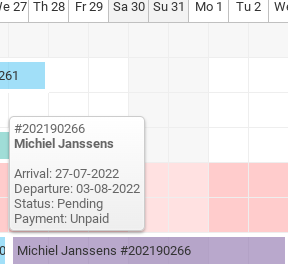
As you can see on the picture above, reservations that are marked purple are reservations that are pending. So these still need to be confirmed.
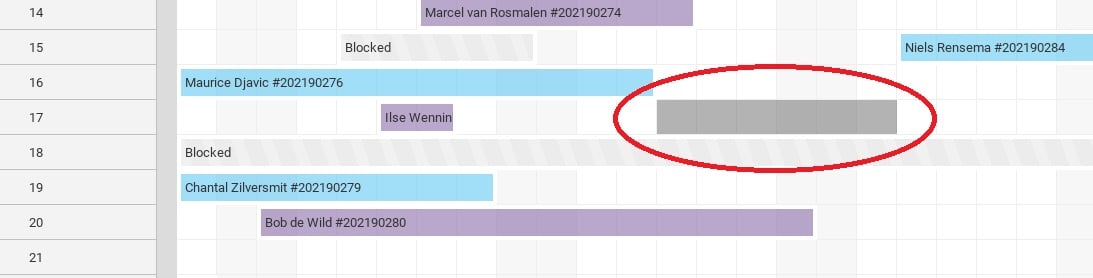
1.5: Status blocked
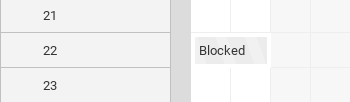
As you can see on the picture above, reservations that are marked light grey/striped are blocked periods.
2. Payment view
It is also possible to see the payment view per reservation in addition to the status view. In the picture below you can see where you can switch between status view and payment view in the schedule board.
2.1: Partly paid
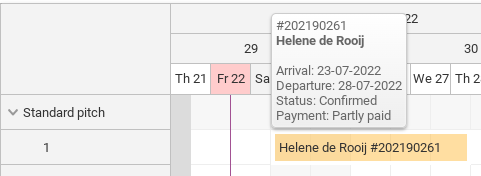
As you can see from the picture above, the partially paid reservations are marked in yellow.
2.2: Paid
As you can see from the picture above, fully paid reservations are marked in green.
2.3 Unpaid
As you can see from the picture above, unpaid reservations are marked in red.
3. Accommodation, tag and place filter
This paragraph describes how you can filter the schedule board by accommodation type, place and tags.
3.1 Accommodation filter
In the picture below you can see the accommodation filter circled in red. If you want to view only 1 accommodation in the plan board, you can click on this button. You can then select which accommodations you wish to see.

3.2 Tag filter
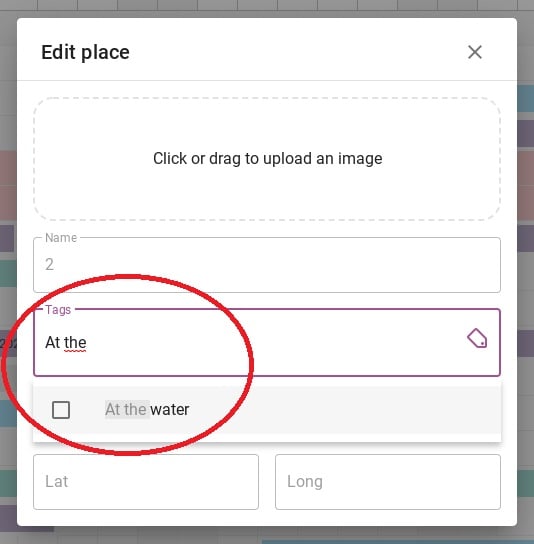
To filter on a tag you first have to add the tags to certain places. To do this, click on the place number where you want to add a tag. On the picture below, it is circled in red where you can click.
This will take you to the tab below. Here you can add a certain tag to a place under the heading ‘Tags’. On the photo below you can see in the red circled that I now add as example the tag ´At the water ´ to place 2.
On the picture below, you can see that I have added the tag ´At the water´ in the red circled area at the top, so you will only see place 2. The place where I just added the tag.

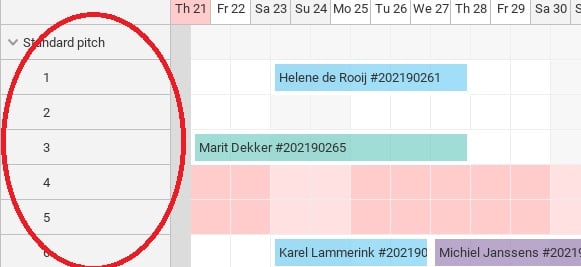
3.3 Place filter
In the picture below you can see the place filter circled in red. With this filter you can filter one specific place. When you click on a place, only the reservations of that specific place will be shown in the schedule board.

4. Adding and removing a blocked period
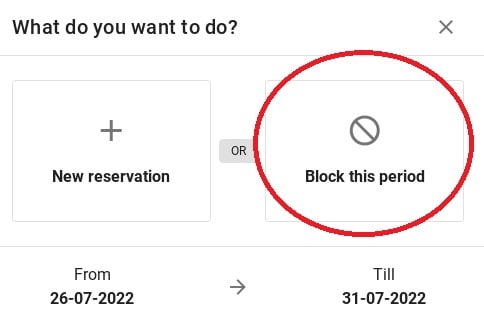
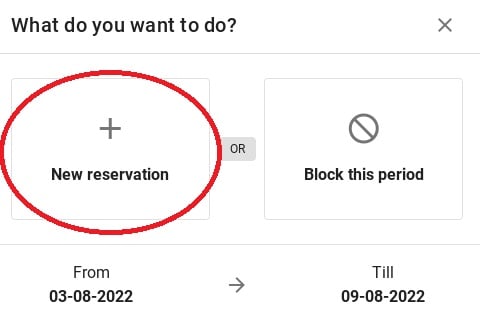
If you want to block a certain place for a certain period of time, you can add a block from the Plan Board. Use your mouse to select the period you want to block. (See picture below).
A notification will then appear asking whether you want to make a reservation for this period or block this period. Click on ‘Block this period’. The image below shows you what the notification looks like.
Then you can see in the image below that the block has been set. To remove this block, just click on it. The block will then automatically show ´remove´.

5. How do I move a reservation in the schedule board?
From the schedule board it is possible to move reservations to a different location. This way, you have an easy overview of the free spaces per pitch. Below is explained how you can move a reservation.
Tip: when moving reservations in any way, always check if the dates and prices are correct!
5.1: Move to another date
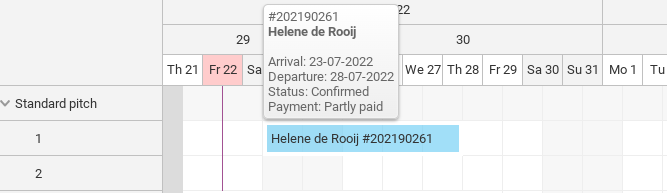
Below is a sample reservation. These guests stay from 23-07-2022 until 28-07-2022. Suppose these guests call and indicate that they would like to arrive 2 days later and leave 2 days later.
You see in the schedule board that 2 days after this reservation is still nothing in the schedule board, and would it be possible to move this reservation for the guest.
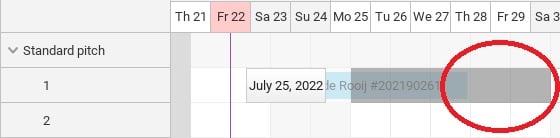
You grab the reservation with your mouse, and drag it to the desired date. The picture below shows how to do this.
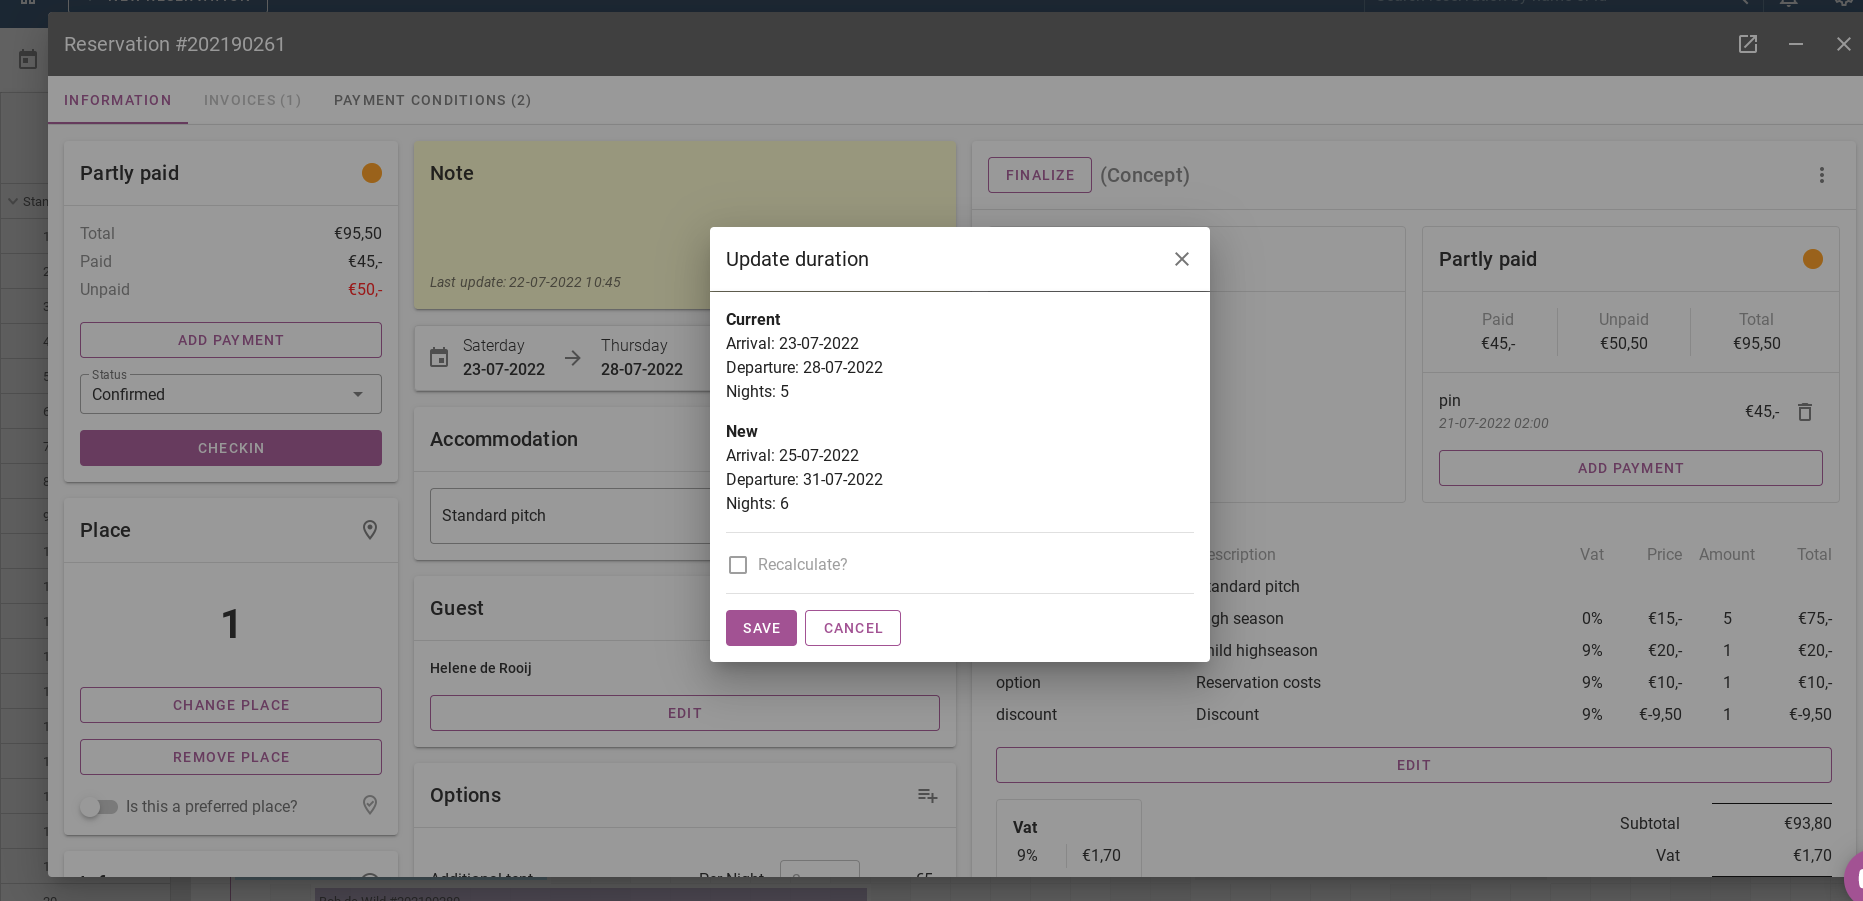
If you release the reservation with the mouse, the system will automatically open the reservation. The system will also ask for an ‘update duration’. This means you can recalculate the reservation and see if the new dates are correct. If all the data is correct, click ´save´. The picture below shows what the update duration looks like.
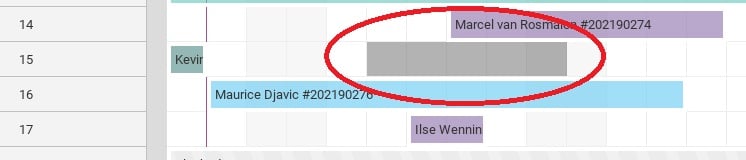
5.2: Move to another place
You can also move an existing reservation to another place in the planning board by clicking on it with the mouse. The image below shows how this works.
5.3: Extend or shorten a reservation
To lengthen or shorten a reservation you grab the side of the reservation on the planning board with your mouse (see image below). Then drag it to another date.
Again the system will ask for a recalculation of the reservation, please check this carefully.
6. How to make a reservation in the schedule board?
To make a reservation from the schedule board, select the period with the mouse. This is done as shown in the image below.
You will again be shown the notification asking you if you want to add a block or make a new reservation. Now click the ´New reservation´ button.
After clicking on the ‘New reservation’ button you will be taken to the page where all details can be entered. To view a detailed explanation of how to make a reservation click here. You will then be directed to another article.
7. Quick search for a special period
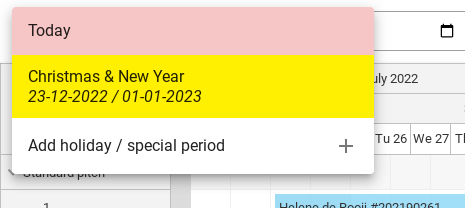
Below is an image where you can see the top edge of the scheduling board. The calendar circled in red is a button that allows you to quickly jump to another date in the planning board.

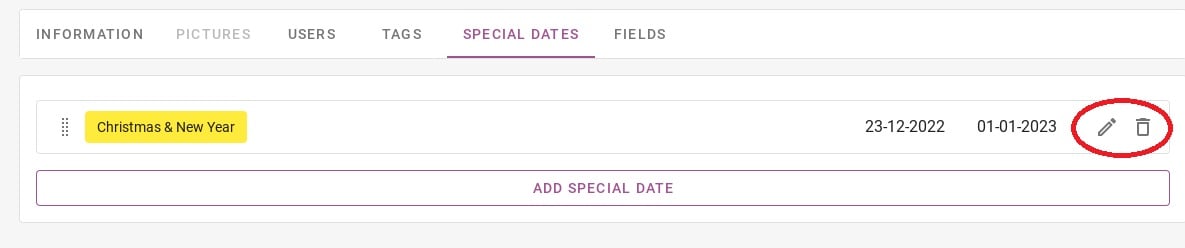
In the picture below, you can see what comes up when you move the mouse on this button. Here you can see an example of the period Christmas & New Year. When you click on this period, the planning board will automatically jump to this date.
You can also add holiday periods and other special periods by clicking on ´Add holiday / special period´.
When you click on ´Add holiday / special period´, you will be taken to the page below. Under the heading ´Special dates´ it is possible to enter these dates. Circled in red, you will see a pencil and a bin. With the pencil, you can change this existing period, and with the bin you can delete this period.
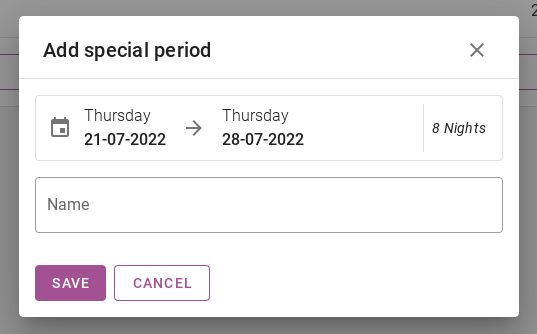
The button in purple with the text ´ADD SPECIAL DATE´ can be used to add a new period. On the picture below, you can see how this period can be added. You enter the start and end date in the calendar and give the special period a name. Finally, you press save.
The picture below shows a calendar circled in red. In this calendar you can click on a date. The schedule board will then jump to this date and show all reservations.
