-
Getting started
-
Settings
-
Schedule Board
-
Reservations
-
Accommodations
-
Prices
-
Guests
-
- Articles coming soon
-
Invoices
-
- Articles coming soon
-
- Articles coming soon
-
Interactive Map
-
Reports
-
- Articles coming soon
-
- Articles coming soon
-
App Store
-
Payments
-
Deals
-
Point of Sale
-
License Plates
-
Online booking
-
Energies
-
Older F.A.Q.
- Can I save my custom reservations list?
- How can I work with lists?
- How do cancellations work?
- How do i change the communication language for a reservation?
- How do i change the place of a reservation?
- How do I change the status of a booking?
- How do I export reservation data to excel?
- How do I make a reservation?
- How to add a payment to a reservation?
- How to search for a booking?
- How to send an email to the guest manually
- What does the messages mean the price calculation returns?
- What kind of reservation statuses are there?
- How to manage prices?
- How to add a price to an accommodation?
- How to set a special week/weekend price?
- How do i create my own reports?
- How do I share a report?
- How do I login with my SSO account?
- How to send a e-mail to yourself via a workflow?
- Administration
- Reservations
- Branding
- Guests
- Invoices
- How do custom fields work?
- Setting period conditions
- How to set up an accommodation?
- How do i modify the informations of the customer?
- How do age tables work?
- How do guest languages work?
- How does the interactive map work?
- How to set up products under accommodations
- What is the difference between concept and final invoices?
- How do i add a product to the invoice?
- How to finalize an invoice?
- How do i print the final invoice?
- How to search for an invoice
- How does the Point of Sale works?
- Show Remaining Articles ( 24 ) Collapse Articles
-
Kiosk
-
Developers
-
Channels
-
Barrier systems
- Articles coming soon
-
Products
- Articles coming soon
Originally written in English, any translations errors should be checked against the original atricle
1. The reservations view
2. Select predefined lists
3. Add filters
4. Make a custom reservation view and save it for later use
1. The reservations view
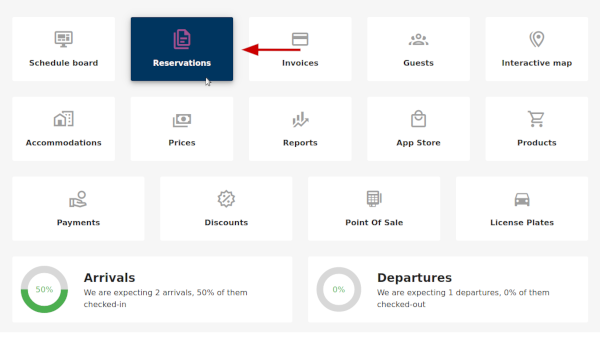
Select reservations from the main menu:
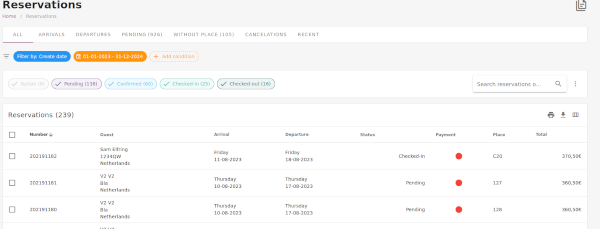
You wil enter the reservation screen where the most used options are already set up:
2. Select predefined lists
Per default all reservations are shown. You can however easily switch to arrivals or departures. On de right side you can set a different date:
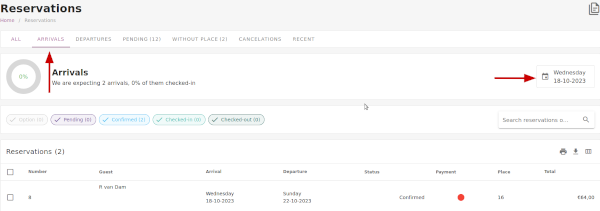
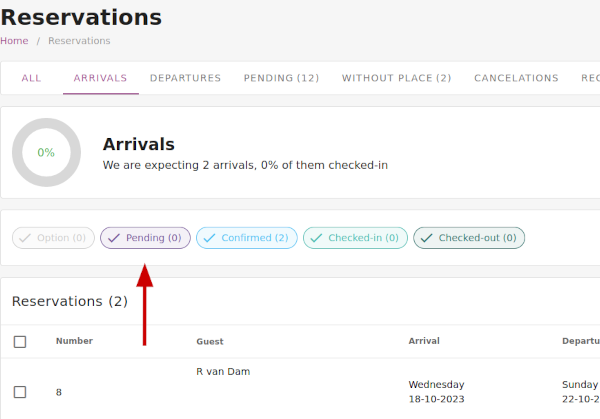
Per default all arrivals for that day are shown. You can however filter on the status of the reservation. If you click on pending all reservation with pending status are hidden from the view:
3. Add filters
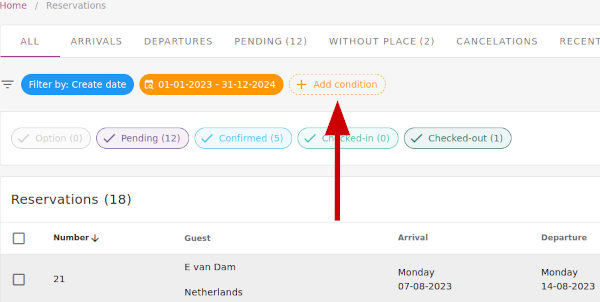
Suppose you want an overview of unpaid reservations from the Netherlands. Goto to the “ALL” overview and add a condition:
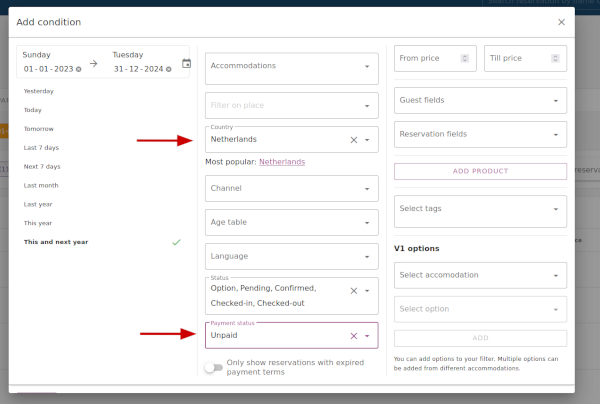
After that –> select Netherlands from the country field –> select unpaid from payment status –> close:
4. Make a custom reservation view and save it for later use
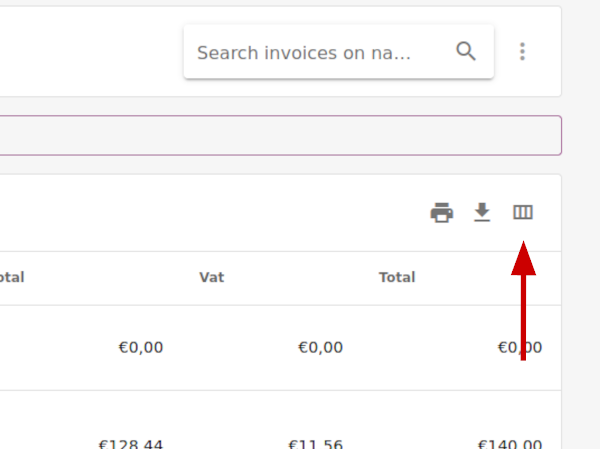
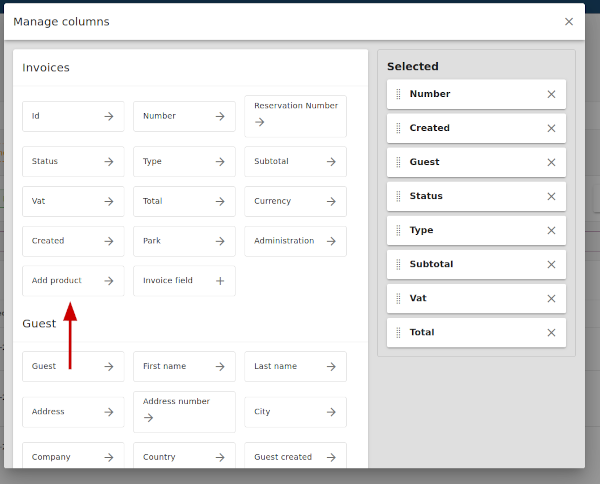
Sometimes you need a custom overview. Suppose you have a service for bed linnen which guest can book as extra option. You can make a custom overview, and save this for later use. Select the column icon on the right side of the screen:
Select “add product”:
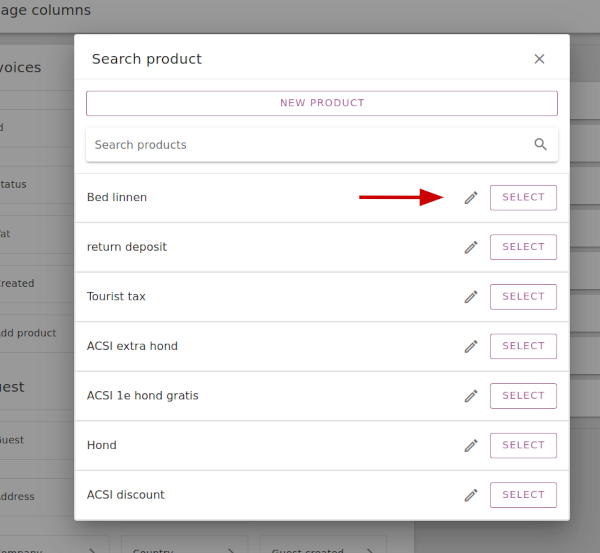
Select “Bed Linnen”:
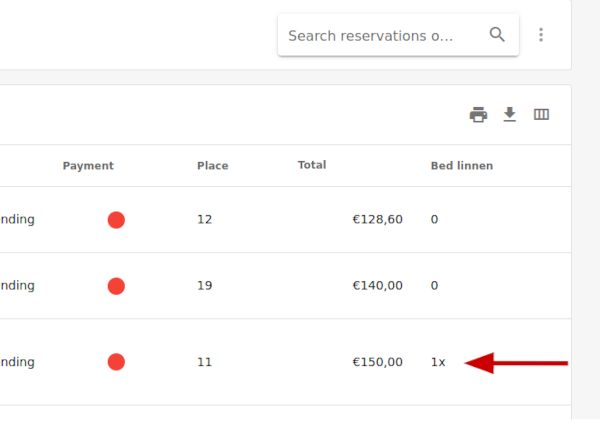
Now you have an overview of the amount of bed linnen you will need for these reservations:
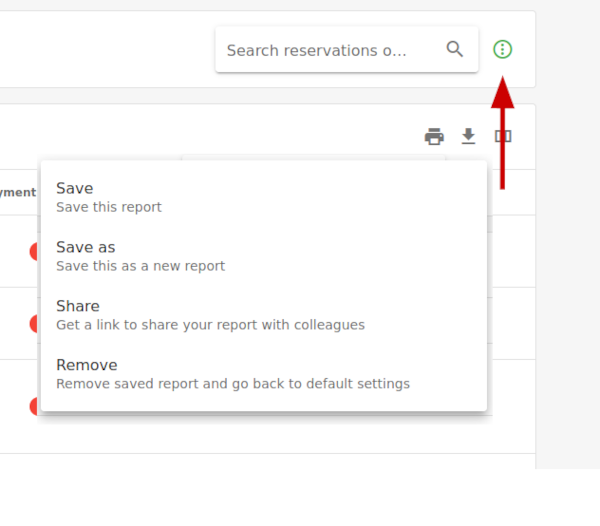
If you need an overview like this more often, you can save it for later use. Click on the three dots icon, and choose save as:
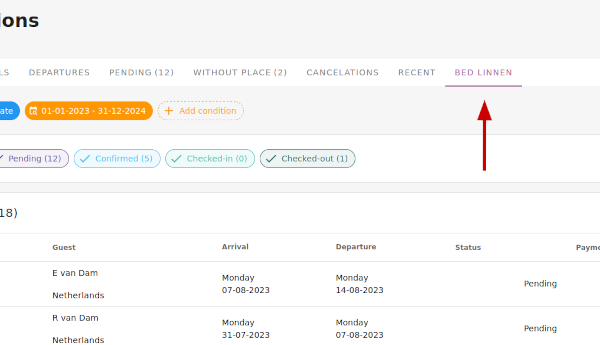
Bed linnen is now available as quick select:
