-
Backoffice / PMS
-
- What are iCal feeds? And what can I do with them.
- How to set up products under accommodations
- Cancellations
- Setting period conditions
- Accommodations overview
- Add new accommodation
- Adding Prices / Rates to an accommodation
- Discounts
- Taxes
- Options
- Places / Rooms / Objects
- Accommodation settings
- How to set up an accommodation?
-
- How can I work with report lists?
- How do I change the next invoice number?
- Delay invoice finalization.
- How do I send PDF or UBL invoices to my Accountancy System automatically?
- Direct payment links
- How to work with ledger accounts
- Invoice branding for e-mails
- How does the invoice screen looks like
- What is the difference between concept and final invoices?
- How do I add a product to the invoice?
- How to finalize an invoice?
- How do I print the final invoice?
- What is a UBL invoice?
-
- How can I work with report lists?
- How can guest information be overwritten?
- How does the Scan Document work?
- Adding guests
- Form setup
- Guests settings
- How to send an email to the guest manually
- How do i modify the informations of the guest?
- How do guest languages work?
- How do custom fields work?
- How to Create and Use a Blocked Guest List
-
- How can I work with report lists?
- Copy a reservation.
- How can guest information be overwritten?
- How does the Scan Document work?
- Price calculation error codes
- Cancellations
- Remove a reservation from a group booking
- Form setup
- Combine two bookings
- Add a existing booking to a group booking
- Add a new booking to a group
- Split a booking
- Remove a period within a booking
- Add days to a booking
- Cancellation of a booking in a group
- How to add a payment to a reservation
- How to add or change a place / room / object in a reservation
- Traveller info
- How do I change the place of a reservation?
- How to add a payment to a reservation?
- How to send an email to the guest manually
- How do I change the communication language for a reservation?
- How do i modify the informations of the guest?
- Create a new reservation (Backend)
- How do I export reservation data to excel?
- Can I save my custom reservations list?
- How do cancellations work?
- What kind of reservation statuses are there?
- How do I change the status of a booking?
- How do I make a reservation?
- How do custom fields work?
- How to Create and Use a Blocked Guest List
- Show Remaining Articles (17) Collapse Articles
-
- What are iCal feeds? And what can I do with them.
- Balances
- How do I change the next invoice number?
- VAT Groups
- Online Booking Settings
- Workflows
- How do I enable the BETA Features?
- How do I prevent emails to be marked as Spam?
- How to setup two factor authentication (2FA)
- How do I set up a Kiosk?
- Special dates
- Form setup
- E-mails
- Discount cards
- Interactive map settings
- Fields
- How to work with ledger accounts
- Invoice branding for e-mails
- Users
- Form setup
- Roles
- Providers & methods
- Online Booking Settings
- Website Integration
- Invoice settings
- License Plates
- Administration images
- Tags
- Guests settings
- How do age tables work?
- How do guest languages work?
- How do I login with my SSO account?
- Branding
- How do custom fields work?
- How do I change my password, user settings and username?
- Show Remaining Articles (20) Collapse Articles
-
-
Online booking
- How can i setup branding for my online booking engine?
- How do I setup the hosted online booking?
- What kind of online booking options do you provide?
- Simple and advanced filtering
- Online Booking Settings
- Form setup
- Online Booking Settings
- Website Integration
- How to setup a pre defined arrival and departure
- Why do I see a price when there's no availability?
-
App Store / Integrations
- Rate Limiter
- What is an API and do you have one?
- What is an MCP server and do you have one?
- Report your INE statistics
- Where to find the CBS statistics?
-
- Articles coming soon
-
- How to setup Chekin
- How do I setup Fiskaltrust?
- Campez Couvert App
- How to use the Datev App
- Feratel Visitor Registration
- Report your INE statistics
- Where to find the CBS statistics?
- Comprehensive Expert Analysis of German Fiscal Compliance for Property Management Systems Integrating fiskaltrust Middleware and Cloud-Based Technical Security Systems
-
Point of Sale (POS)
-
Self Service Kiosk
-
Hardware
-
Support
-
Subscriptions
Originally written in English, any translations errors should be checked against the original atricle
This only works for Google Chrome OS and you need a google Account to add the devices to your Workspace. There are costs involved for Google to maintain your devices.
Go to admin.google.com to login to your workspace account
1. Setup the camping.care kiosk app
If you have the rights you can go to Devices->Apps and extensions and click on the kiosks Tab
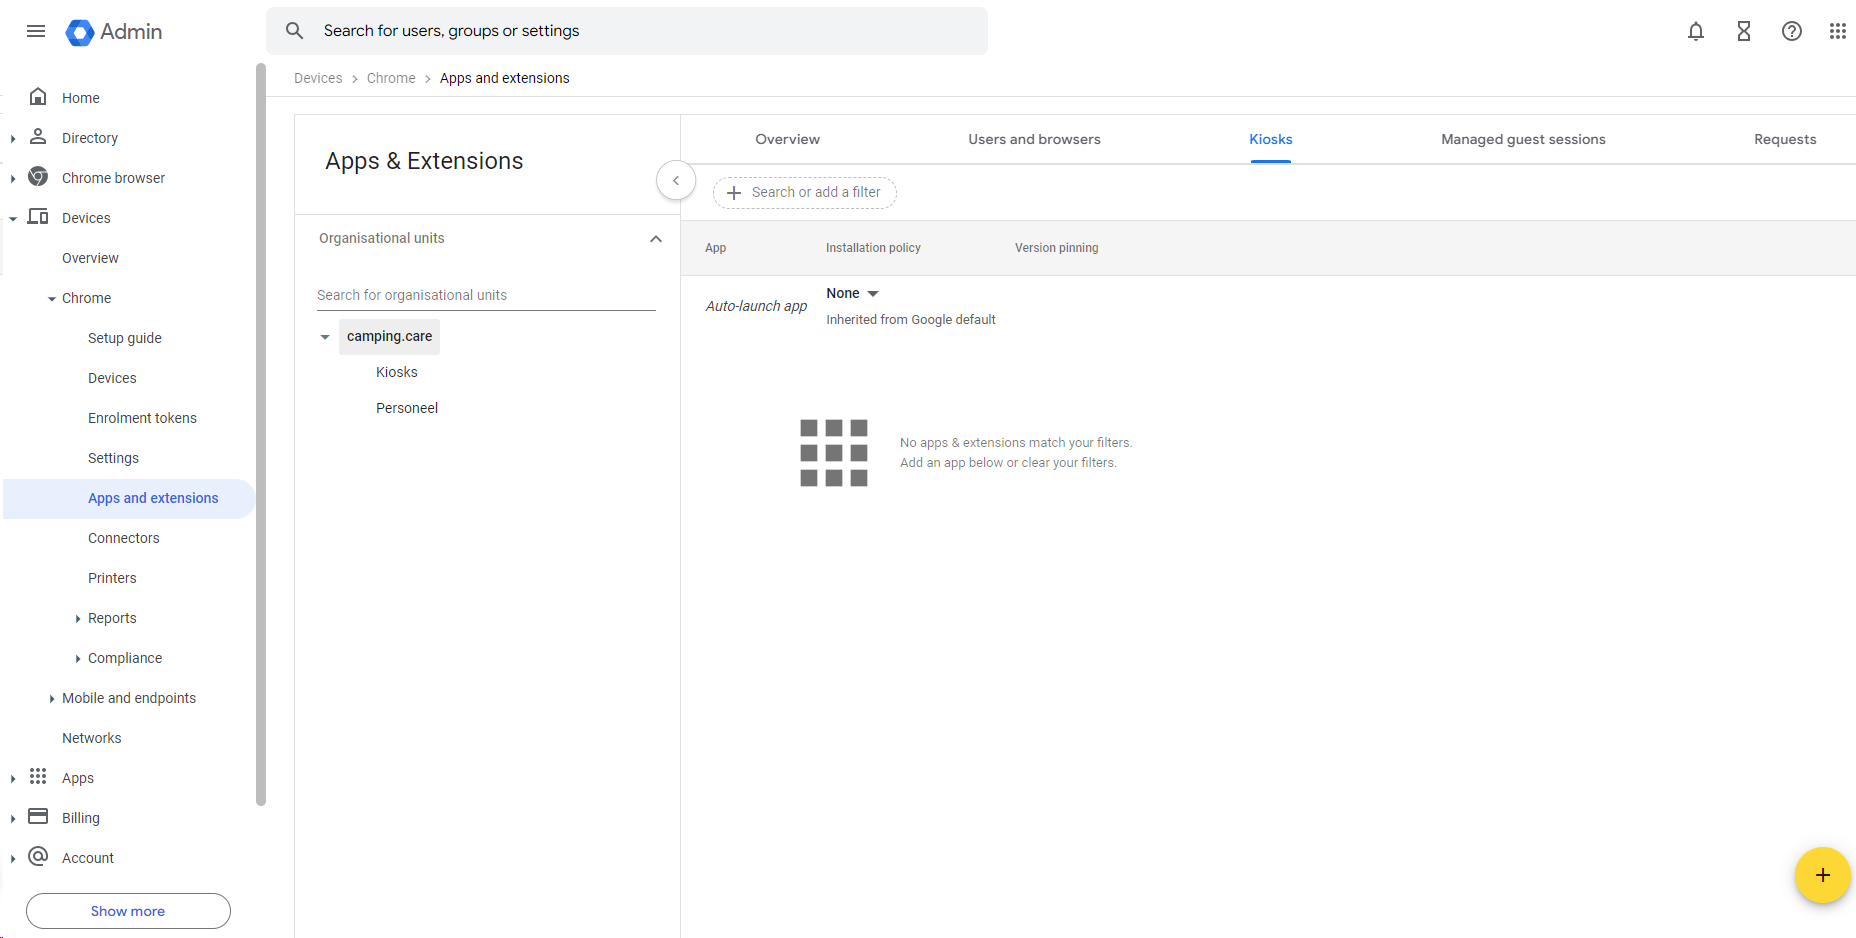
In the bottom right corner there is an (+) icon to add a kiosk.
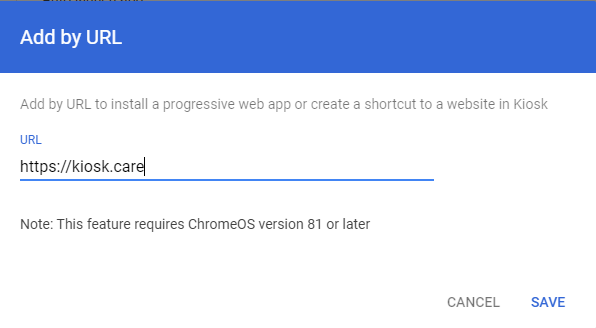
Select the Add by URL option and add the url https://kiosk.care
select the auto launch app function and choose the “Booking engine” option
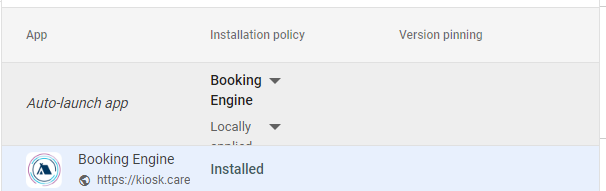
Now click on save in the top right corner
The kiosk configuration is done
2. Setup a Chrome OS device to your workspace
Turn on the device and follow the on-screen instructions until you see the sign-in screen. Don’t sign in yet. If you see the enrollment screen instead of the sign-in screen, go to Step 4.
If you’re enrolling a Chromebook tablet, tap Email or phone. Then, tap More More and then Switch to full layout to open the on-screen keyboard.
Open the enrollment screen. At the bottom of the sign-in screen, click Enterprise enrollment.
Or, for Chrome Enterprise Upgrade or Chrome Education Upgrade, use keyboard shortcut keys. Press Ctrl+Alt+E.
Enter username and password.
If prompted, enter the asset ID and location.
For devices with ChromeOS version 103 or earlier, click Next.
For devices with ChromeOS version 104 or later:
Chrome Enterprise Upgrade or Chrome Education Upgrade—Click Enroll enterprise device.
Kiosk & Signage Upgrade—Click Enroll kiosk or signage device.
(Kiosk & Signage Upgrade) Make sure that you selected the enrollment type you want and then click Confirm.
When you get a confirmation message that the device is successfully enrolled, click Done.
For devices enrolled with Chrome Enterprise Upgrade or Chrome Education Upgrade, users can sign in and start using them. For devices enrolled with Kiosk & Signage Upgrade, users can’t sign in or use managed guest sessions.
You can see a list of enrolled devices in your Admin console. For details, see View ChromeOS device details.
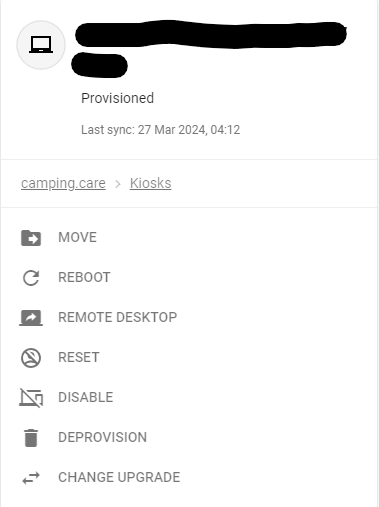
You will see a list with devices you added to the organisation.
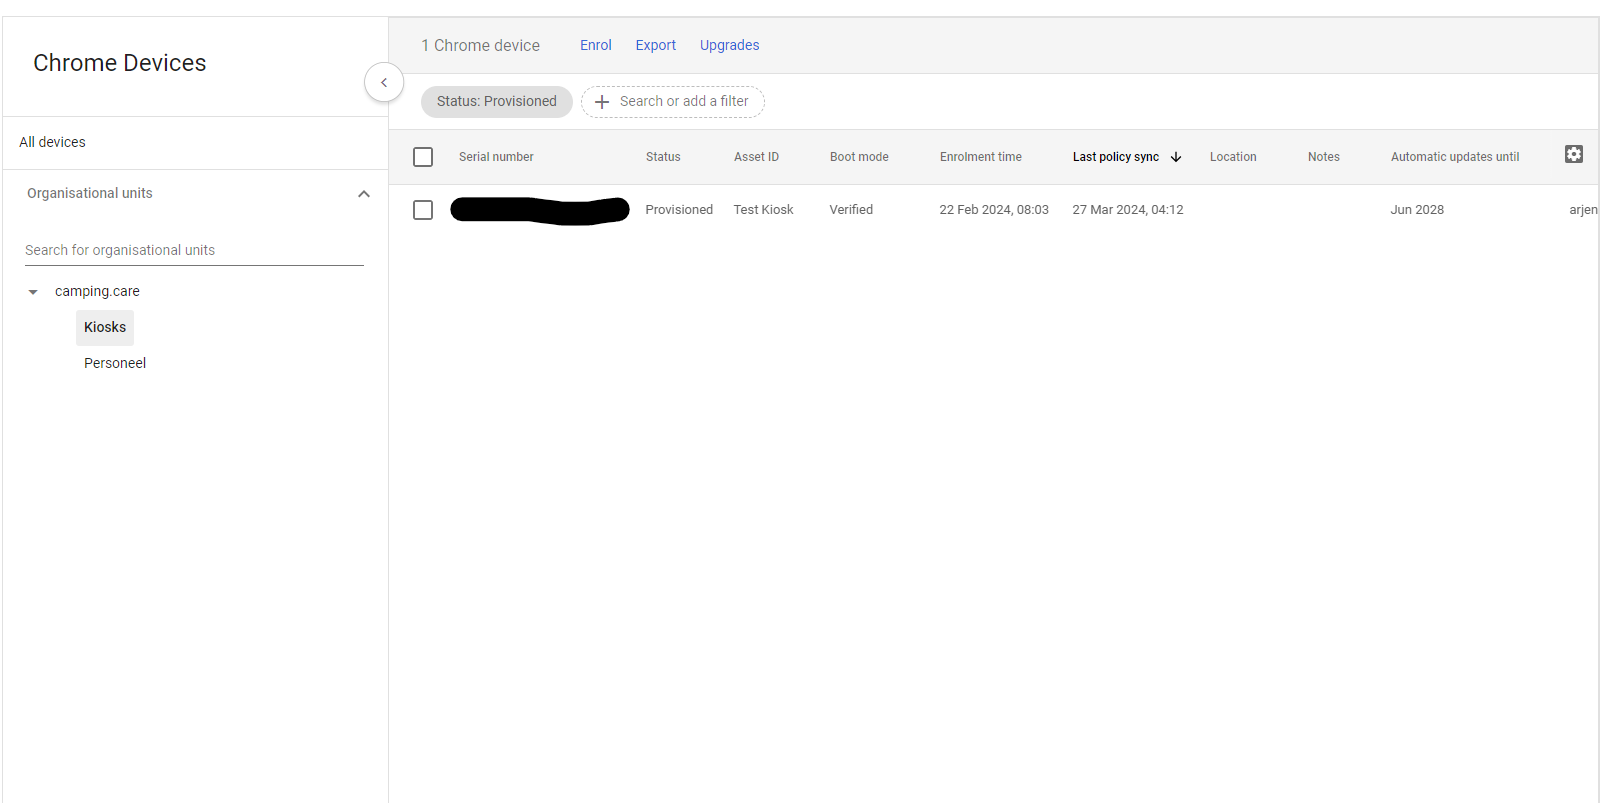
Optionally you could also add organisational units (Directory -> Organisational Units) to separate different groups so you can optionally start the Kiosk.
Now the Kiosk can start automatically in kiosk mode and within the device you will have the options to open remote desktop, reboot etc: