Come faccio a configurare un chiosco con Chrome OS e Google Workspace?
Scritto originariamente in inglese, eventuali errori di traduzione devono essere confrontati con l'articolo originale
This only works for Google Chrome OS and you need a google Account to add the devices to your Workspace. There are costs involved for Google to maintain your devices.
Vai a admin.google.com to login to your workspace account
1. Setup the camping.care kiosk app
If you have the rights you can go to Devices->Apps and extensions and click on the kiosks Tab
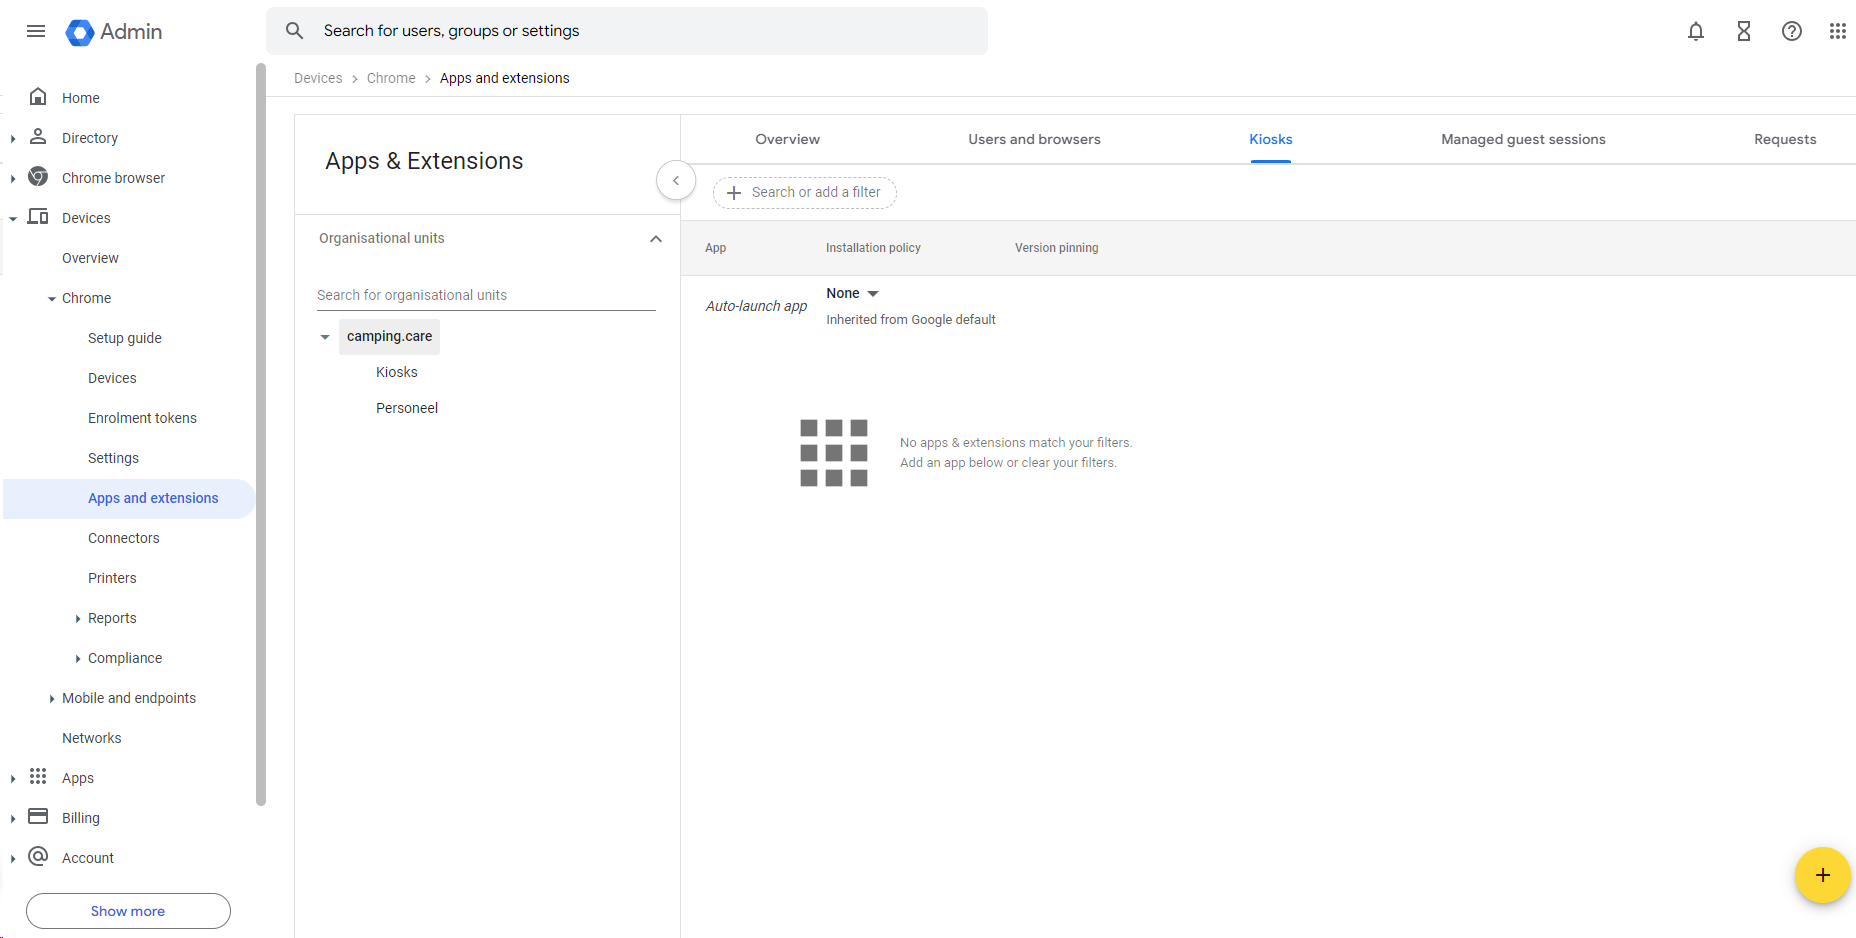
In the bottom right corner there is an (+) icon to add a kiosk.
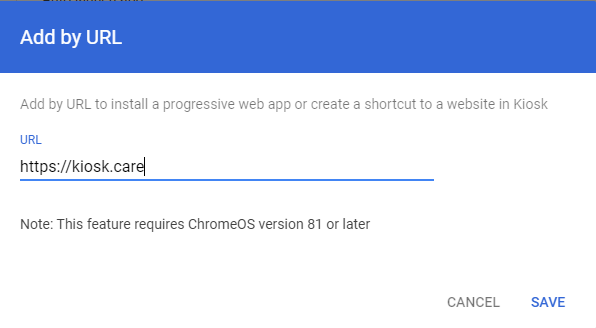
Select the Add by URL option and add the url https://kiosk.care
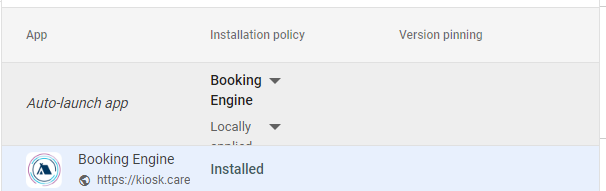
select the auto launch app function and choose the “Booking engine” option
Now click on save in the top right corner
The kiosk configuration is done
2. Setup a Chrome OS device to your workspace
Turn on the device and follow the on-screen instructions until you see the sign-in screen. Don’t sign in yet. If you see the enrollment screen instead of the sign-in screen, go to Step 4.
If you’re enrolling a Chromebook tablet, tap Email or phone. Then, tap More More and then Switch to full layout to open the on-screen keyboard.
Open the enrollment screen. At the bottom of the sign-in screen, click Enterprise enrollment.
Or, for Chrome Enterprise Upgrade or Chrome Education Upgrade, use keyboard shortcut keys. Press Ctrl+Alt+E.
Enter username and password.
If prompted, enter the asset ID and location.
For devices with ChromeOS version 103 or earlier, click Next.
For devices with ChromeOS version 104 or later:
Chrome Enterprise Upgrade or Chrome Education Upgrade—Click Enroll enterprise device.
Kiosk & Signage Upgrade—Click Enroll kiosk or signage device.
(Kiosk & Signage Upgrade) Make sure that you selected the enrollment type you want and then click Confirm.
When you get a confirmation message that the device is successfully enrolled, click Done.
For devices enrolled with Chrome Enterprise Upgrade or Chrome Education Upgrade, users can sign in and start using them. For devices enrolled with Kiosk & Signage Upgrade, users can’t sign in or use managed guest sessions.
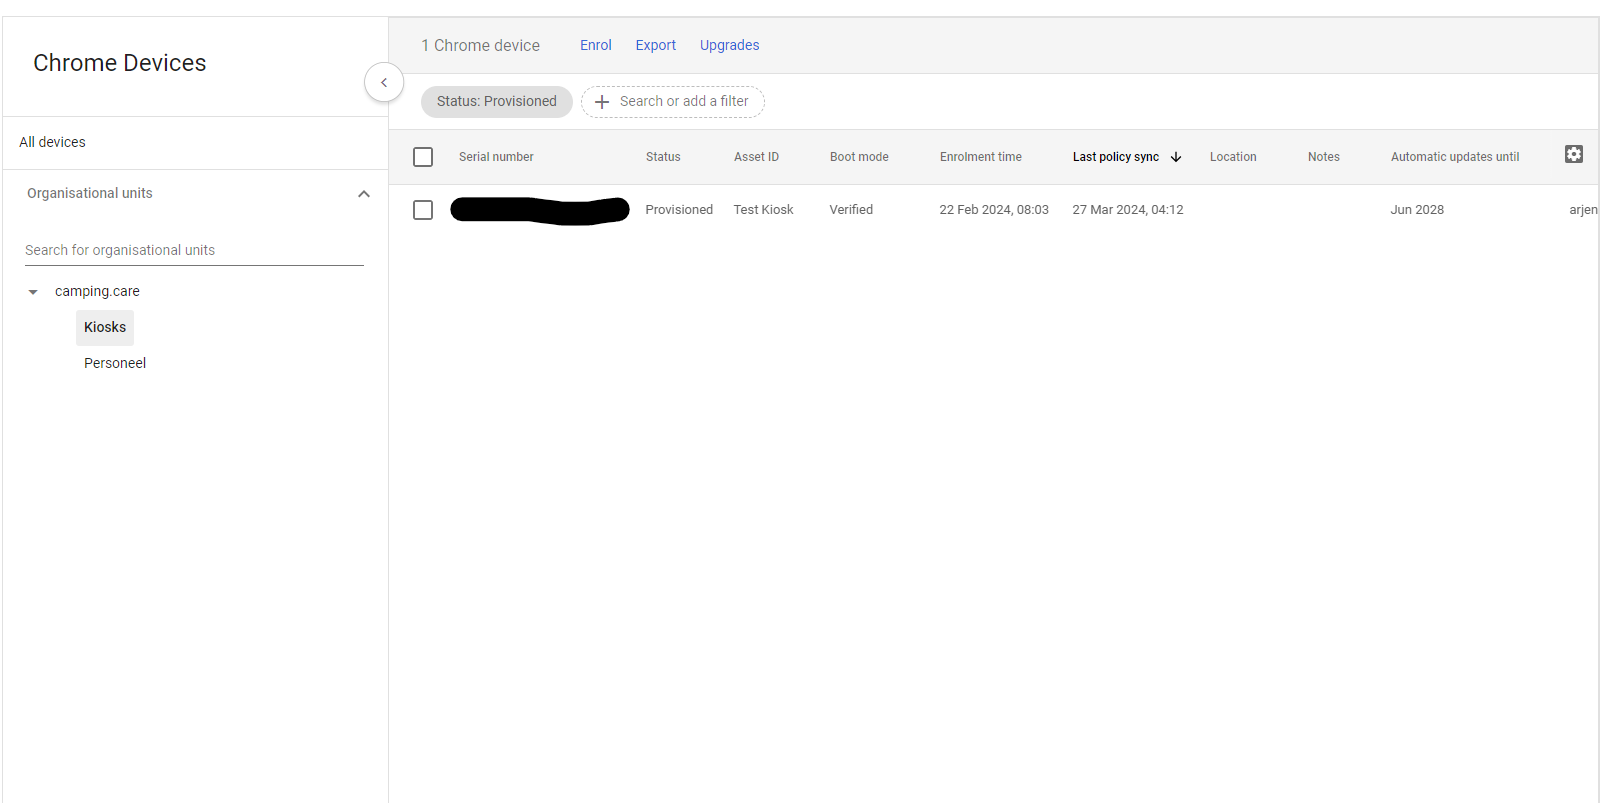
You can see a list of enrolled devices in your Admin console. For details, see View ChromeOS device details.
You will see a list with devices you added to the organisation.
Optionally you could also add organisational units (Directory -> Organisational Units) to separate different groups so you can optionally start the Kiosk.
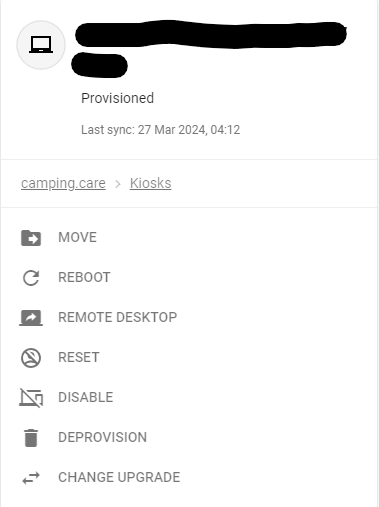
Now the Kiosk can start automatically in kiosk mode and within the device you will have the options to open remote desktop, reboot etc: