Come funziona la scheda di pianificazione?
Scritto originariamente in inglese, eventuali errori di traduzione devono essere confrontati con l'articolo originale
The schedule board is an overview of all the reservations in a selected period. Here you can see who, when and where guests are coming to your campsite. It is also possible to make reservations from the schedule board. There are many ways to view the schedule board. It is possible to select the things you want to see in the schedule board. This can be special vacations, periods or people who already paid and much more variations. This article explains everything step by step.
1. Visualizzazione dello stato
2. Visualizzazione pagamento
3. Accommodation, tag and place filter
4. Adding and removing a blocked period
5. How do I move a reservation in the schedule board?
6. How to make a reservation in the schedule board?
7. Quick search for a special period
1. Visualizzazione dello stato
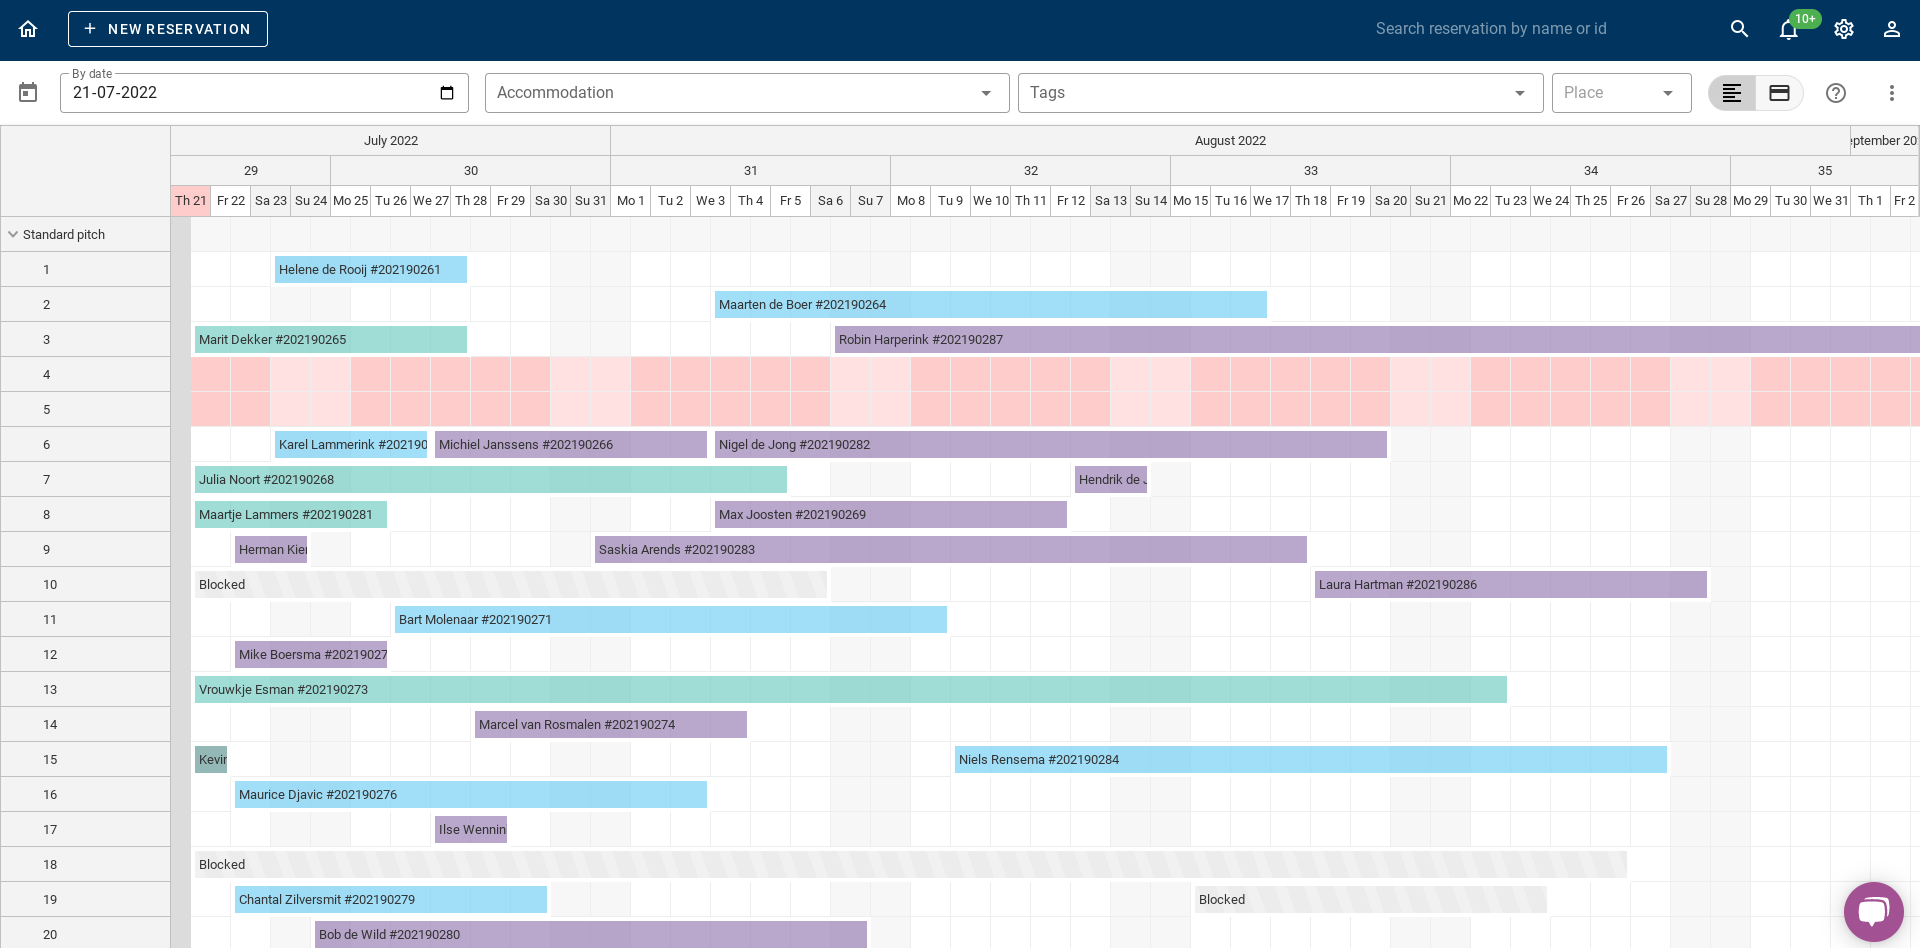
In the schedule board you can see the status view and a payment view. In the picture below, you can see in circled red where you can switch between status view and payment view. This paragraph discusses the status view.

The status view means you can see the status of a reservation. This chapter explains which statuses there are and what the colours on the schedule board mean.
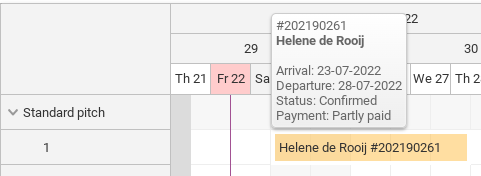
1.1: Status confirmed
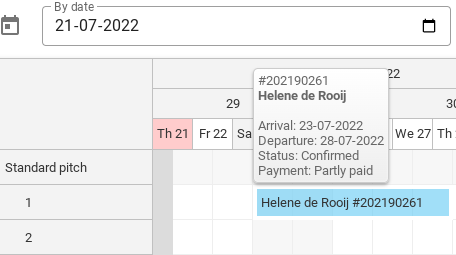
Come puoi vedere nell'immagine sopra, le prenotazioni contrassegnate in blu sono prenotazioni confermate.
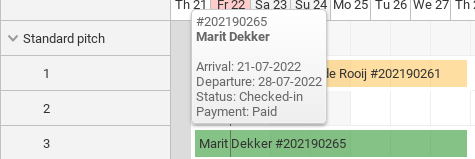
1.2: Status checked-in
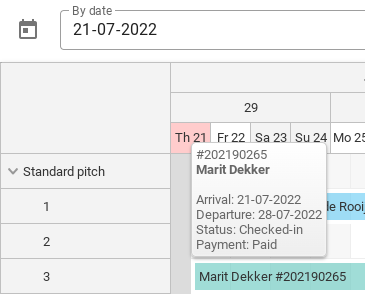
Come puoi vedere nell'immagine sopra, le prenotazioni contrassegnate in verde sono prenotazioni che hanno effettuato il check-in.
1.3: Status checked-out
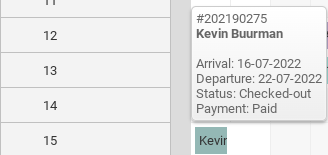
Come puoi vedere nell'immagine sopra, le prenotazioni contrassegnate in verde scuro sono prenotazioni che sono state verificate.
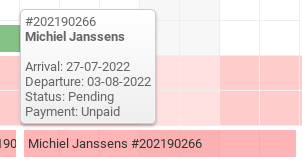
1.4: Status pending
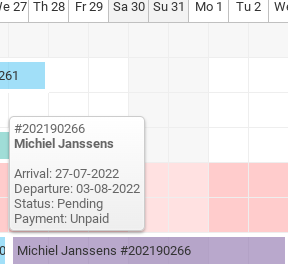
Come puoi vedere nell'immagine sopra, le prenotazioni contrassegnate in viola sono prenotazioni in sospeso. Quindi questi devono ancora essere confermati.
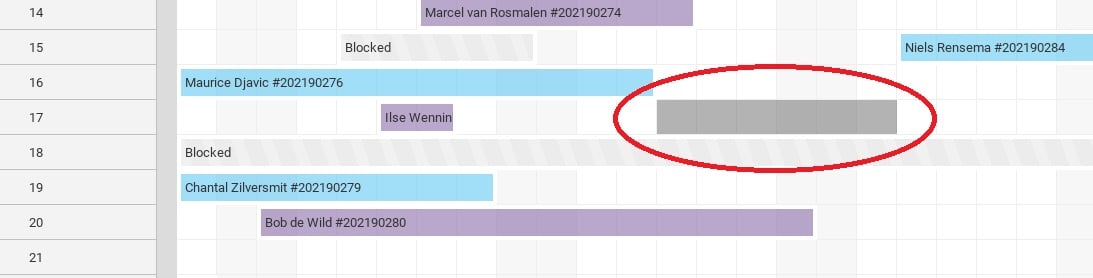
1.5: Status blocked
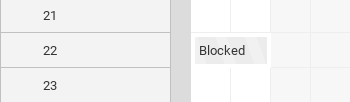
Come puoi vedere nell'immagine sopra, le prenotazioni contrassegnate in grigio chiaro/strisce sono periodi bloccati.
2. Visualizzazione pagamento
It is also possible to see the payment view per reservation in addition to the status view. In the picture below you can see where you can switch between status view and payment view in the schedule board.
2.1: Partly paid
Come puoi vedere dall'immagine qui sopra, le prenotazioni parzialmente pagate sono contrassegnate in giallo.
2.2: Paid
Come puoi vedere dall'immagine sopra, le prenotazioni interamente pagate sono contrassegnate in verde.
2.3 Non pagato
Come puoi vedere dall'immagine qui sopra, le prenotazioni non pagate sono contrassegnate in rosso.
3. Accommodation, tag and place filter
This paragraph describes how you can filter the schedule board by accommodation type, place and tags.
3.1 Accommodation filter
In the picture below you can see the accommodation filter circled in red. If you want to view only 1 accommodation in the plan board, you can click on this button. You can then select which accommodations you wish to see.

3.2 Tag filter
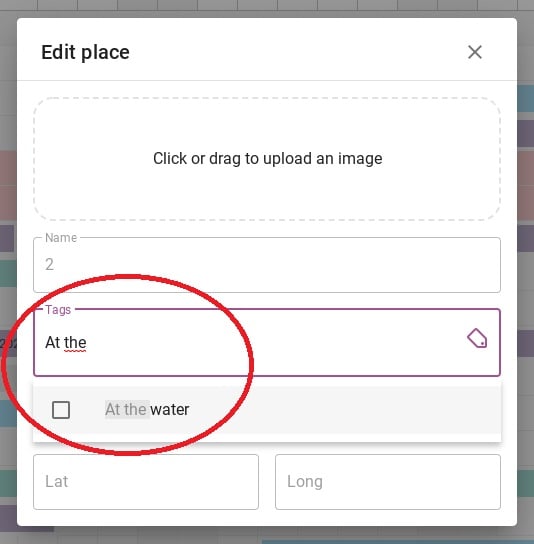
To filter on a tag you first have to add the tags to certain places. To do this, click on the place number where you want to add a tag. On the picture below, it is circled in red where you can click.
This will take you to the tab below. Here you can add a certain tag to a place under the heading ‘Tags’. On the photo below you can see in the red circled that I now add as example the tag ´At the water ´ to place 2.
On the picture below, you can see that I have added the tag ´At the water´ in the red circled area at the top, so you will only see place 2. The place where I just added the tag.

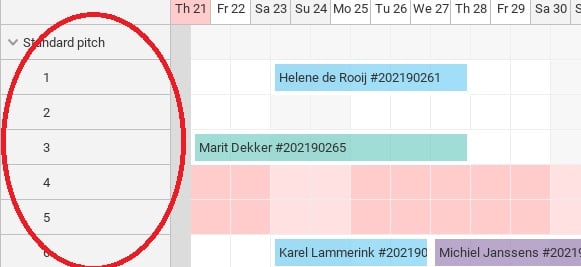
3.3 Place filter
In the picture below you can see the place filter circled in red. With this filter you can filter one specific place. When you click on a place, only the reservations of that specific place will be shown in the schedule board.

4. Adding and removing a blocked period
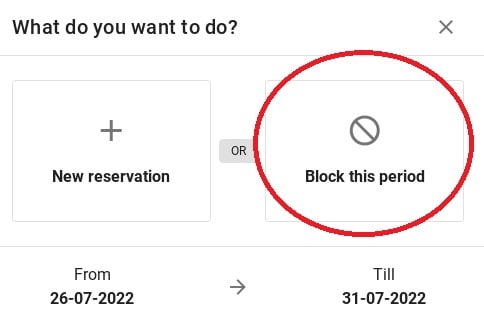
If you want to block a certain place for a certain period of time, you can add a block from the Plan Board. Use your mouse to select the period you want to block. (See picture below).
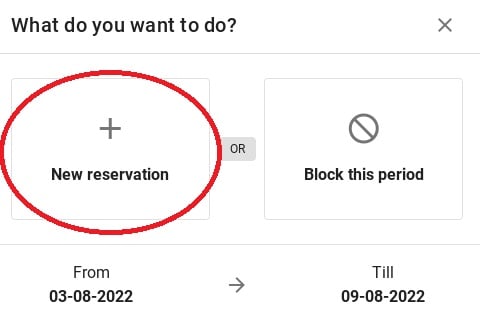
Apparirà quindi una notifica che ti chiederà se desideri effettuare una prenotazione per questo periodo o bloccare questo periodo. Clicca su "Blocca questo periodo". L'immagine qui sotto mostra come appare la notifica.
Quindi puoi vedere nell'immagine qui sotto che il blocco è stato impostato. Per rimuovere questo blocco, basta fare clic su di esso. Il blocco verrà quindi visualizzato automaticamente rimuovere.

5. How do I move a reservation in the schedule board?
Dalla scheda di pianificazione è possibile spostare le prenotazioni in una sede diversa. In questo modo avrai una facile panoramica degli spazi liberi per piazzola. Di seguito viene spiegato come spostare una prenotazione.
Suggerimento: quando sposti in qualsiasi modo le prenotazioni, controlla sempre che le date e i prezzi siano corretti!
5.1: Move to another date
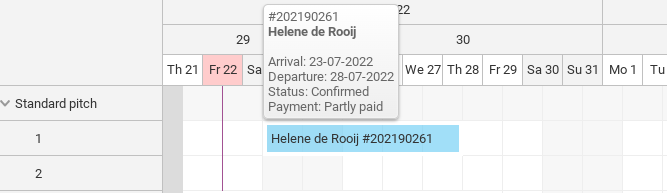
Di seguito è riportato un esempio di prenotazione. Questi ospiti soggiornano dal 23-07-2022 al 28-07-2022. Supponiamo che questi ospiti chiamino e indichino che vorrebbero arrivare 2 giorni dopo e partire 2 giorni dopo.
You see in the schedule board that 2 days after this reservation is still nothing in the schedule board, and would it be possible to move this reservation for the guest.
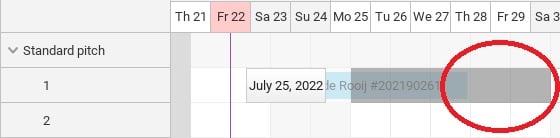
Prendi la prenotazione con il mouse e la trascini sulla data desiderata. L'immagine qui sotto mostra come farlo.
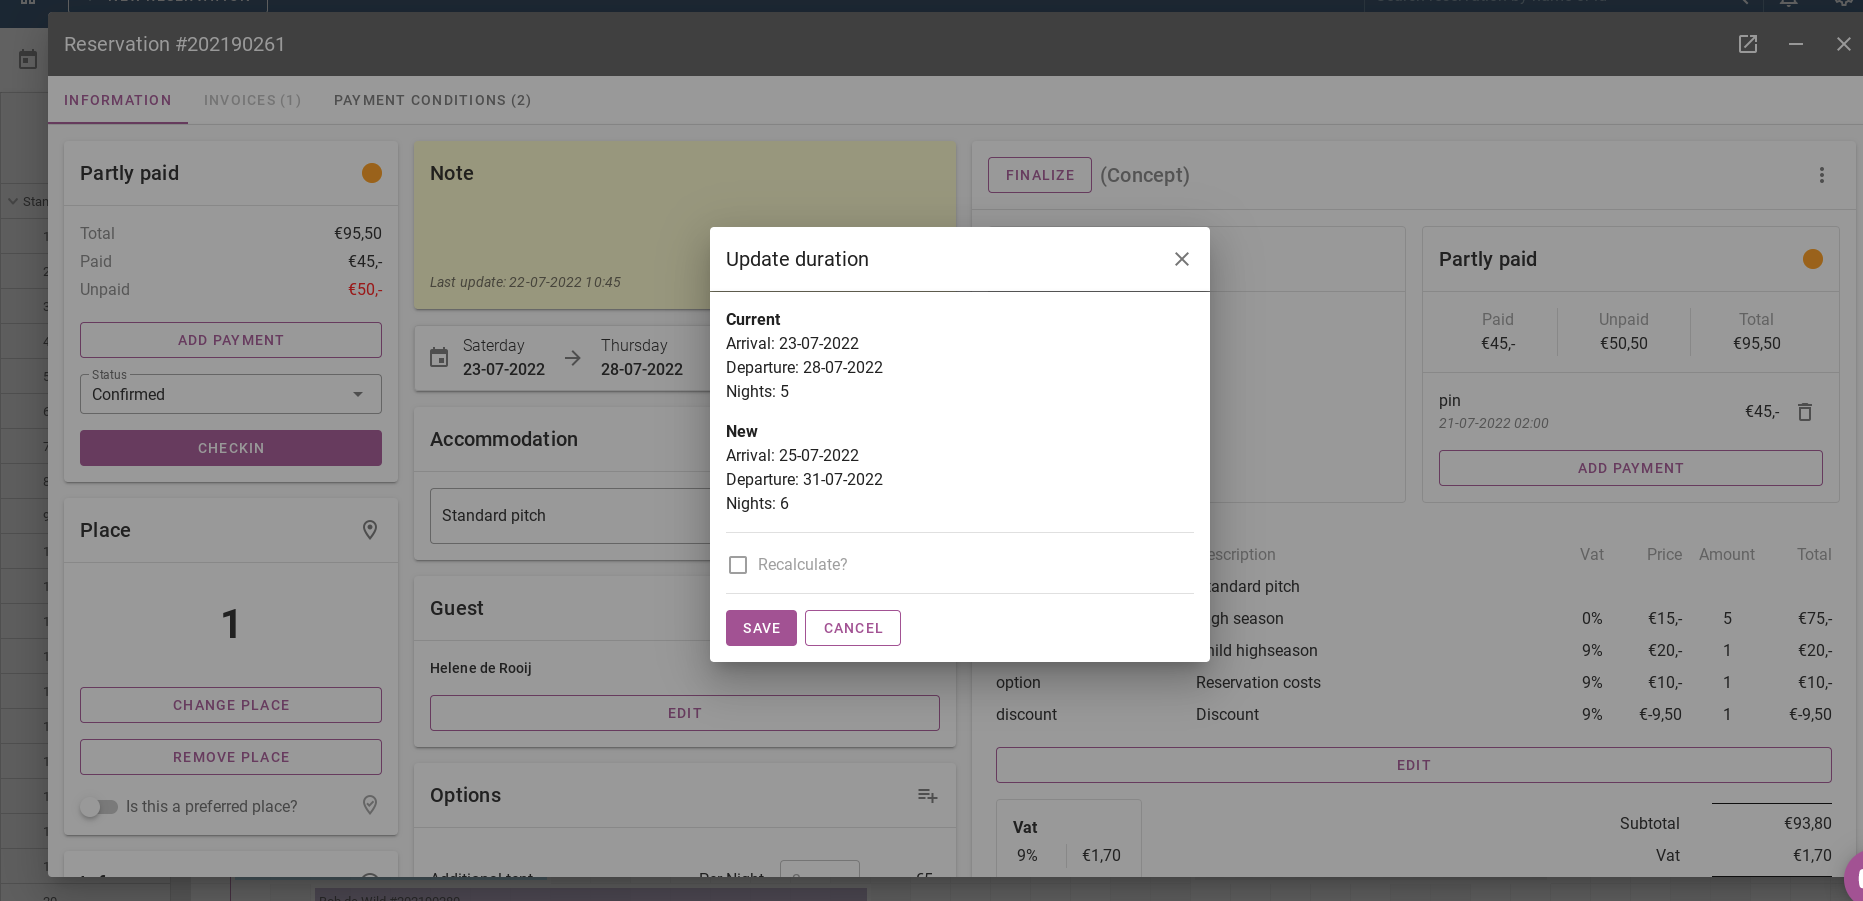
Se rilasci la prenotazione con il mouse, il sistema aprirà automaticamente la prenotazione. Il sistema richiederà anche una "durata dell'aggiornamento". Ciò significa che puoi ricalcolare la prenotazione e vedere se le nuove date sono corrette. Se tutti i dati sono corretti, fare clic su salva. L'immagine seguente mostra la durata dell'aggiornamento.
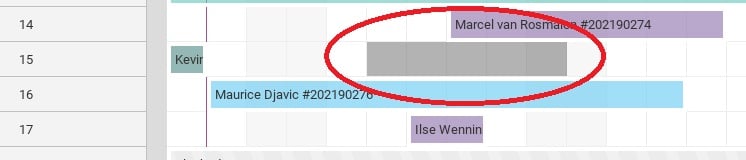
5.2: Move to another place
Puoi anche spostare una prenotazione esistente in un altro posto nella scheda di pianificazione facendo clic su di essa con il mouse. L'immagine qui sotto mostra come funziona.
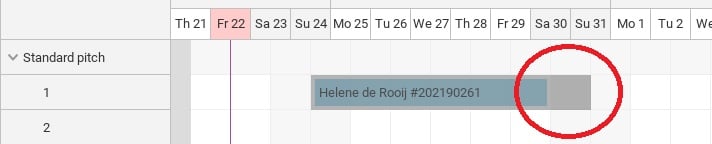
5.3: Extend or shorten a reservation
Per allungare o accorciare una prenotazione, afferra con il mouse il lato della prenotazione sulla scheda di pianificazione (vedi immagine sotto). Quindi trascinalo in un'altra data.
Anche in questo caso il sistema chiederà un ricalcolo della prenotazione, si prega di verificarlo attentamente.
6. How to make a reservation in the schedule board?
Per effettuare una prenotazione dalla scheda del programma, seleziona il periodo con il mouse. Questo viene fatto come mostrato nell'immagine qui sotto.
Ti verrà nuovamente mostrata la notifica che ti chiede se vuoi aggiungere un blocco o effettuare una nuova prenotazione. Ora fai clic su ´Nuova prenotazione´ pulsante.
Dopo aver cliccato sul pulsante "Nuova prenotazione" verrai indirizzato alla pagina in cui potrai inserire tutti i dettagli. Per visualizzare una spiegazione dettagliata su come effettuare una prenotazione, fare clic su Qui. Verrai quindi indirizzato a un altro articolo.
7. Quick search for a special period
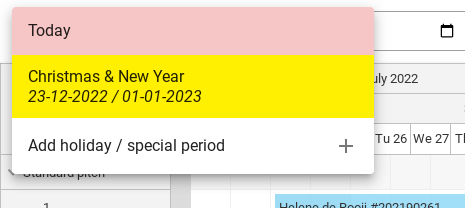
Below is an image where you can see the top edge of the scheduling board. The calendar circled in red is a button that allows you to quickly jump to another date in the planning board.

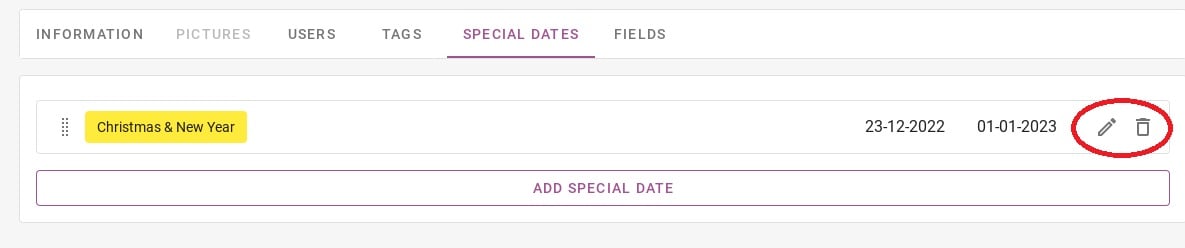
In the picture below, you can see what comes up when you move the mouse on this button. Here you can see an example of the period Christmas & New Year. When you click on this period, the planning board will automatically jump to this date.
You can also add holiday periods and other special periods by clicking on ´Add holiday / special period´.
When you click on ´Add holiday / special period´, you will be taken to the page below. Under the heading ´Special dates´ it is possible to enter these dates. Circled in red, you will see a pencil and a bin. With the pencil, you can change this existing period, and with the bin you can delete this period.
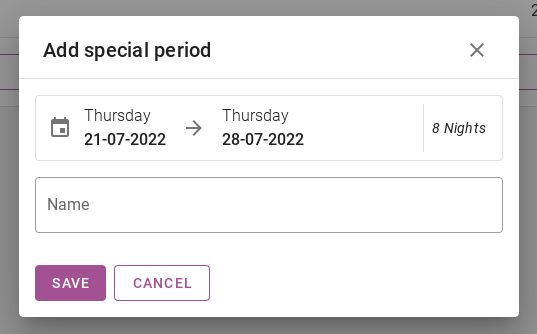
The button in purple with the text ´ADD SPECIAL DATE´ can be used to add a new period. On the picture below, you can see how this period can be added. You enter the start and end date in the calendar and give the special period a name. Finally, you press save.
The picture below shows a calendar circled in red. In this calendar you can click on a date. The schedule board will then jump to this date and show all reservations.
