How do age tables work?
Originally written in English, any translations errors should be checked against the original atricle
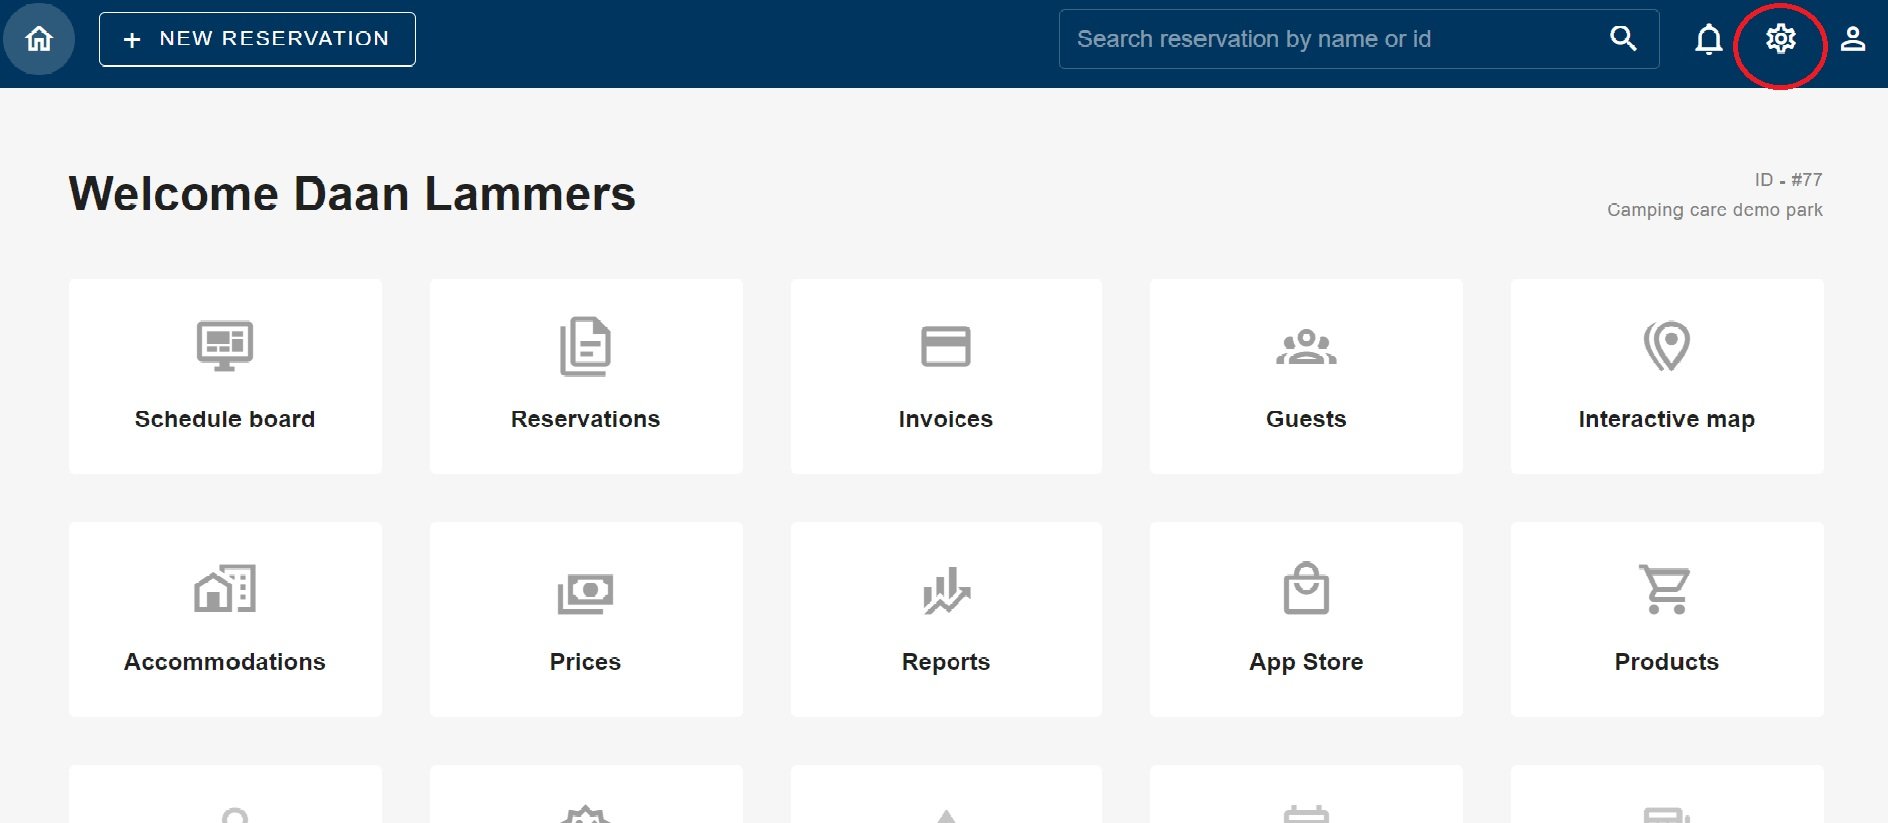
When you log into Camping.care, you can press the settings cog on the top right. As circled in red in the image above.
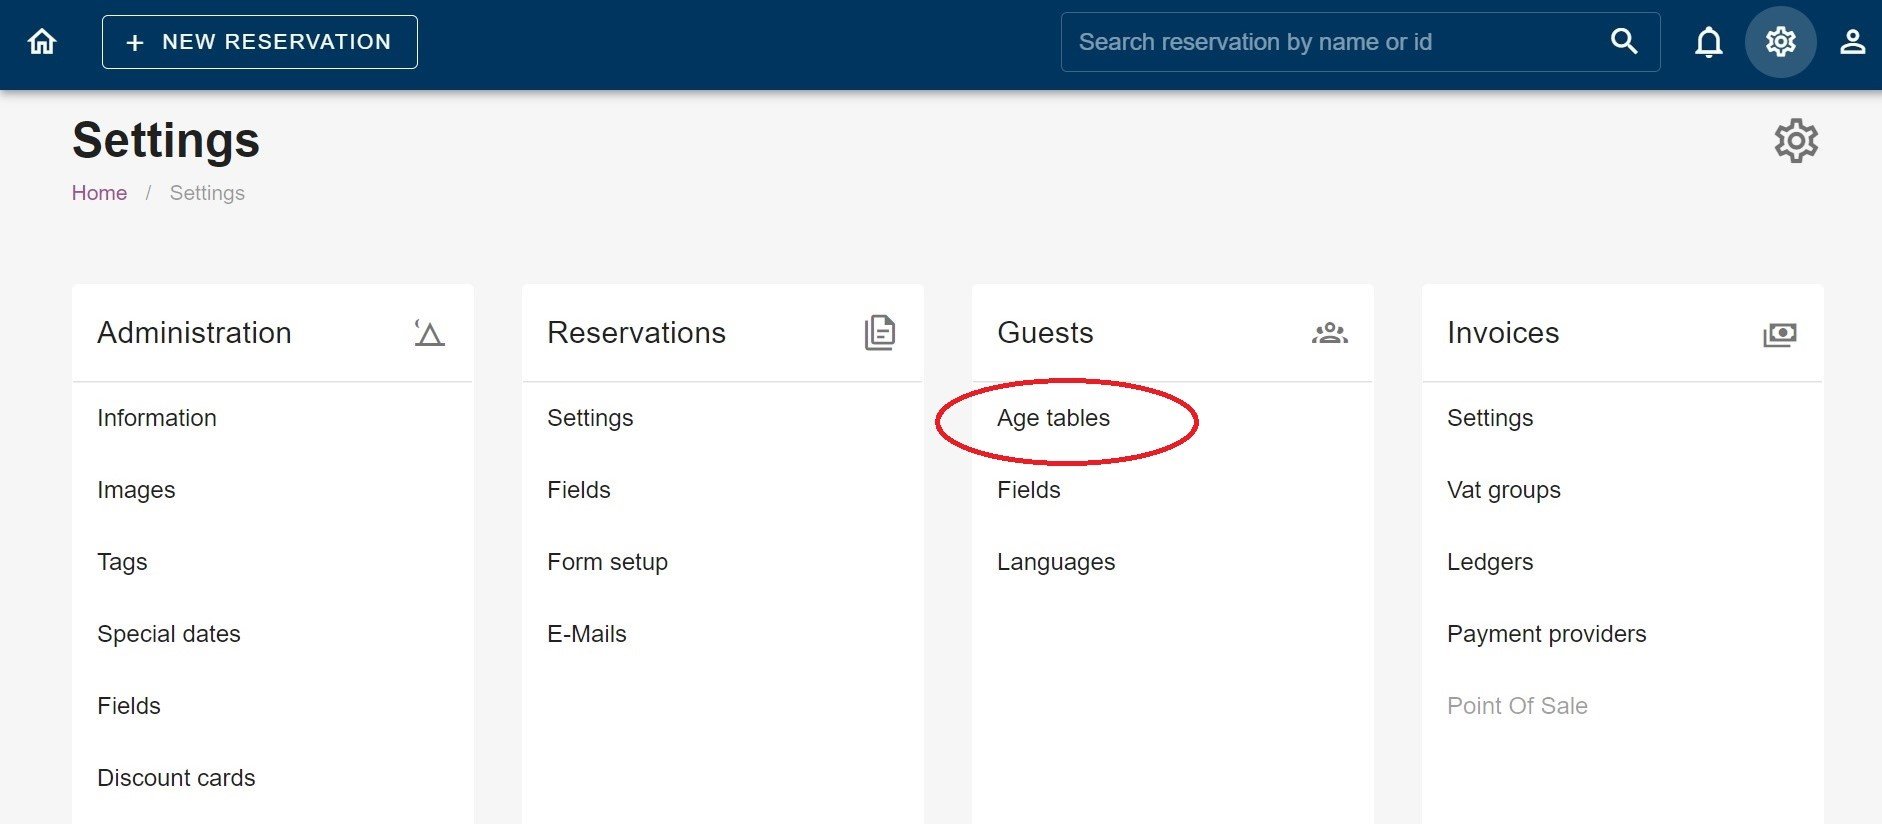
Then, under the guests box, you will see the age tables. In the image above, it is circled in red.
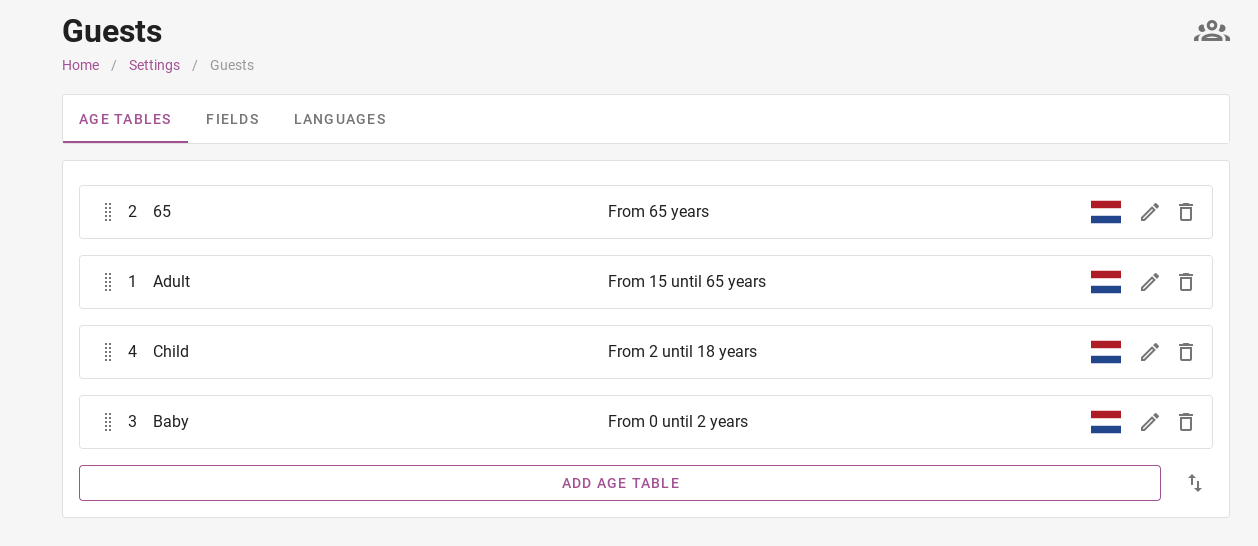 Now you have arrived at the age tables. But what are the age tables for?
The age tables can be used to calculate different prices based on person. It can also be used for calculating tourist tax. A night rate for a child may be cheaper than the night rate for an adult. So you can use age tables to differentiate between them. In the picture above, you can see that a distinction has been made between babies, children, adults and over-65s.
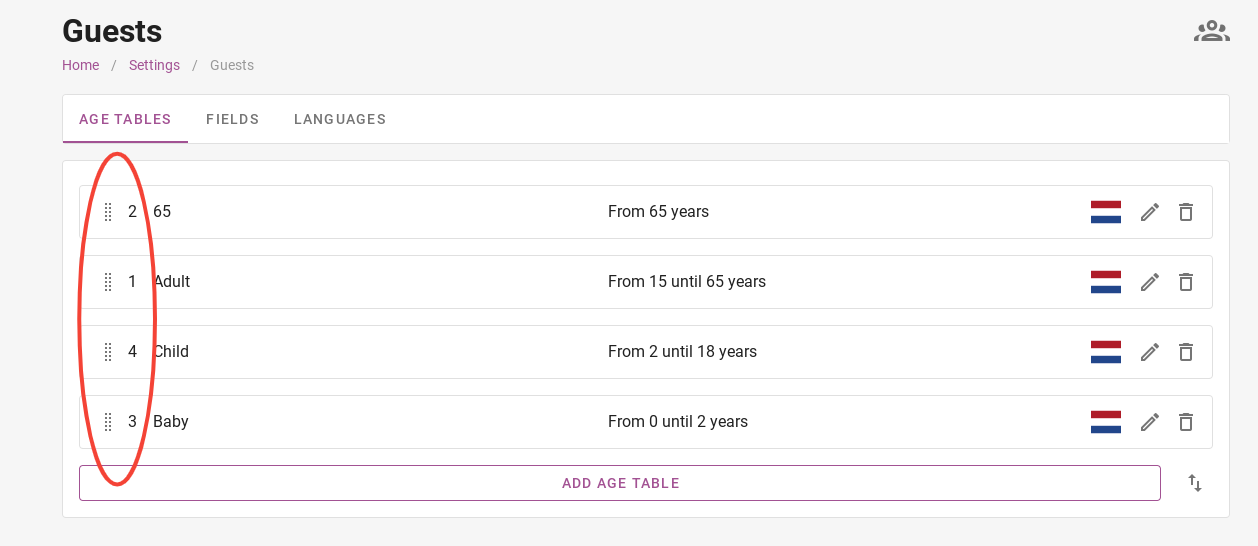 The image above shows that priority can be given to certain ages. In the picture, you can see that first priority has been given to adults. If certain accommodation includes 2 people in the price, the system will automatically select 2 adults.
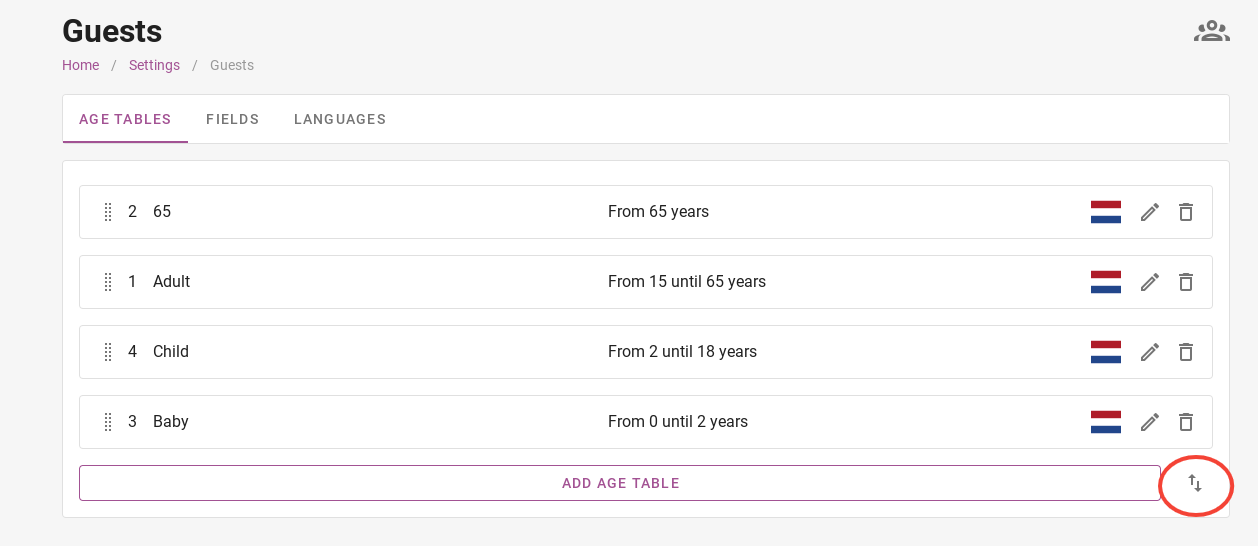
To change a priority, click on the arrows at the bottom right. You will then be taken to the page shown in the image below.
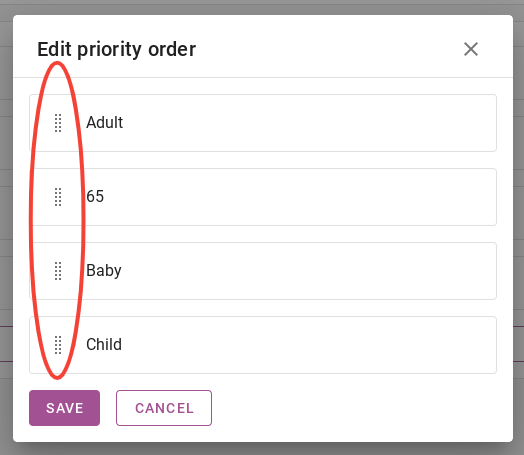
You can change the priority by dragging the age tables up or down with the dots circled in red in the image below. The age table at the top has the highest priority.
Remember to always click ´ save ´ when making a change.
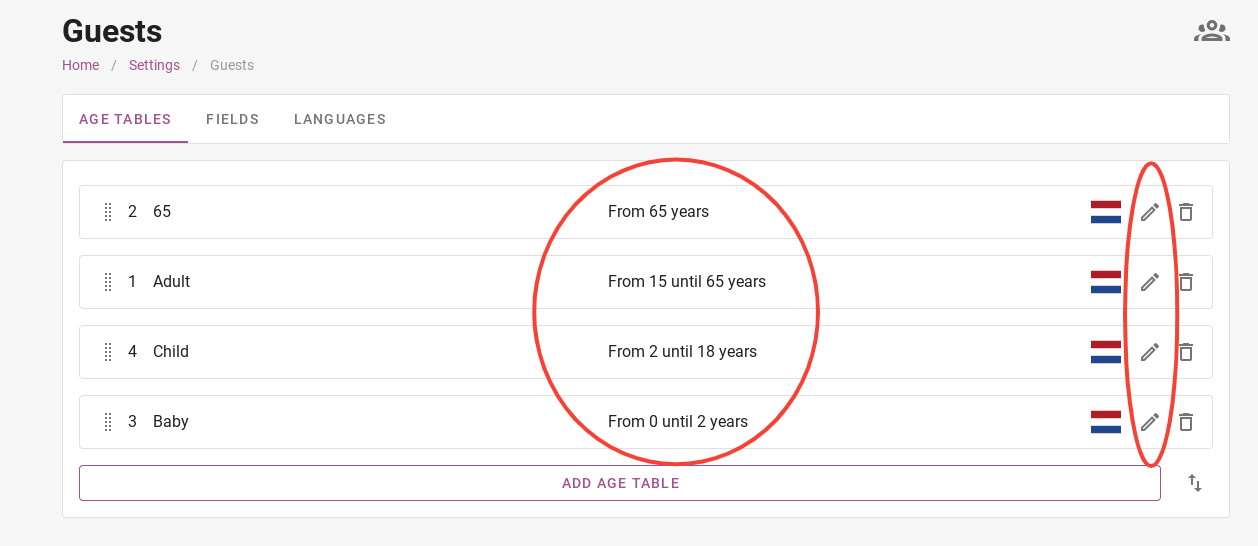
In Camping.care’s demo park, certain ages have been chosen. In the demo park, a baby has an age of 0 to 2 years, a child has an age of 2 to 18 years and so on. You can of course set which ages belong to which age table. By clicking on the pencil on the right, you can change the age tables.
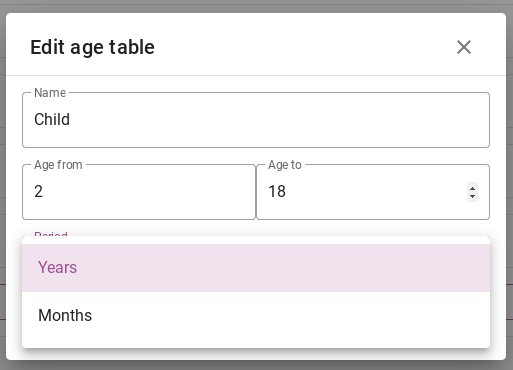
When you have clicked on the pencil, a tab appears where you can change the age table. Here you can change the name, the age it applies to, and whether it is years or months. After editing, don’t forget to click the ´edit´ button to save the change.
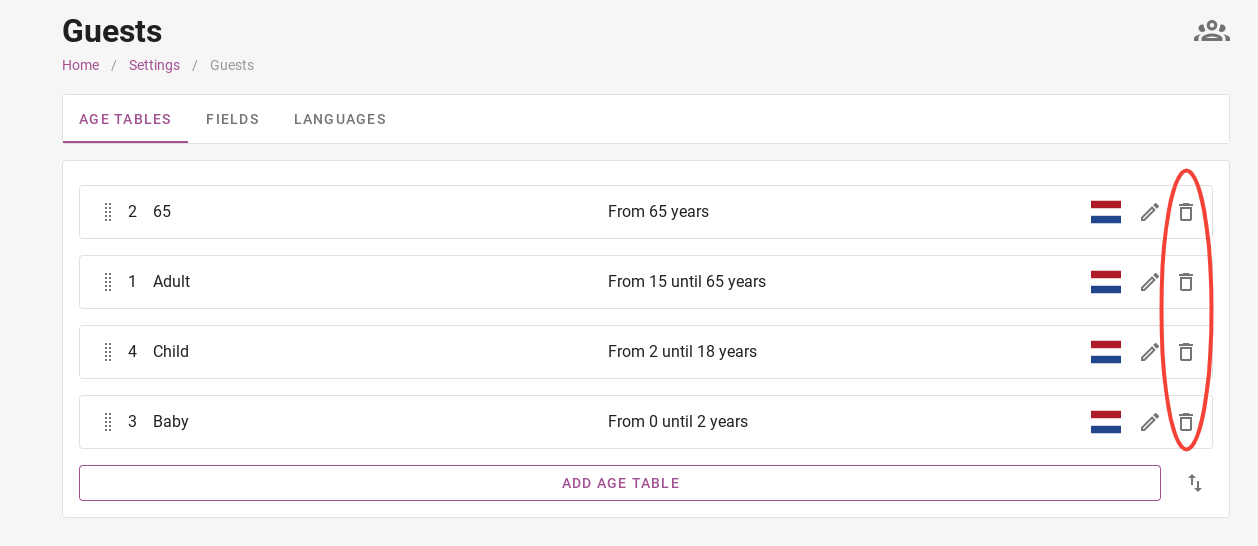
To delete an age table, click on the bin on the right. In the image above it is circled in red.
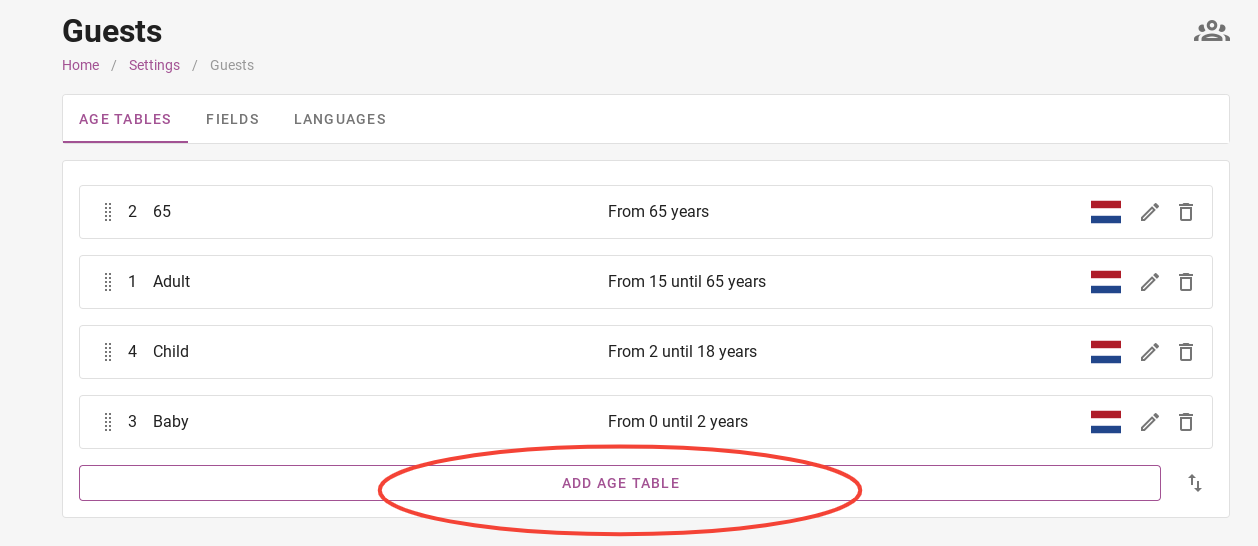
To add a new age table, click the purple button where it says ´add age table´. Then, just like when editing an age table, you can enter what the name is, the start and end ages and whether it is months or years.
