-
Backoffice / PMS
-
- What are iCal feeds? And what can I do with them.
- How to set up products under accommodations
- Cancellations
- Setting period conditions
- Accommodations overview
- Add new accommodation
- Adding Prices / Rates to an accommodation
- Discounts
- Taxes
- Options
- Places / Rooms / Objects
- Accommodation settings
- How to set up an accommodation?
-
- How can I work with report lists?
- How do I change the next invoice number?
- Delay invoice finalization.
- How do i send PDF or UBL invoices to your Accountancy System automatically?
- Direct payment links
- Ledgers
- Invoice branding for e-mails
- How does the invoice screen looks like
- What is the difference between concept and final invoices?
- How do I add a product to the invoice?
- How to finalize an invoice?
- How do I print the final invoice?
-
- How can I work with report lists?
- How can guest information be overwritten?
- How does the Scan Document work?
- Adding guests
- Form setup
- Guests settings
- How to send an email to the guest manually
- How do i modify the informations of the guest?
- How do guest languages work?
- How do custom fields work?
- How to Create and Use a Blocked Guest List
-
- How can I work with report lists?
- Copy a reservation.
- How can guest information be overwritten?
- How does the Scan Document work?
- Price calculation error codes
- Cancellations
- Remove a reservation from a group booking
- Form setup
- Combine two bookings
- Add a existing booking to a group booking
- Add a new booking to a group
- Split a booking
- Remove a period within a booking
- Add days to a booking
- Cancellation of a booking in a group
- How to add a payment to a reservation
- How to add or change a place / room / object in a reservation
- Traveller info
- How do I change the place of a reservation?
- How to add a payment to a reservation?
- How to send an email to the guest manually
- How do I change the communication language for a reservation?
- How do i modify the informations of the guest?
- Create a new reservation (Backend)
- How do I export reservation data to excel?
- Can I save my custom reservations list?
- How do cancellations work?
- What kind of reservation statuses are there?
- How do I change the status of a booking?
- How do I make a reservation?
- How do custom fields work?
- How to Create and Use a Blocked Guest List
- Show Remaining Articles ( 17 ) Collapse Articles
-
- What are iCal feeds? And what can I do with them.
- Balances
- How do I change the next invoice number?
- VAT Groups
- Online Booking Settings
- Workflows
- How do I enable the BETA Features?
- How do I prevent emails to be marked as Spam?
- How to setup two factor authentication (2FA)
- How do I set up a Kiosk?
- Special dates
- Form setup
- E-mails
- Discount cards
- Interactive map settings
- Fields
- Ledgers
- Invoice branding for e-mails
- Users
- Form setup
- Roles
- Providers & methods
- Online Booking Settings
- Website Integration
- Invoice settings
- License Plates
- Administration images
- Tags
- Guests settings
- How do age tables work?
- How do guest languages work?
- How do I login with my SSO account?
- Branding
- How do custom fields work?
- Show Remaining Articles ( 19 ) Collapse Articles
-
-
Online booking
-
App Store / Integrations
-
- Articles coming soon
-
Point of Sale (POS)
-
Self Service Kiosk
-
Hardware
-
Support
-
Subscriptions
Originally written in English, any translations errors should be checked against the original atricle
Requirements
- Premium subscription
- Payments account
- Payment Terminal
- Kiosk PC, iPad with webcam
- Beta features enabled
1. Create the kiosk
Go to settings -> Kiosks -> Settings
Click on the purple button on the bottom of the page to add a new Kiosk.

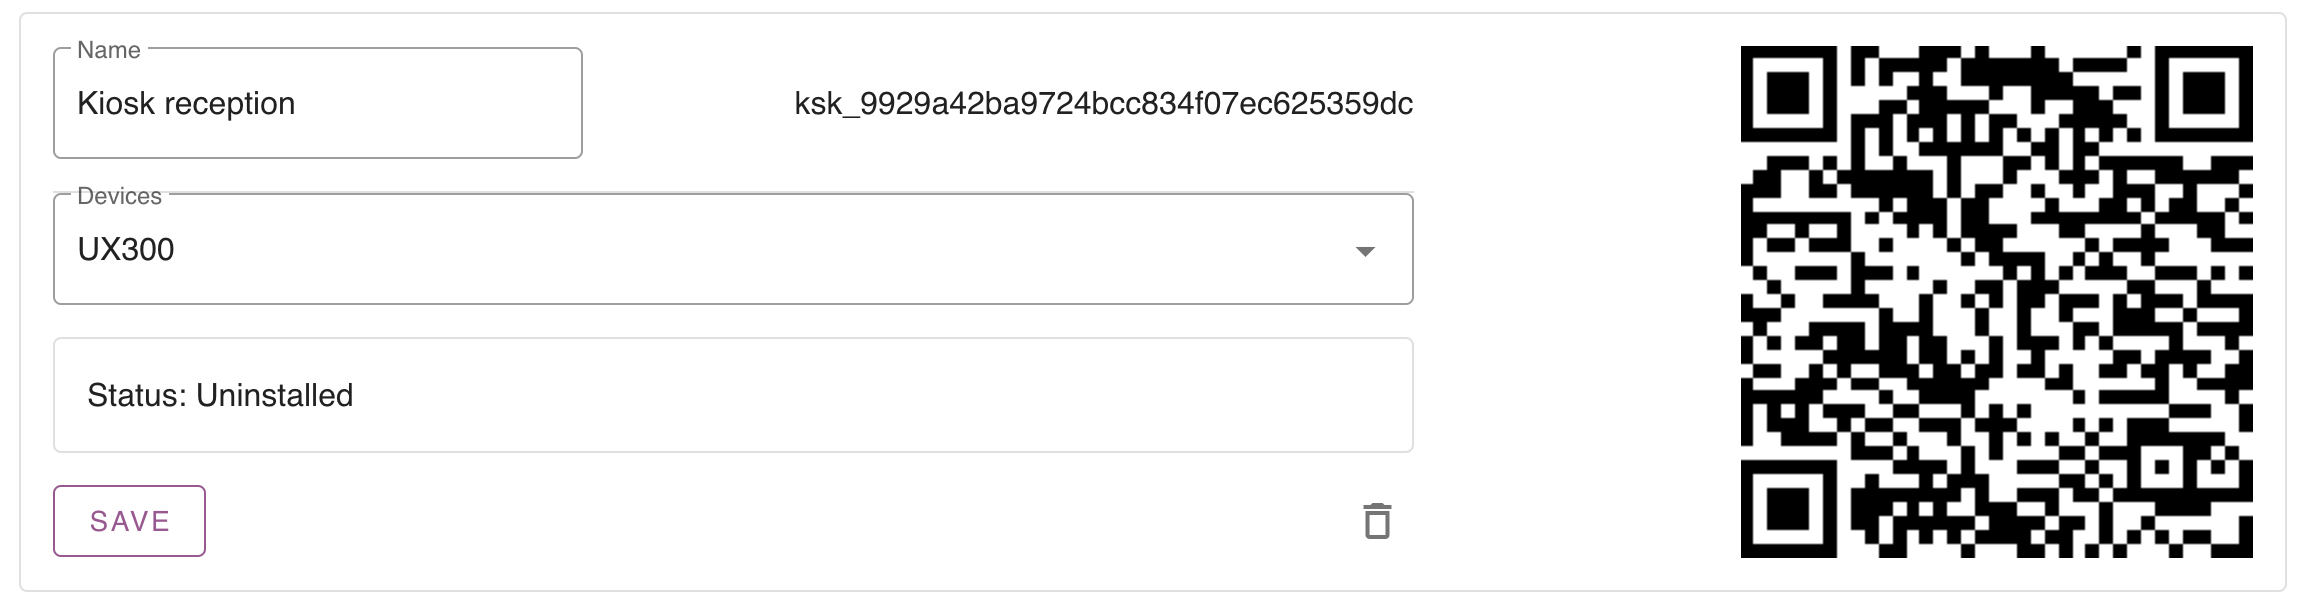
By default the status is uninstalled. This means it’s not connected to a physical Kiosk.
Now select your pin terminal and name your kiosk. Save the kiosk so you can proceed.
2. Configure the Kiosk
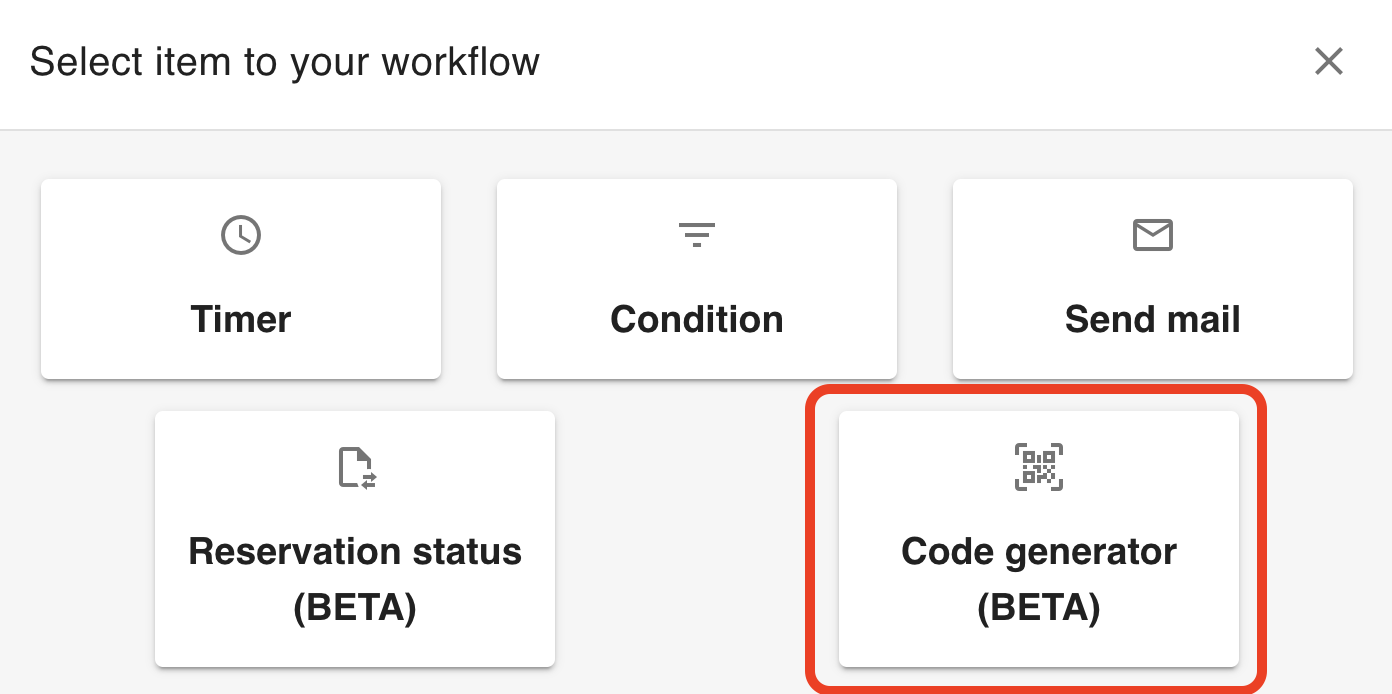
Create a code workflow
To login into the kiosk we have to create a 6 figure code for each reservation. This can be done by creating a workflow on ‘reservation created’.

Set the required fields for the kiosk
What data do you need before someone can check-in? You can set these fields specific for the Kiosk. If you go to Settings -> Kiosk -> Form setup you are able to select what fields are required to check-in via the Kiosk.
3. Install the Kiosk
Once your Kiosk configuration is complete, you are able to install the kiosk. Simply go to https://kiosk.care and you will find the following install screen.
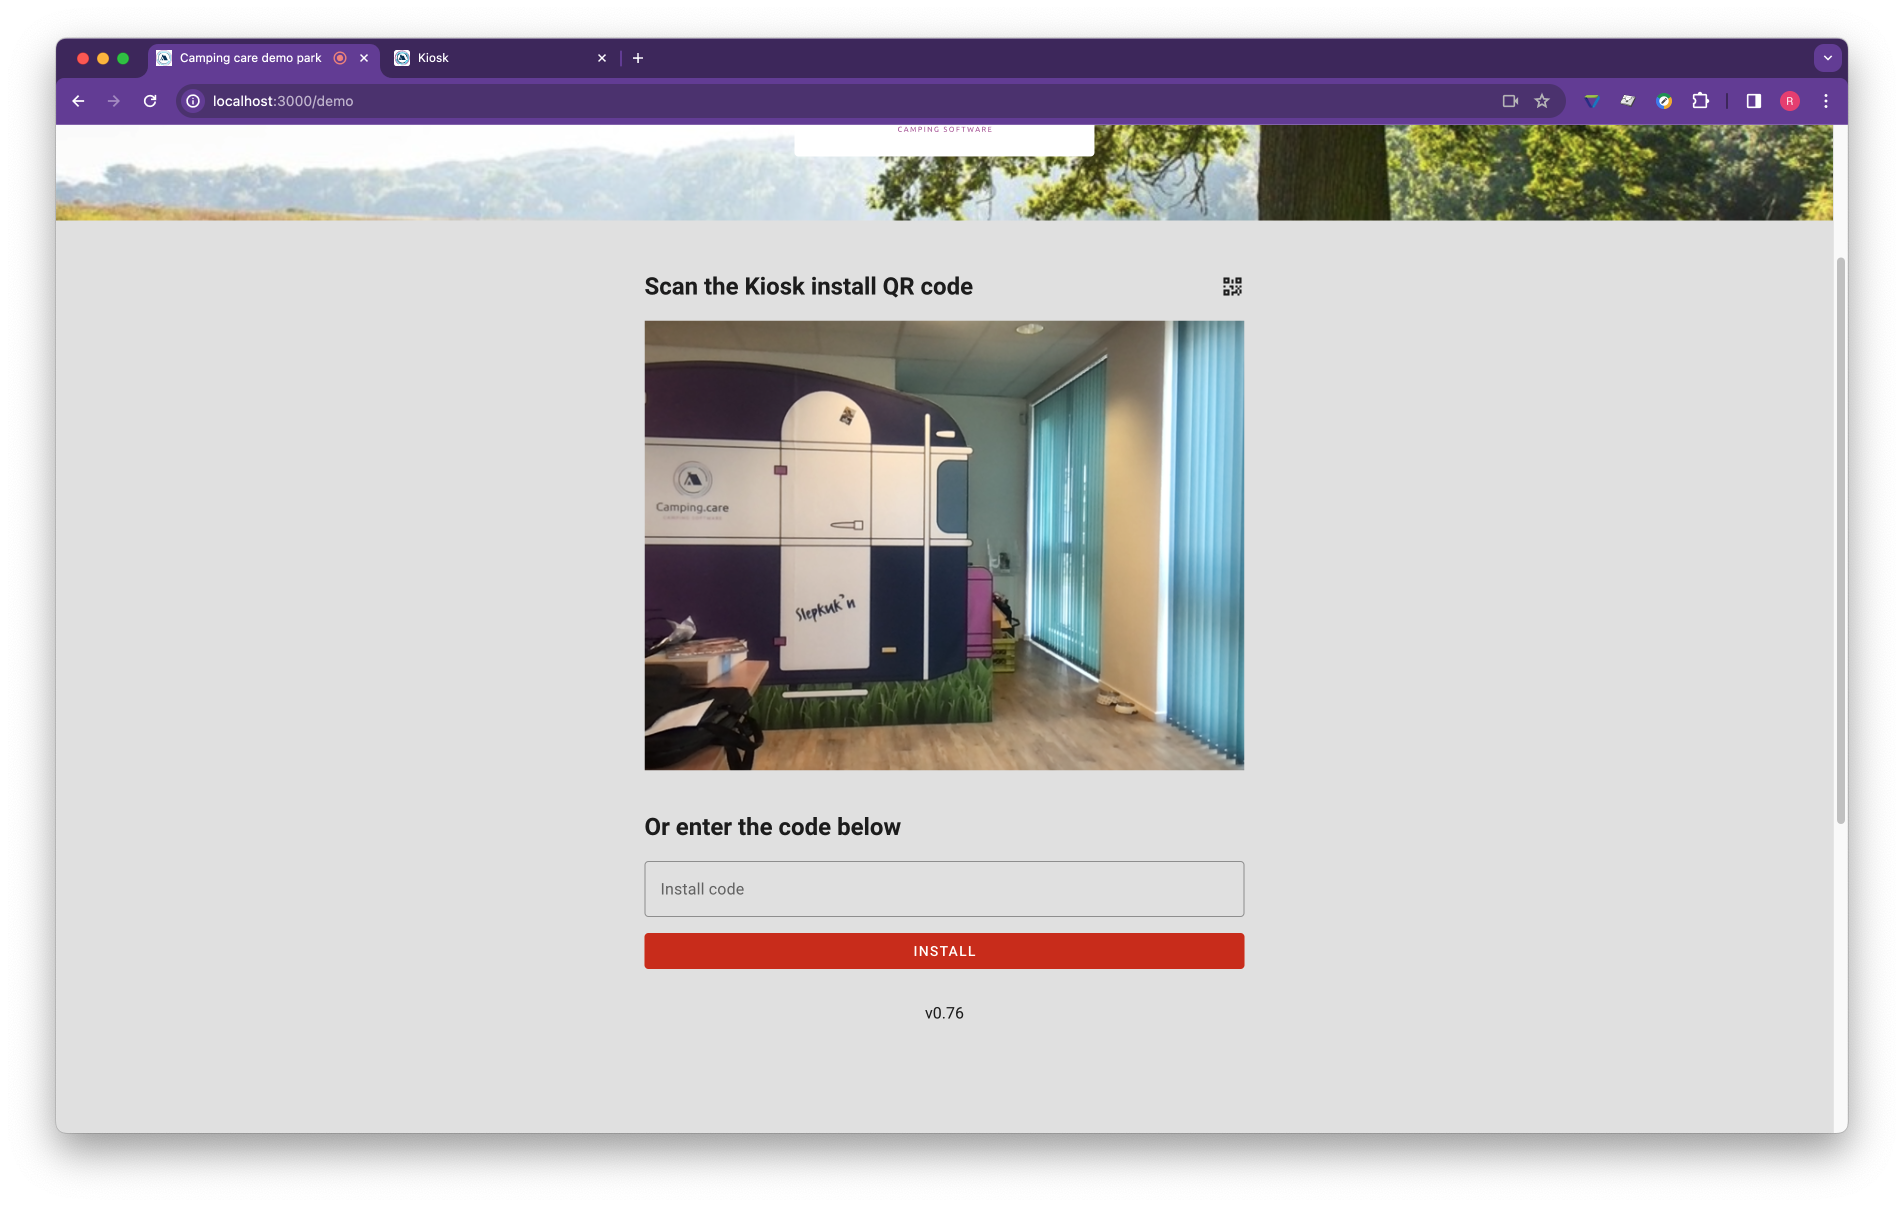
Scan QR code
The browser will ask you to use the camera. Allow this with each visit, in order to scan QR codes.

Scan the QR code generated in the first step (At the kiosk settings).
Manual install
Copy the kiosk ID (the ID starting with ksk_ in you kiosk settings screen) and copy it into the Kiosk install screen. Then hit install and the kiosk will be connected to your backoffice.
4. Run the Kiosk in full screen / Kiosk mode
When visitors use the Kiosk you don’t want them to change / modify anything on the device. For this it’s important to use run our Kiosk application in Kiosk mode. All the operating systems offer such an option, with some systems it’s easier than with others.
We have setup an tutorial with an iPad and with Chrome OS how to do this.
Install the Kiosk on an iPad
https://support.camping.care/en/install-the-kiosk-on-an-ipad
Install the Kiosk on Google Chrome and Google workspace
https://support.camping.care/en/how-do-i-setup-an-kiosk-with-chrome-os
Windows or Linux does offer the same functionality. However there are tons of tutorials available on the internet to do this, we have not made them yet.
Read more
– How do I send an reservation from the backoffice to the Kiosk