How to Create and Use a Blocked Guest List
This configuration field is your superpower for guest management! It ensures you have the most important information at your fingertips for any purpose, whether you’re trying to ban a ‘troublemaker’ or spoil a ‘VIP’. The best part? The field is completely customizable.So if you don’t have any guests to put on a blocklist, why not use it to identify your Special Guests instead? After all, not every field has to be about trouble!
This guide details the process of creating a list of “undesirable guests” (blocked) in the Camping.care system, using custom fields and reports to facilitate management.
1. Creating a Custom Field
The first step is to create a custom field that will determine which guests will be part of this new list. We can do this navigating to Settings > Guests > Fields.
At the end of the field list, click the Add button to create a new customizable field.
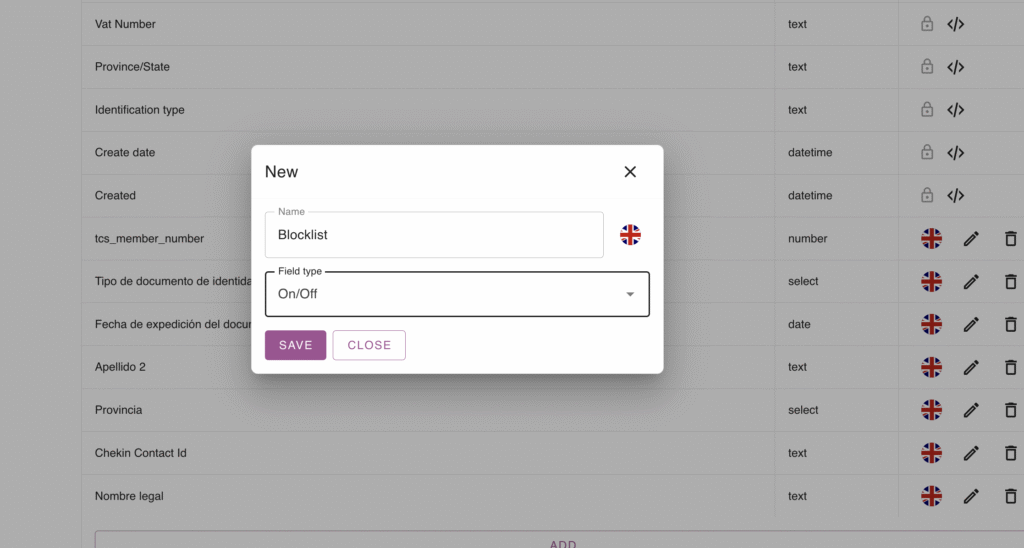
Fill in the Name field (e.g., Blocked Guests), and chose the field type.
P.s: It is essential to define the Field Type as On/Off (Bool/Boolean), as this will make filling in the information easier later.
Click SAVE.
And voilà! The new field will appear in the listing along with the others.
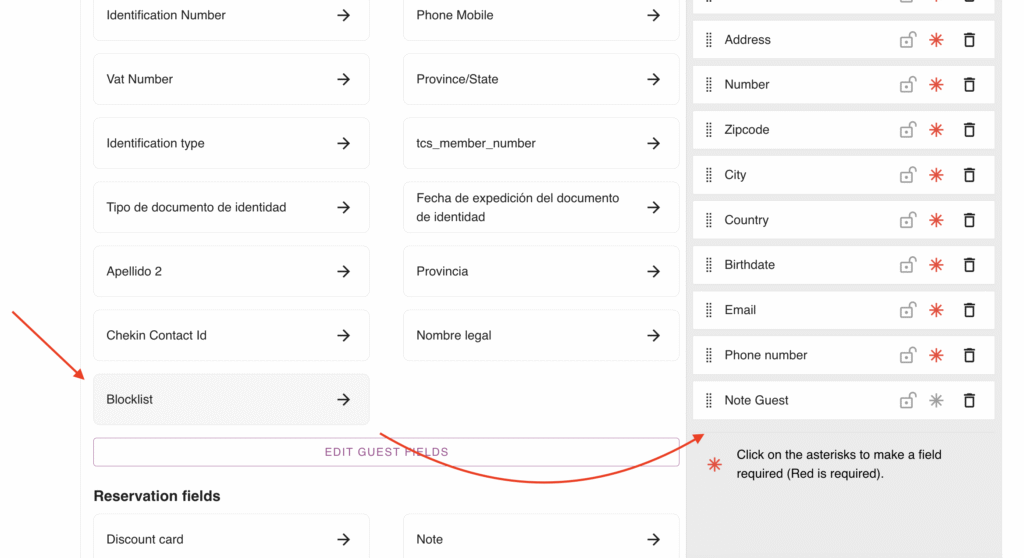
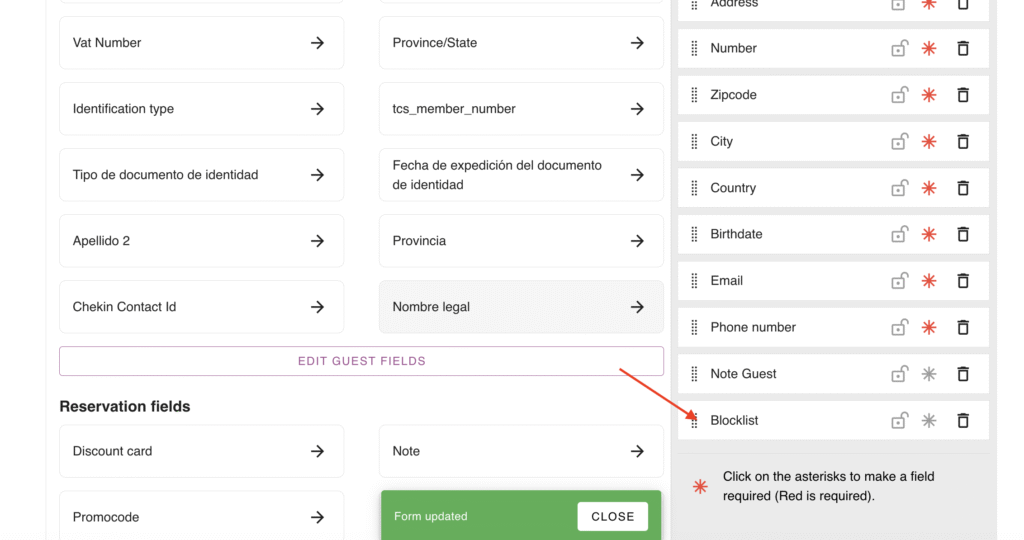
2. Adding the New Field to the Booking Form
With the field created, you must add it to the booking form so that it can be marked when necessary. It is crucial to only add it in the Backoffice/Support Office. This is very important because the option should not be visible to guests, but rather be information exclusive to the system.
We start going to Settings > Guests > Form setup, them select the backoffice tab. Once on the correct tab, click on the Blocklist field to add it to the form fields.
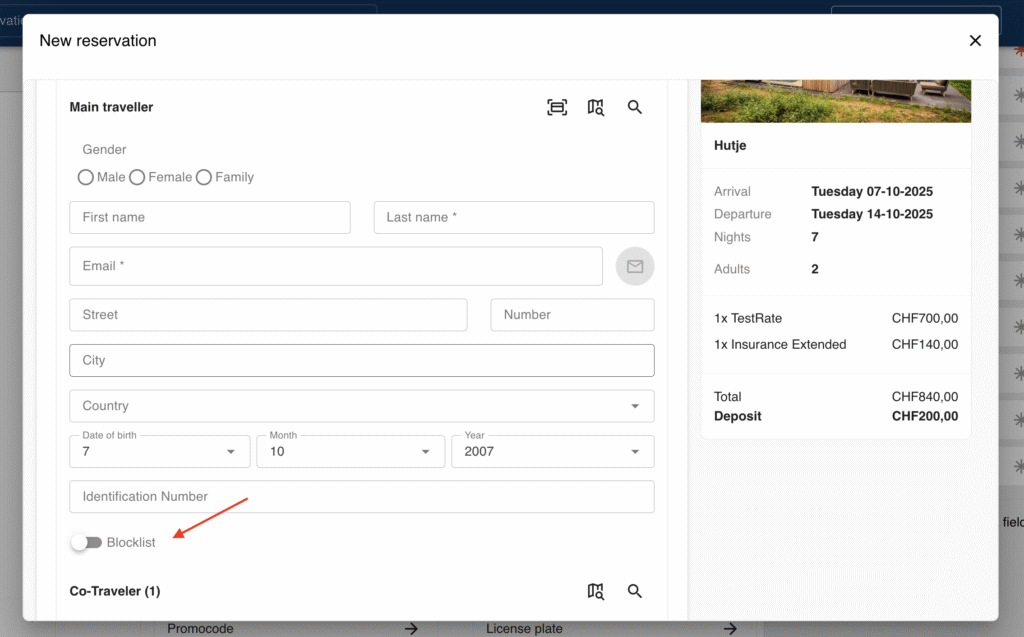
3. Using the New Field in Practice
After completing the previous steps, the field will now be available in the booking form.
During the Creation of a New Booking: When creating a new booking, the on/off field for the guest to be added to the “blocked” list will be visible alongside the Main Traveler’s details.
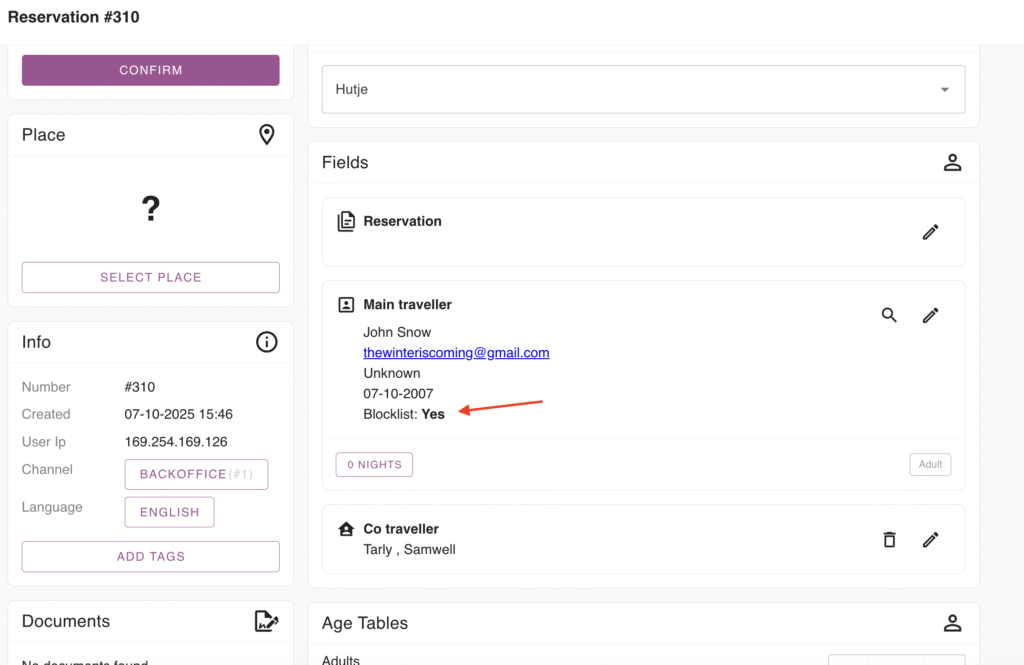
Booking View: On the booking page, this information (Blocked Guests: Yes/No) will be listed along with the traveler’s details.
4. Viewing the Information in a Report
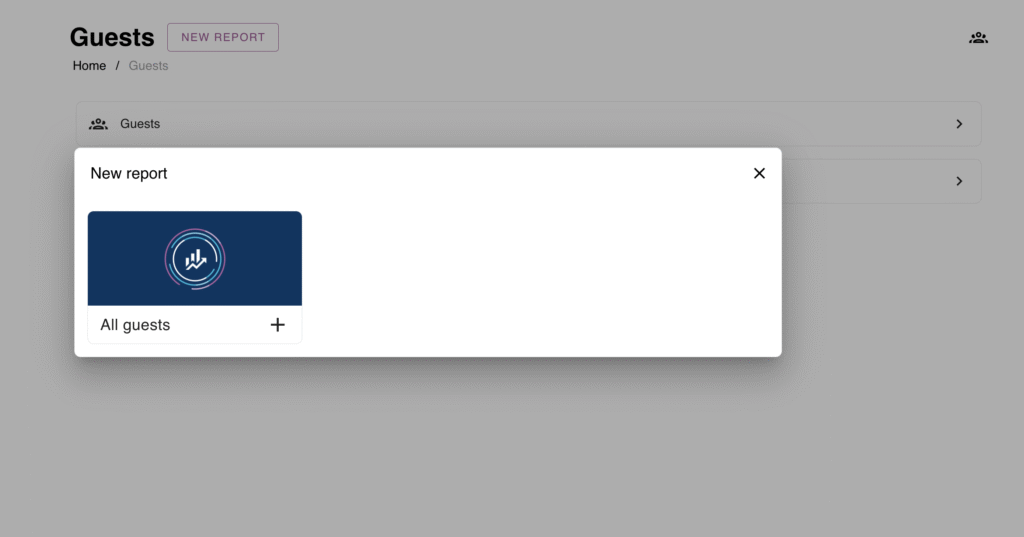
To ensure the blocked guests list is always accessible, you can create a dedicated report.
Go to Guests > New Report
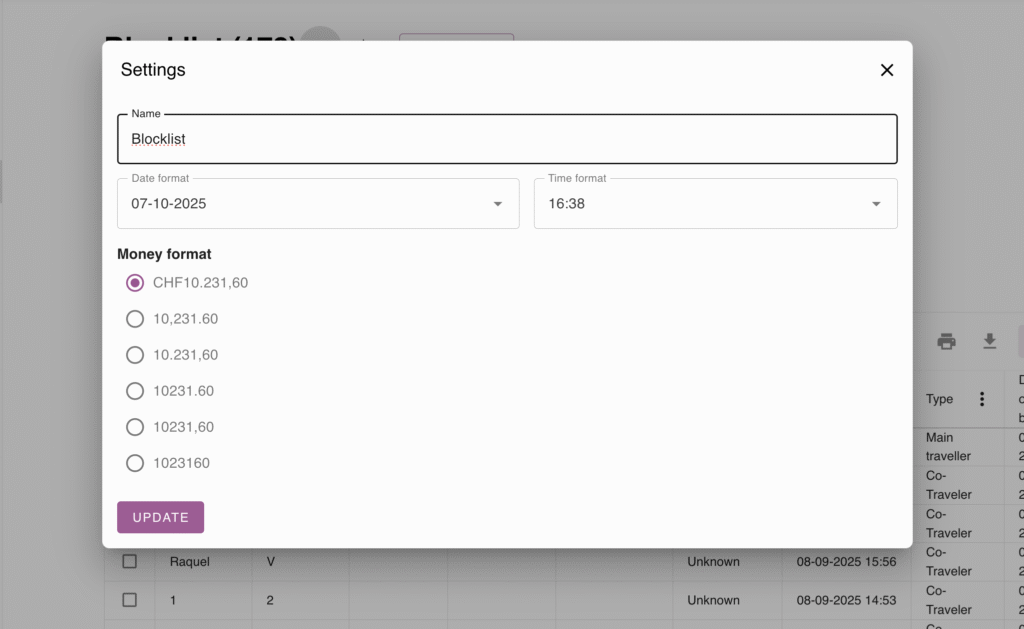
Then, rename the report (e.g., Blocklist) by accessing the report’s Settings:
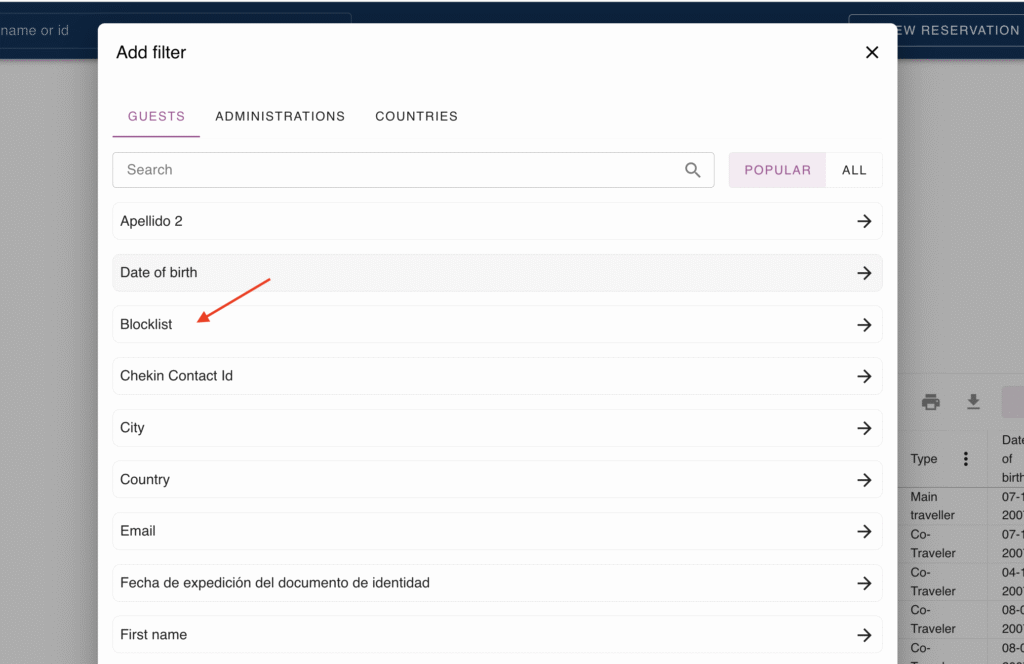
Now that the report is renamed, click Add filter and create the condition:
In the filter window, select the custom field created (e.g., Blocklist):
Set the filter condition by comparing the field with the value 1 (where 1 equals YES and 0 equals NO in the On/Off field type):
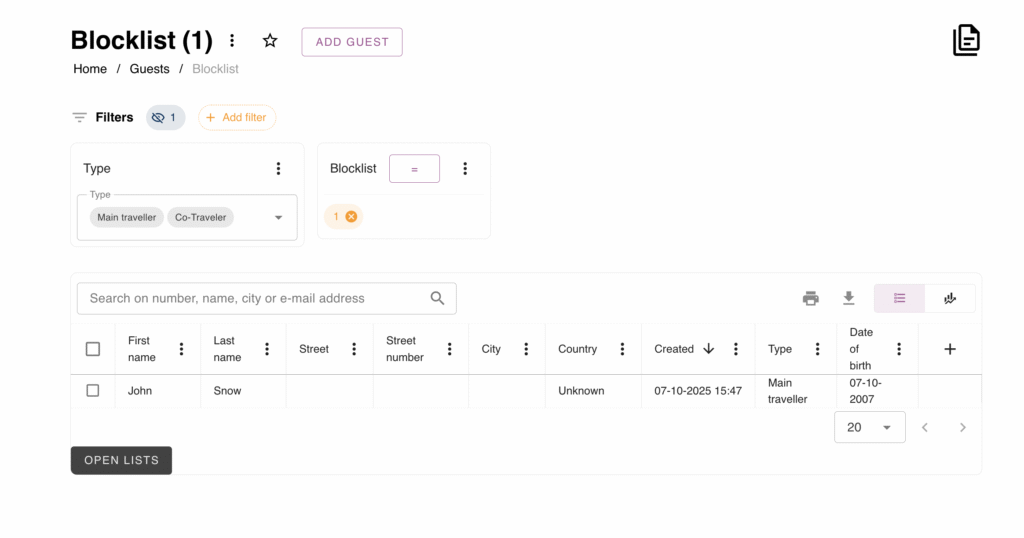
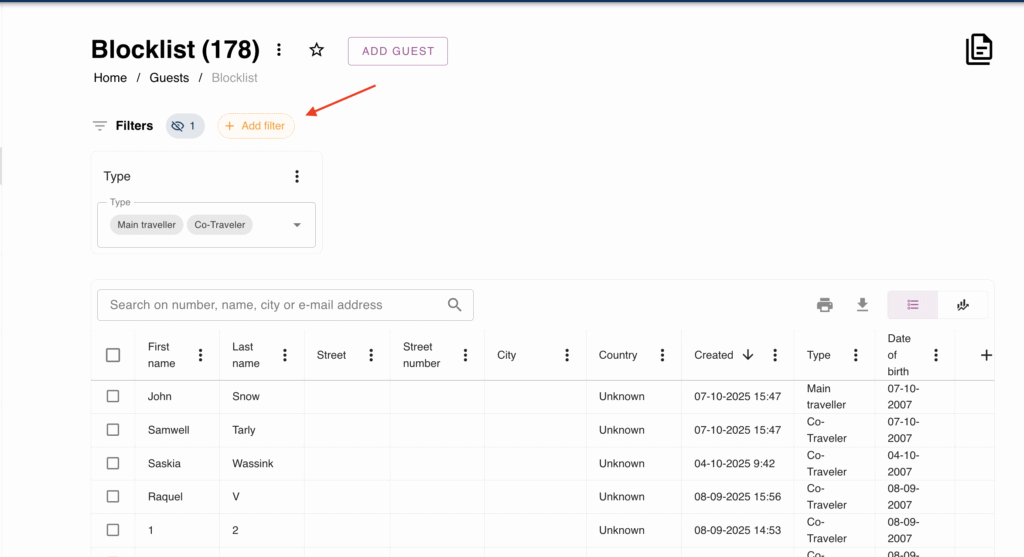
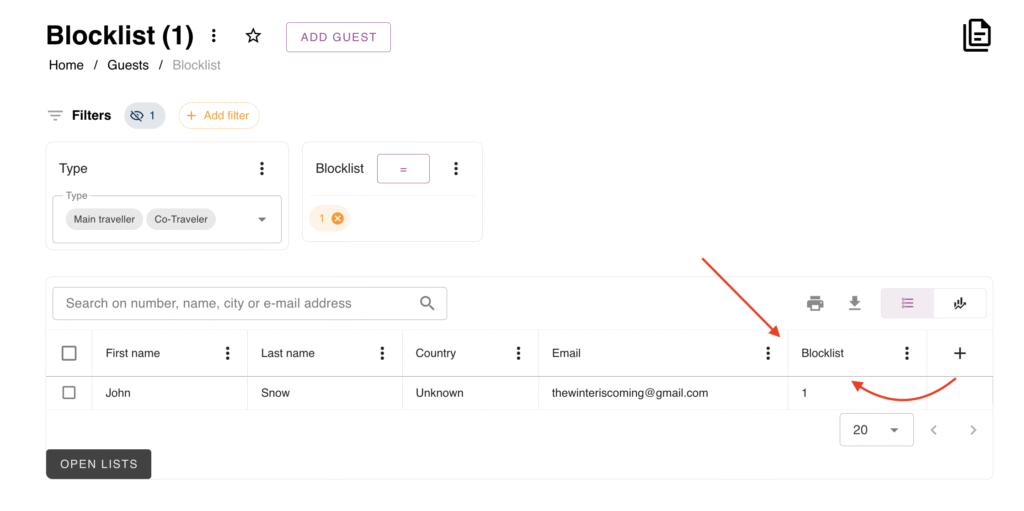
With this configuration, all guests with the blocked tag associated will appear in this new report.
All set!
Your custom guest list is ready to roll.
With the custom field and the dedicated report, you have a powerful and fully customizable tool to manage your guests efficiently.
Remember, the system is flexible: you can use this same method to organize lists of VIPs, guests with special needs, or any other group that requires differentiated attention.
Harness the power of the Form Configuration so that your team always has the exact information they need at the moment of booking to ensure the best stay, whether it’s for a very special guest, or a traveler who might just need a “time-out” from your campground.